
How to Draw an Owl Step by Step
Learn how to draw an owl step by step and easily with this guide. Here you will find cute and cartoon animals for fun drawing!


We are glad that you found free time, took pencils and other necessary drawing supplies and decided to portray a beautiful bird! Here you will learn how to draw an owl step by step and easily.
A furry bird with big eyes can be found in forests, in the steppes, at the height of the mountains and even in cities, that is, almost everywhere. At the moment, more than 220 different types of these birds are known. The predominant amount of owls can be safely called night birds, since they have the peak of activity in the dark. Also, owls have really sharp vision: a special pupil, rapidly expanding and narrowing, contributes to an ambulance to lighting and examining what is happening around both day and night.
Drawing owls is a simple and entertaining process. Let’s start it!
Time needed: 20 minutes
How to Draw an Owl Step by Step
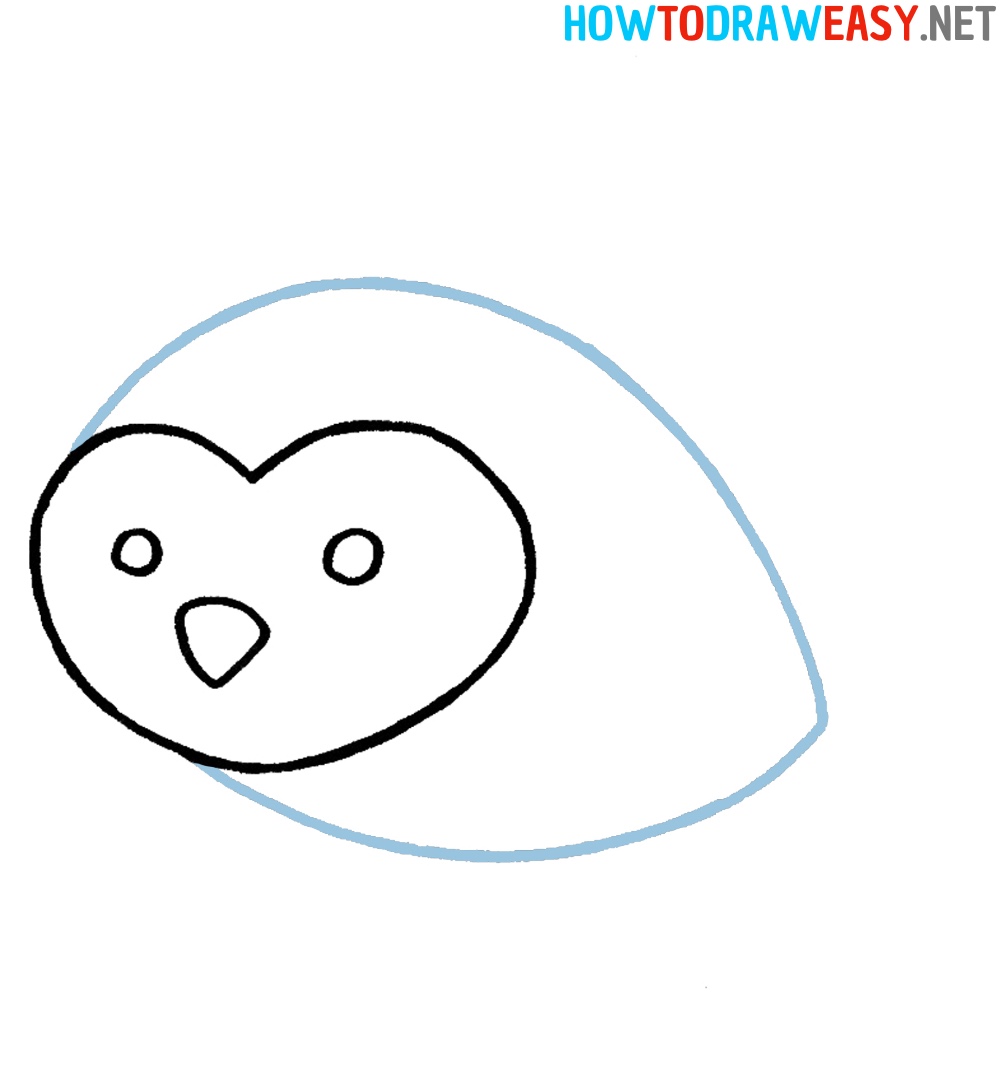
- Shape the face.
Start by drawing the face shape as shown.

- Add face details.
Draw the eyes and beak of the bird. Use a small triangular shape to represent the beak.

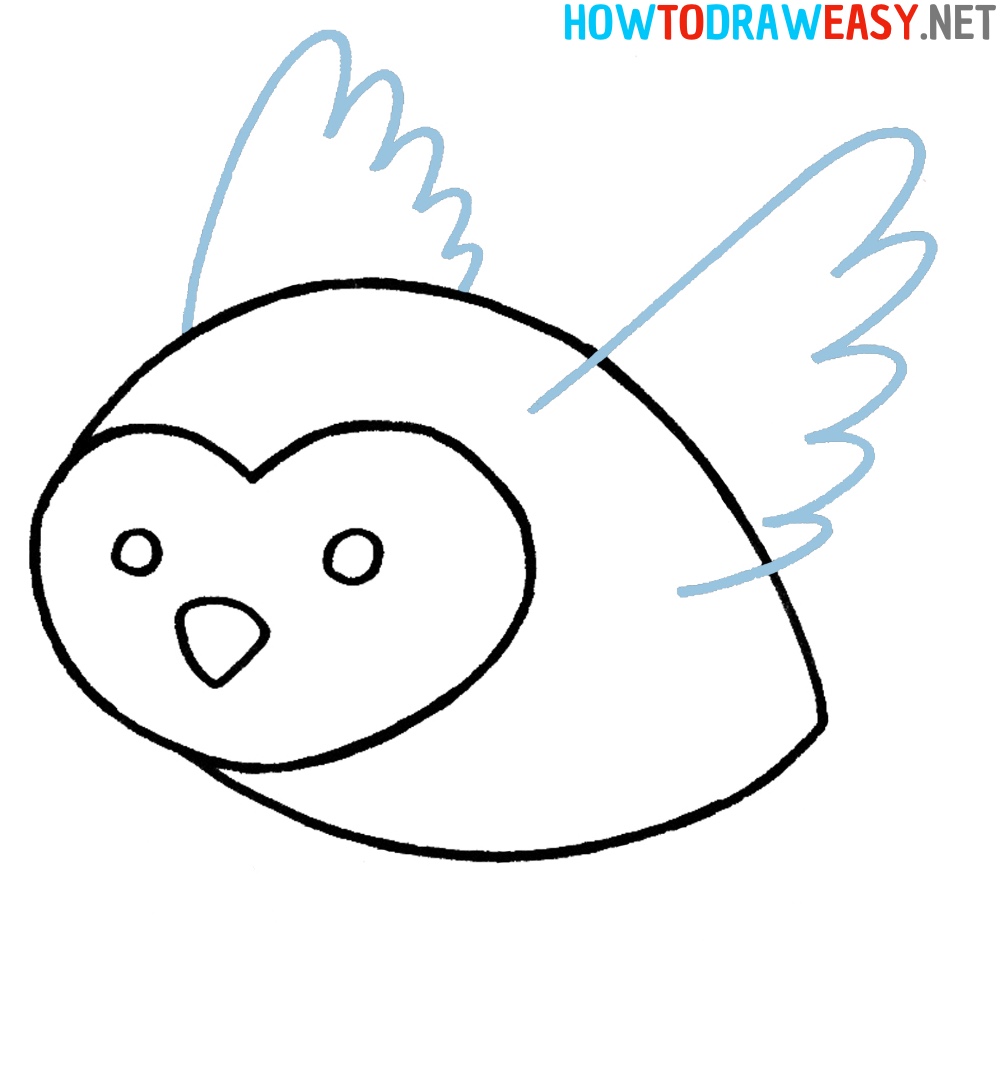
- Draw the body.
Using two curved lines, draw the owl body as an example.
- Add wings.
Draw owl wings just as shown in the example. Use “U”-shaped forms for drawing feathers on the wings.
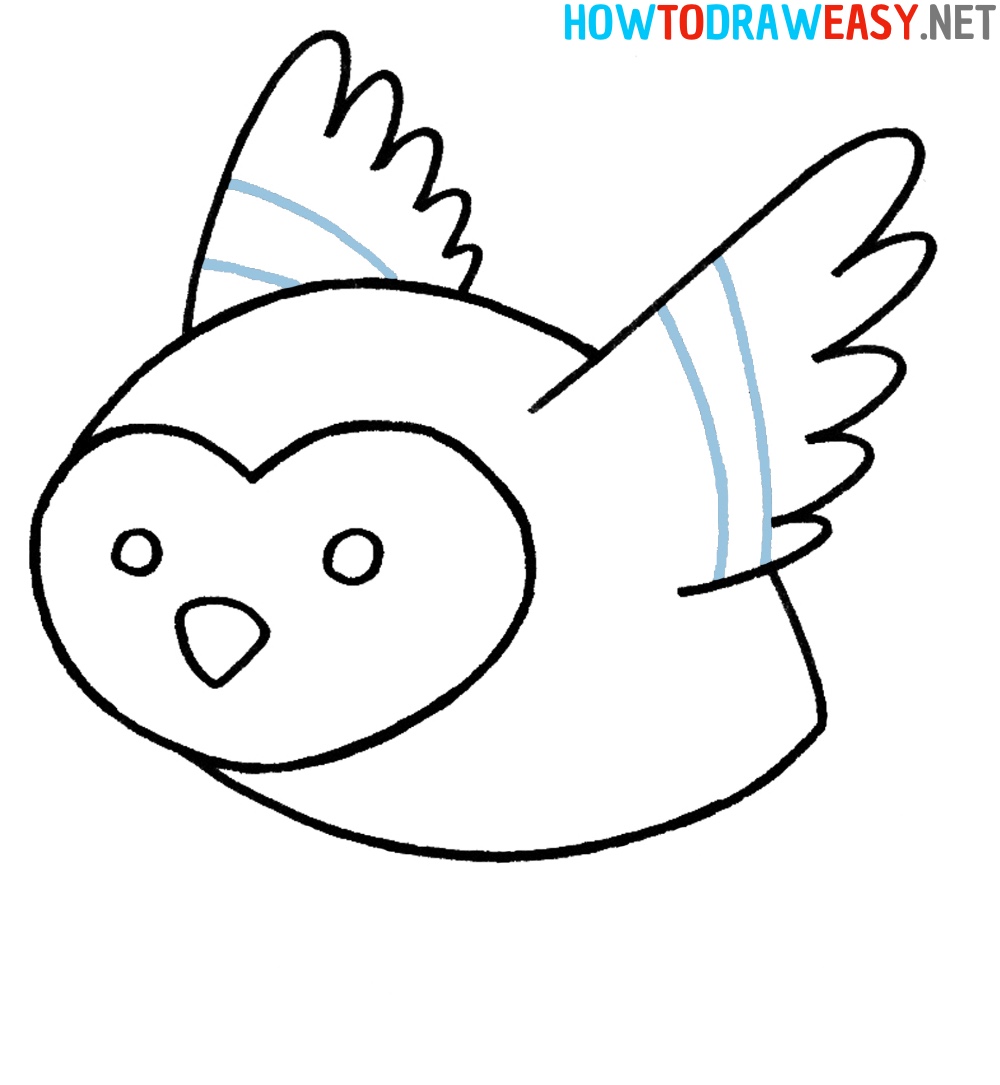
- Detail the wings.
Add a simple texture to owl wings. You just need to draw strips as shown in the example.
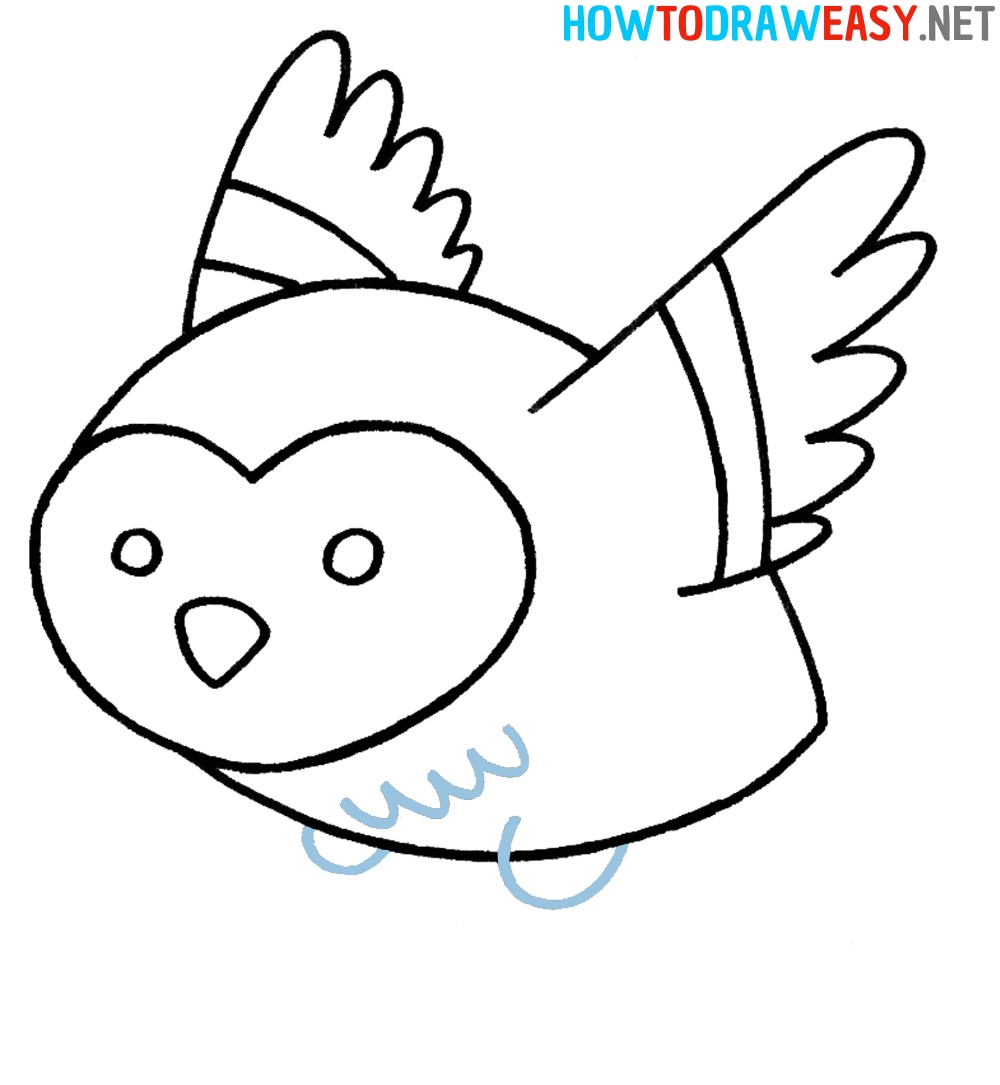
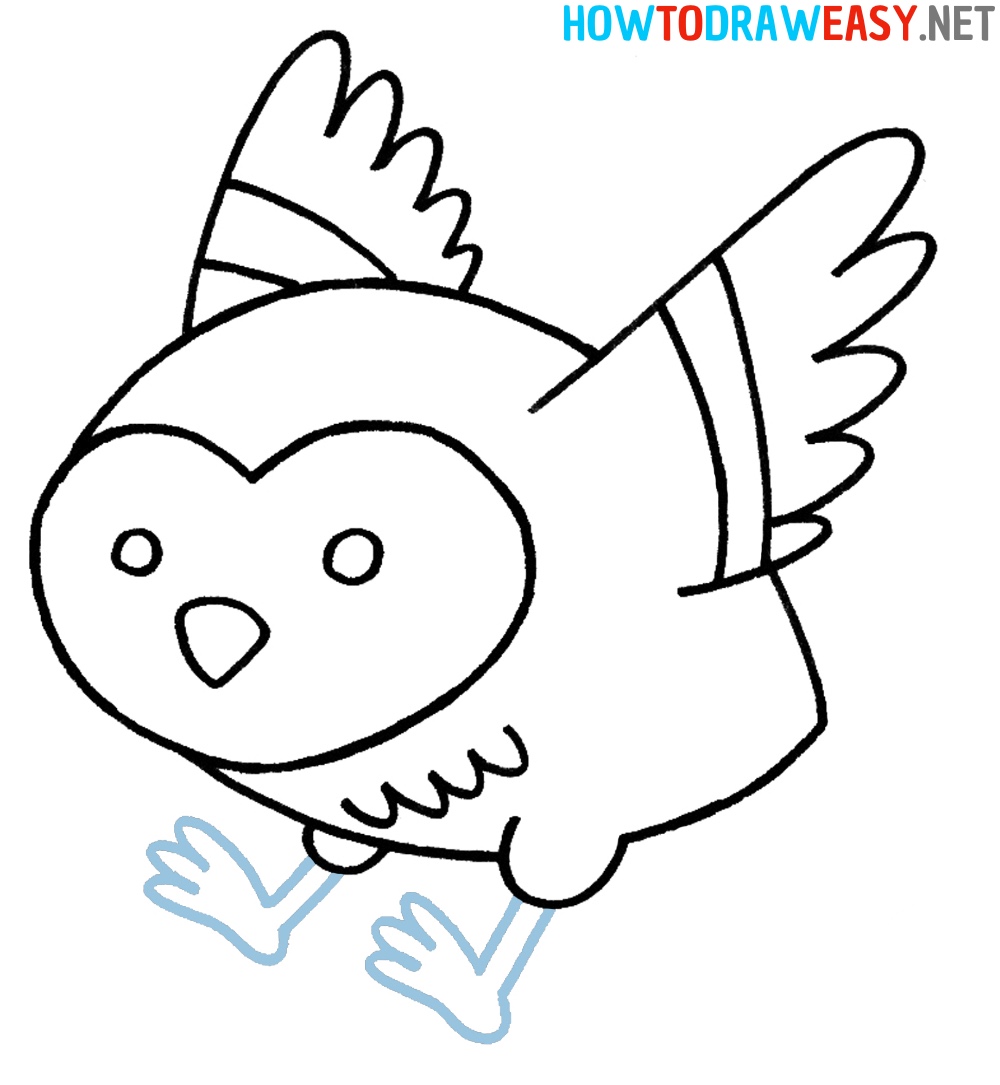
- Add the thighs.
Draw the semicircular thighs of the owl, as well as detail the owl breast by adding the texture of the feathers.
- Draw owl legs.
Depict the legs of a flying owl.
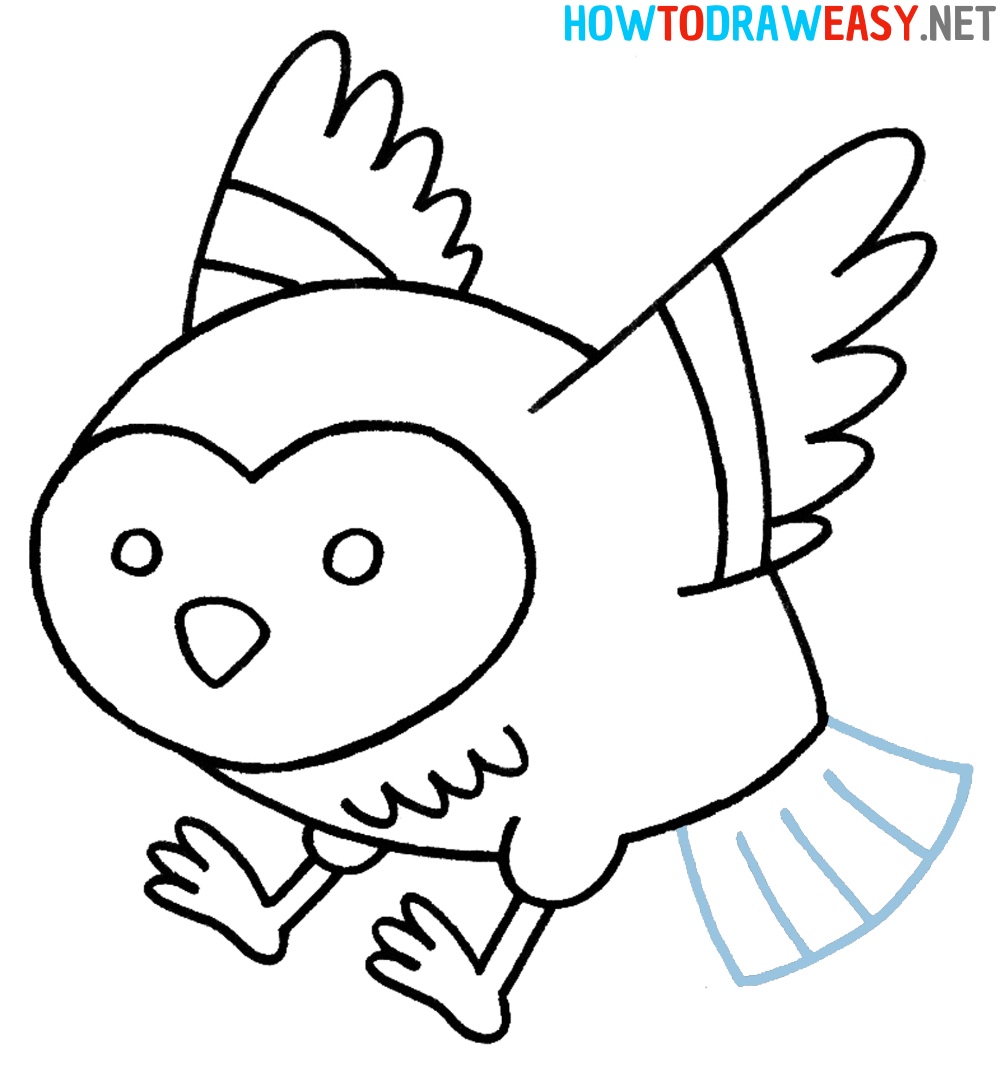
- Add the tail.
Now you need to draw the tail of the owl using several straight lines.
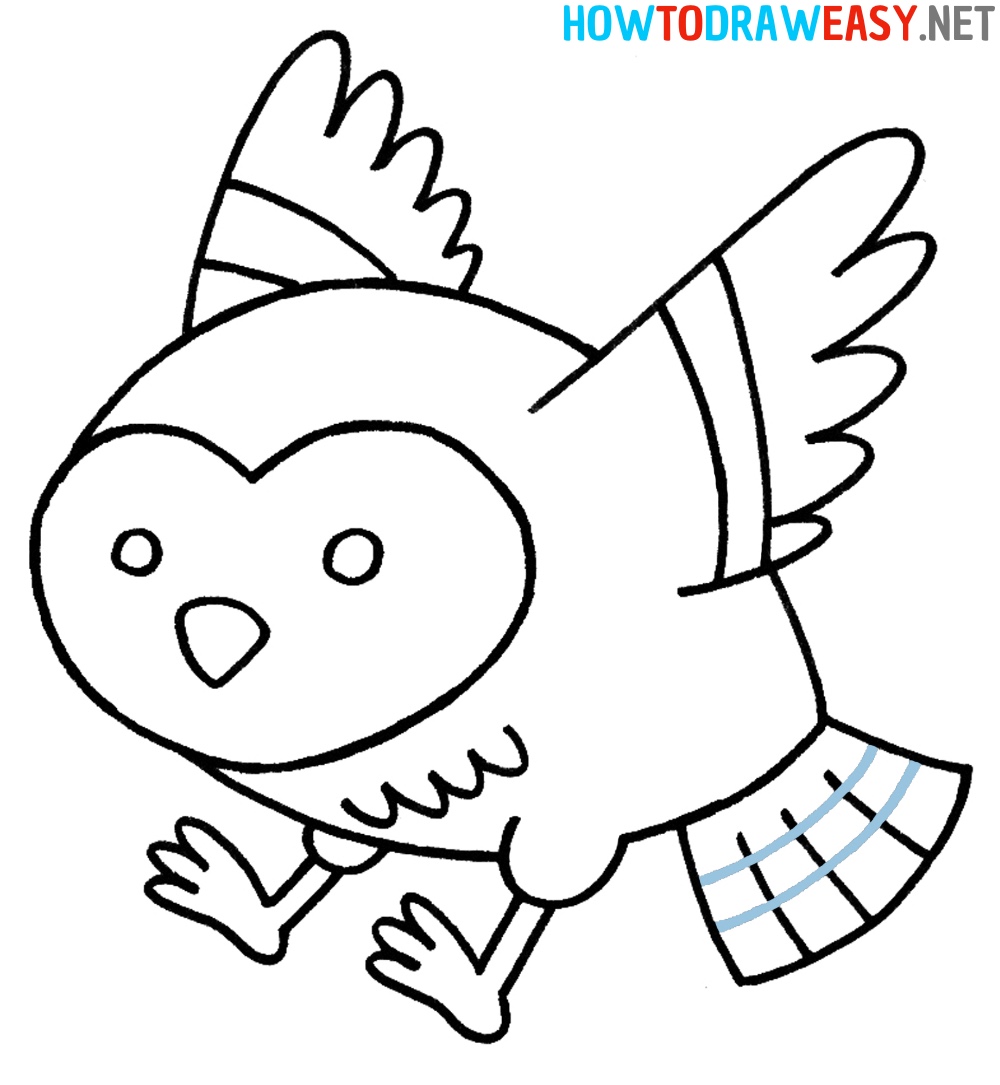
- Details of the tail.
Draw the owl’s tail texture in the same form as the texture on the wings of the owl was drawn.
- Color the artwork.
To color your funny owl, use crayons, colored pencils or felt-tip pens. In addition to coloring, you can outline your pencil drawing using a black marker or fountain pen.
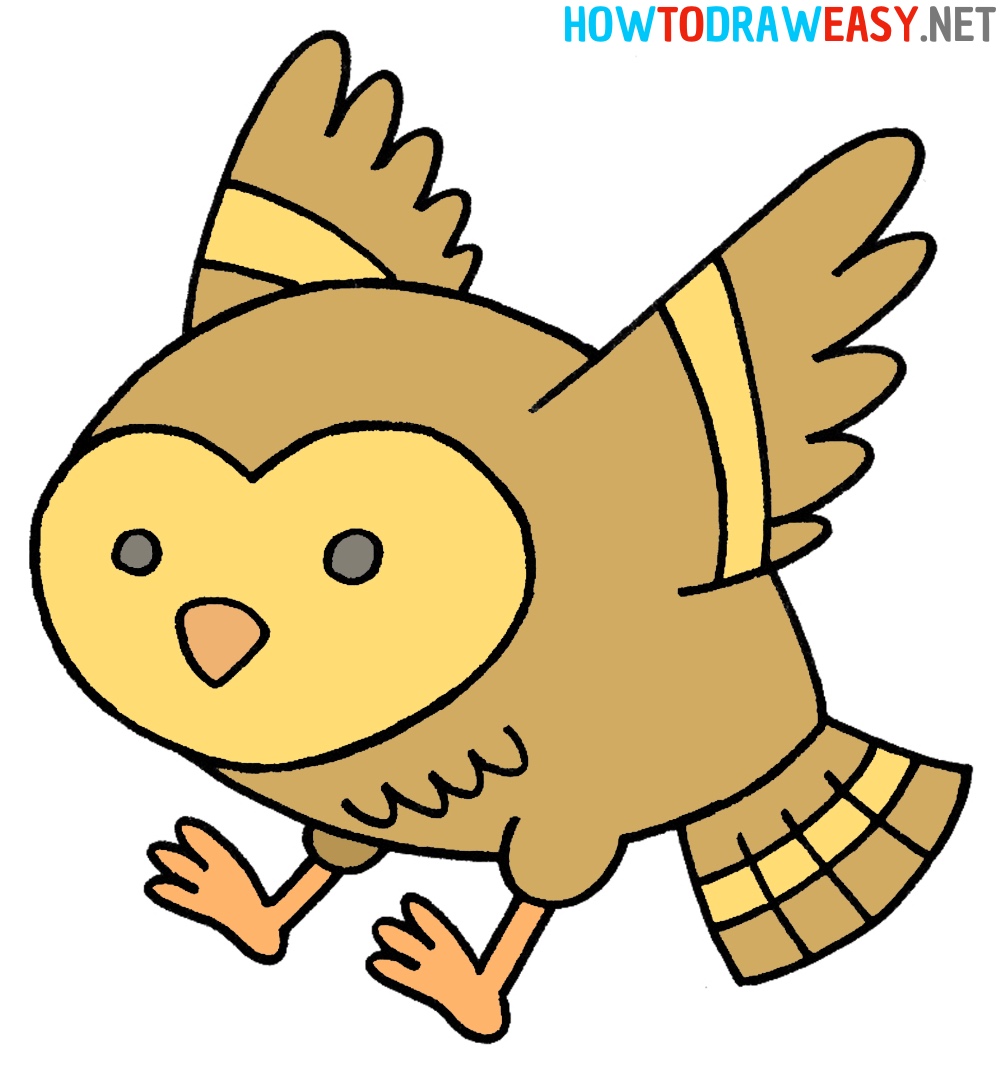


Wonderful! Your drawing of a flying owl is ready, and you have done a great job for it. You can draw an eagle, a crow, and a dove, as well as many other animals and characters.