
How to Draw a Train
Learn how to draw a train step by step with this easy drawing tutorial. Perfect for beginners and kids, discover fun facts about trains and tips for creating a realistic locomotive sketch!


How to Draw a Train: Step-by-Step Tutorial
Trains are some of the most iconic vehicles in the world, symbolizing progress, innovation, and adventure. From the steam locomotives of the 19th century to the high-speed bullet trains of today, trains have fascinated people for centuries. In this tutorial, you’ll learn how to draw a train step by step, starting with simple shapes and gradually adding details until you have a fully illustrated locomotive and carriage.
This drawing lesson is perfect for beginners, kids, and anyone who loves trains. Whether you’re inspired by the classic steam engines or modern locomotives, this guide will help you bring your train to life with easy-to-follow instructions.
A Brief History of Trains
Trains have been a key mode of transportation since the early 19th century. The first steam-powered locomotive was developed in 1804 by Richard Trevithick, and by the 1820s, trains were being used to transport goods and passengers across long distances. Steam trains dominated the railways for over a century before being replaced by diesel and electric locomotives.
Today, modern trains are marvels of technology. High-speed trains, such as Japan’s Shinkansen and France’s TGV, can reach speeds of over 300 km/h (ca. 186 mph), making them some of the fastest ground transportation methods in the world. Despite these advancements, steam trains remain a nostalgic favorite for many and are often featured in movies, books, and children’s stories.
What You’ll Need to Draw a Train
Before we start, let’s gather the supplies you’ll need for this tutorial:
- Paper: Any drawing paper or notebook will work, but a sketchpad is ideal.
- Pencil: A standard HB pencil for sketching the basic shapes.
- Eraser: To correct any mistakes and refine your lines.
- Ruler: For drawing straight lines and maintaining symmetry in your train design.
- Markers or Colored Pencils: To color your train once it’s complete. Use vibrant colors like red, green, and blue for a classic look.
- Black Pen (Optional): To outline the drawing and make it stand out.
Why Learn to Draw a Train
Drawing trains is not only fun but also a great way to practice symmetry, proportions, and perspective. Trains combine basic geometric shapes such as squares, rectangles, and circles, making them an ideal subject for beginner artists. Plus, trains are versatile: you can draw historical steam engines, modern freight trains, or even a fantasy-style locomotive straight out of a storybook!
This tutorial will walk you through every step, from the locomotive to the carriage and even the tracks. By the end, you’ll have a colorful, detailed train drawing to showcase your artistic skills.
Let’s Start Drawing!
Now that you’re equipped with the necessary tools and some knowledge about trains, it’s time to dive into the step-by-step drawing tutorial. Follow each step carefully, and don’t be afraid to take your time. Remember, drawing is all about practice and creativity.
Continue reading below for the complete tutorial on how to draw a train, and enjoy the process as you bring this iconic vehicle to life on paper.
Time needed: 15 minutes
How to Draw a Train
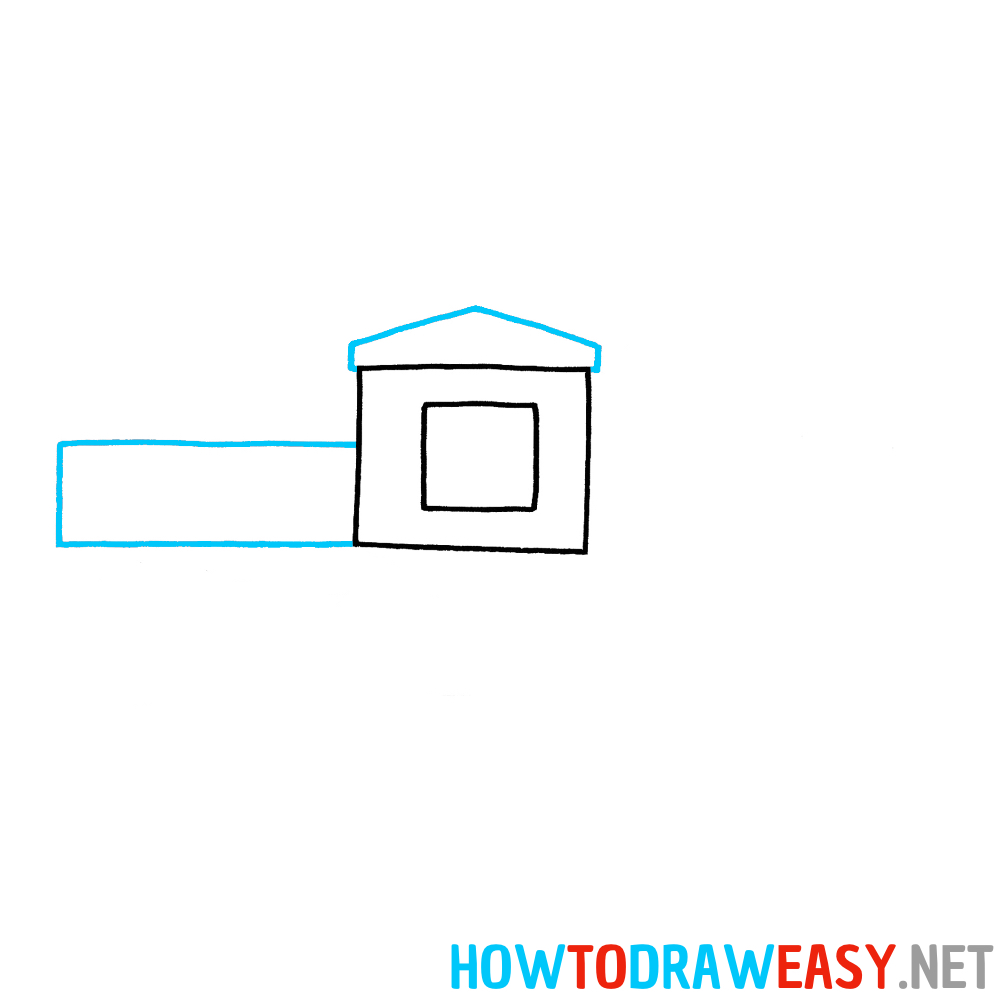
- Draw the Base of the Locomotive Cabin
Start by drawing a square. This will serve as the base for the locomotive cabin. Inside the square, draw a smaller square closer to the center — this will be the cabin window. Try to make the lines straight, as this is the foundation of your drawing.

- Add the Cabin Roof and Locomotive Base
Above the square, draw a triangle to represent the roof of the cabin. Then, to the left of the square, add a horizontal line to create a rectangle. This rectangle will form the base of the locomotive. Make sure this rectangle is longer than the cabin square.
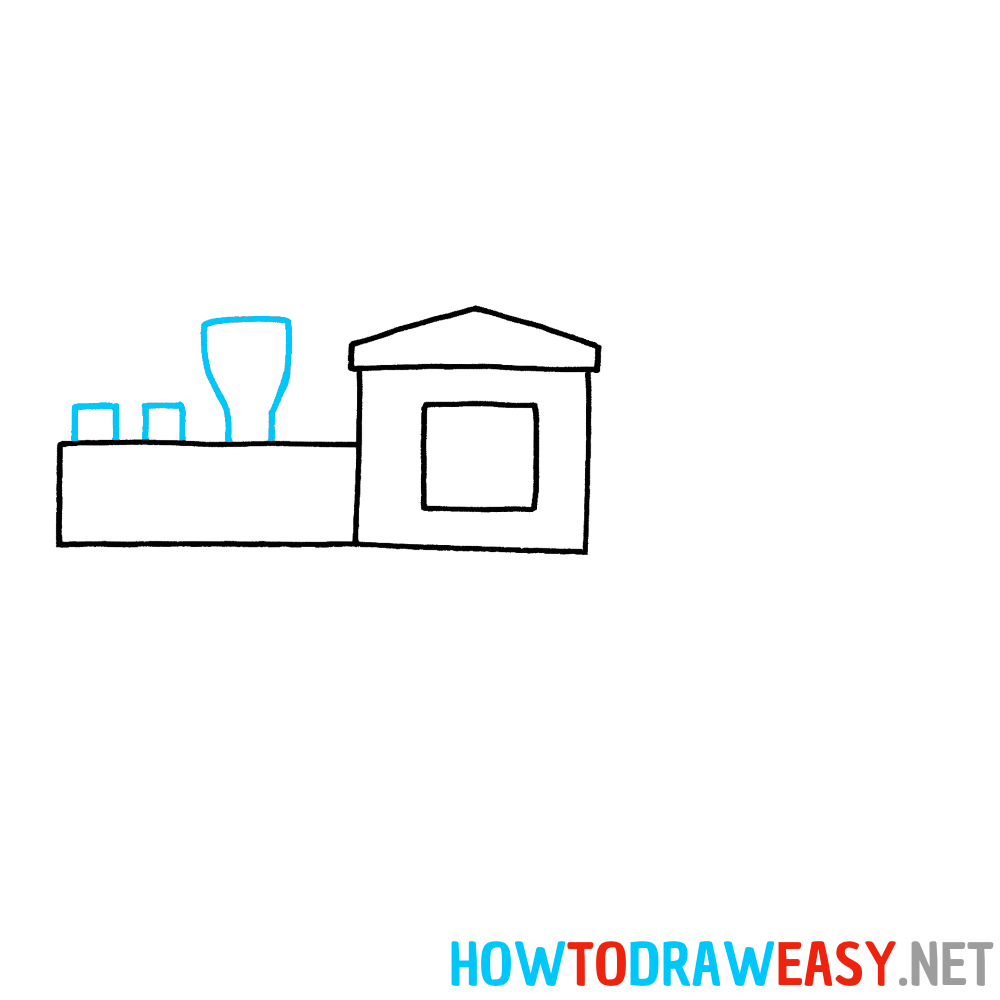
- Draw the Chimney and Locomotive Details
On the front part of the locomotive (to the left of the square), draw a tall, elongated shape that looks like an upside-down vase — this will be the chimney. Behind the chimney, add two small rectangles to represent additional structural elements.
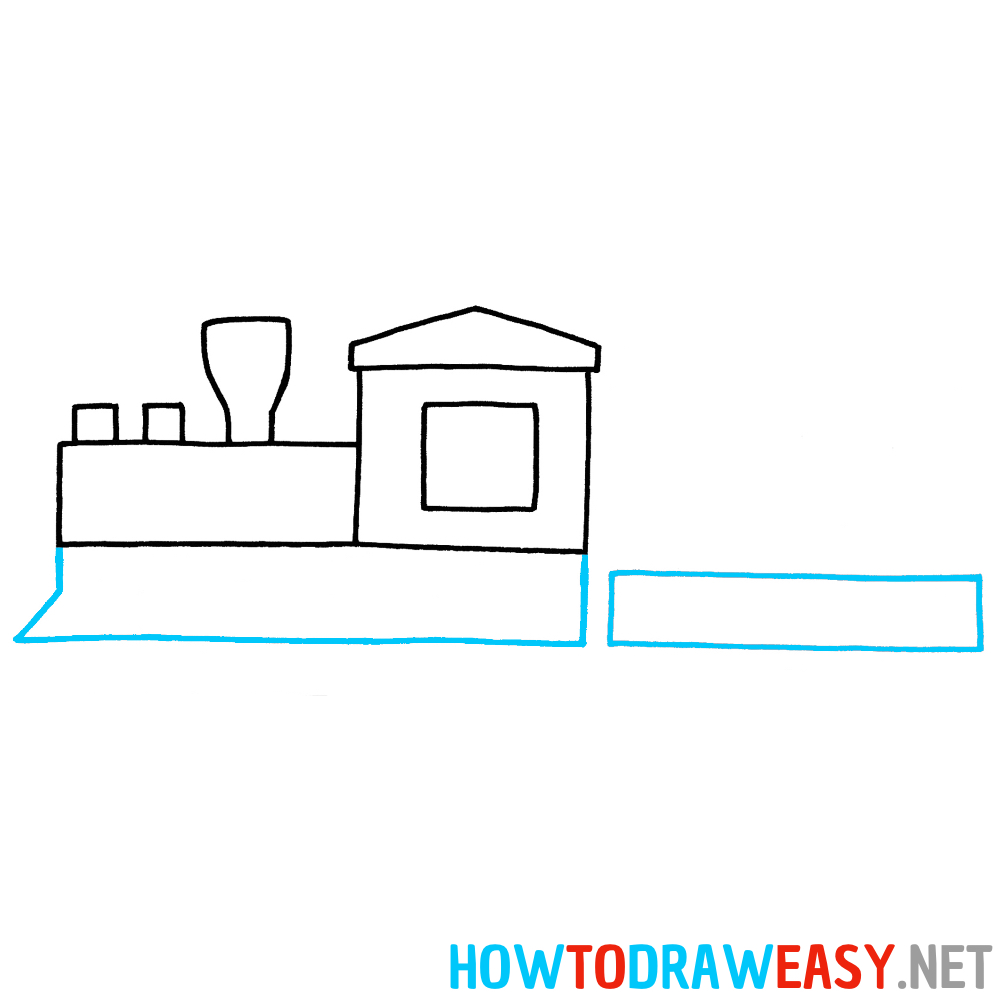
- Add the Front Platform of the Locomotive
At the bottom of the front part of the locomotive, draw a slanted line that extends outward. This will create the front platform of the locomotive. Ensure the lines are smooth and straight. Also, draw the base for the first carriage, which will be positioned behind the cabin.
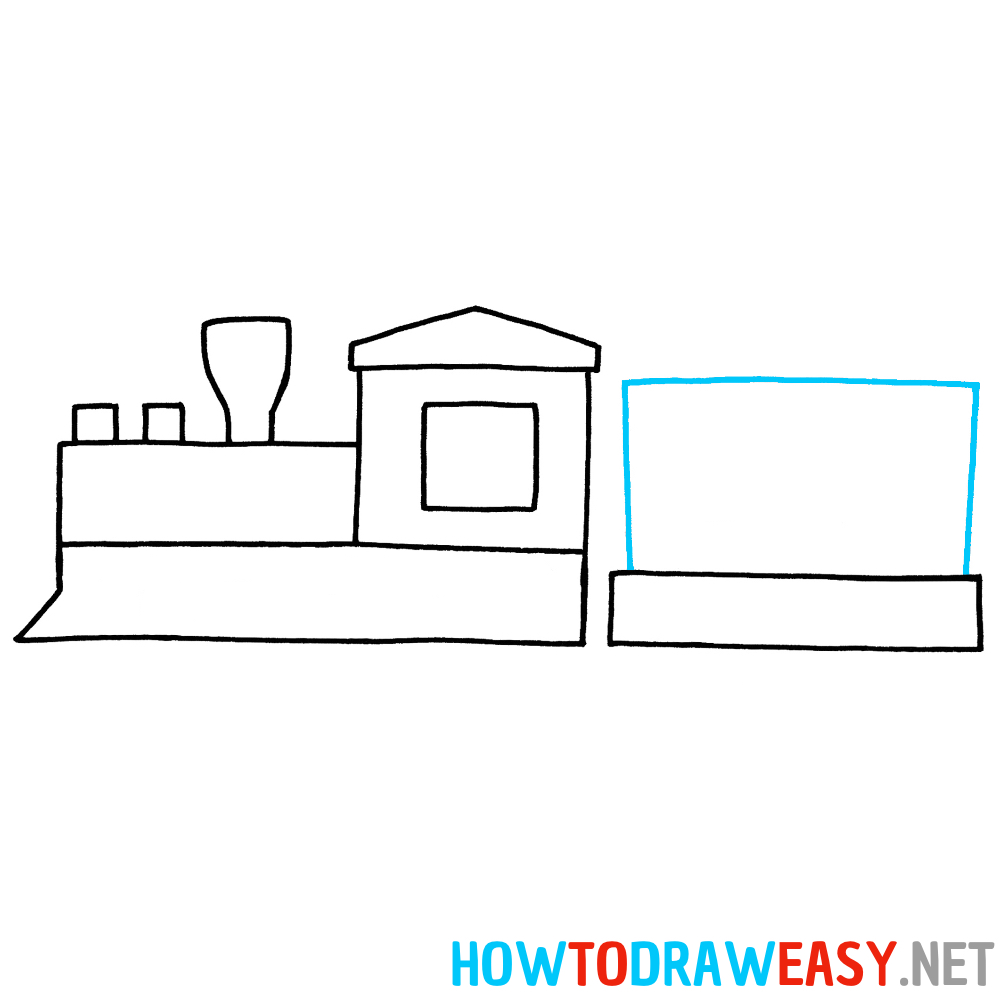
- Draw the Carriage
Next to the locomotive, draw a large rectangle — this will serve as the first carriage.
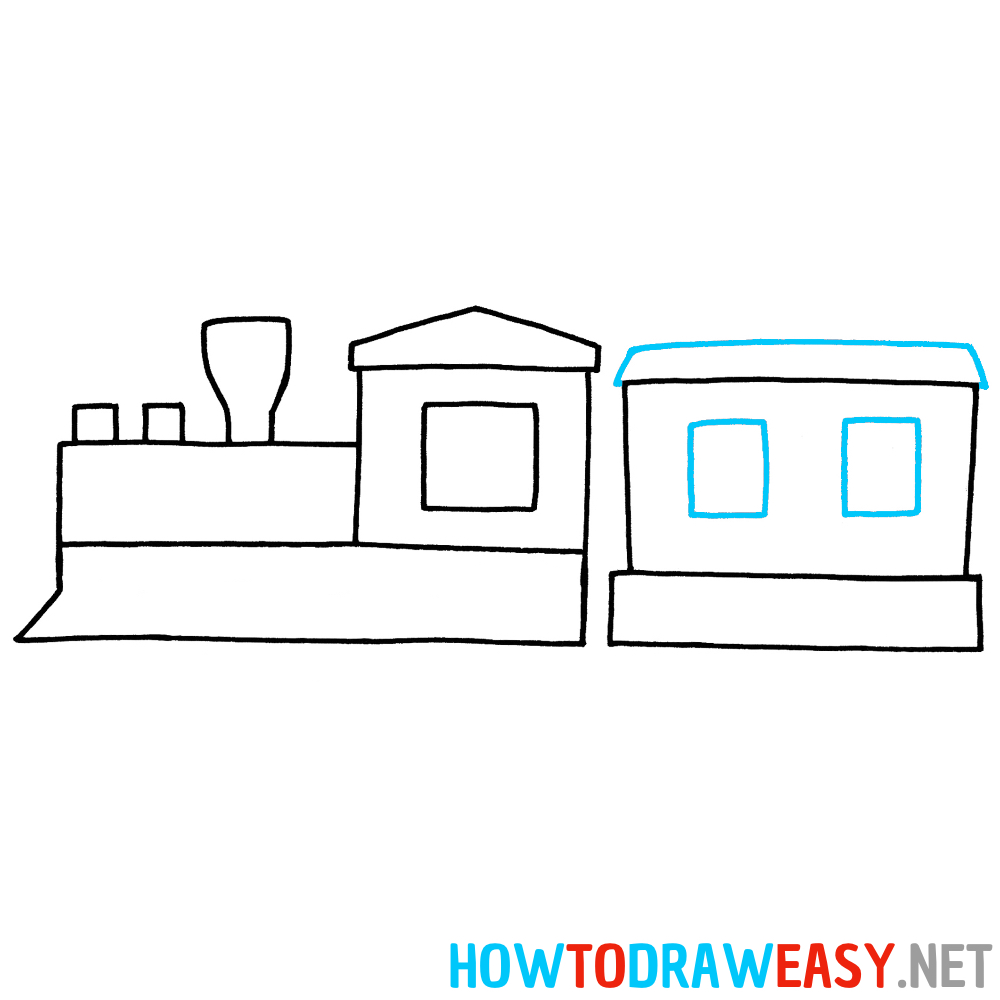
- Add the Carriage Roof and Windows
Draw a slightly curved roof on top of the carriage to make it look more realistic. Inside the carriage, draw two squares to represent the windows.
- Draw the Wheels
Underneath the locomotive and the carriage, draw circles to form the wheels. The locomotive should have three wheels, while the carriage should have two. Make sure all the wheels are the same size and evenly spaced. Inside each wheel, draw a smaller circle for additional details.

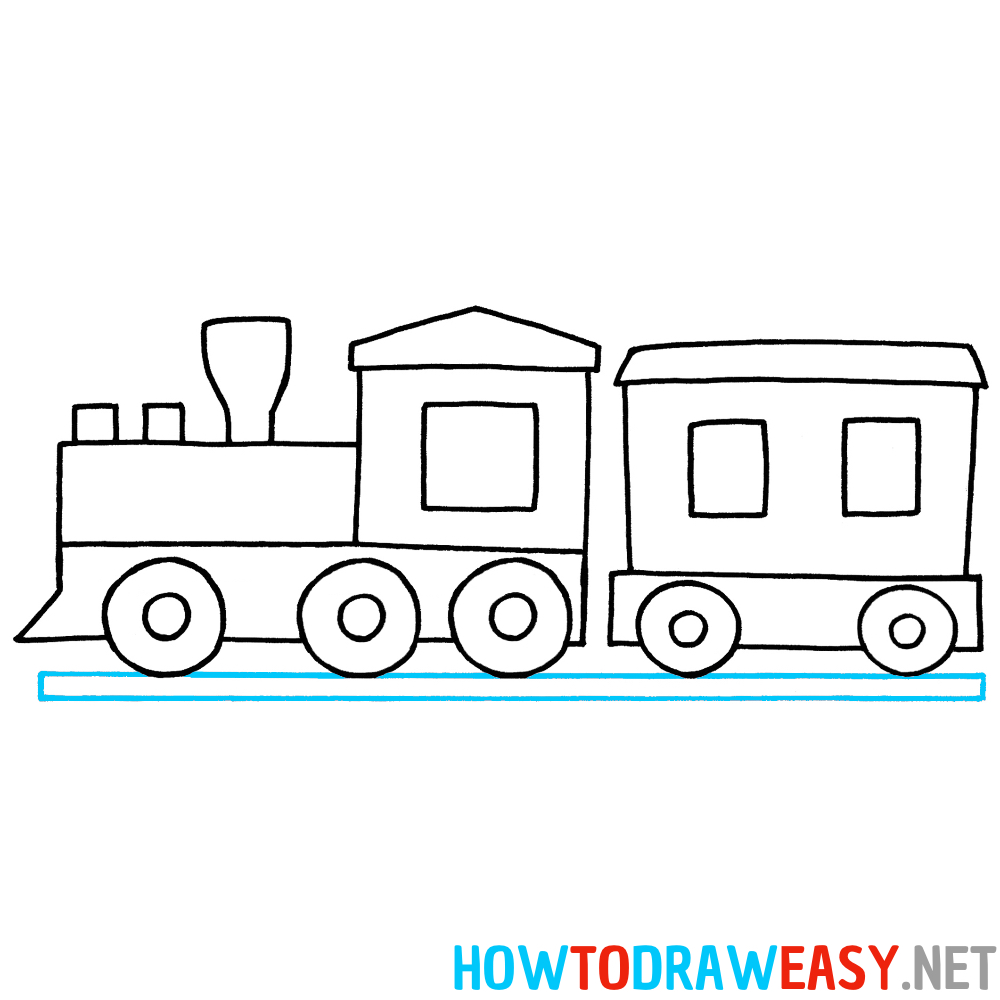
- Draw the Rails
Below the wheels of the locomotive and carriage, draw two parallel horizontal lines to represent the rails. Ensure the lines are straight and positioned evenly below the wheels.
- Color the Drawing
Now that your train is complete, it’s time to color it! Use red and brown for the locomotive, and vibrant shades like green and blue for the carriage. Make the wheels gray or black, and the rails gray. Feel free to add extra details to make your train look even cooler!


Thanks!
Congratulations! You’ve completed the step-by-step guide on how to draw a train and created your very own locomotive masterpiece. Whether you were inspired by vintage steam engines or modern carriages, your drawing is a unique expression of your creativity. Don’t forget to proudly display your work, share it with friends, or even frame it as a reminder of your artistic journey!
Drawing trains not only teaches you basic shapes and symmetry but also gives you insight into the history and beauty of these iconic vehicles. Remember, every artist improves with practice, so keep challenging yourself with new designs, colors, and details.
Explore More Transportation-Themed Tutorials
If you enjoyed drawing a train, why not continue exploring the world of transportation art? Check out these fun and easy tutorials on Howtodraweasy.net:
- How to Draw a Car: Learn how to draw a classic car step by step.
- How to Draw a Truck: A perfect tutorial for fans of heavy-duty vehicles.
- How to Draw a Helicopter: Take your drawings to the skies with this detailed guide.
- How to Draw a Boat: Dive into maritime art with this easy boat-drawing tutorial.
Each tutorial offers simple steps and helpful tips to ensure that drawing remains an enjoyable and rewarding activity for artists of all levels.
Share Your Work and Stay Inspired
We’d love to see your finished train drawing! Share it with us and your fellow artists by tagging our website on social media or leaving a comment on our page. Your creativity can inspire others to pick up a pencil and start their own drawing journey.
Thank you for joining us on this fun and educational lesson. Remember, art is all about having fun and expressing yourself. Keep practicing, exploring, and enjoying every moment of your artistic adventures.
Happy drawing, and see you in the next tutorial!