How to Draw a School
Learning how to draw a school can be a fun and engaging activity for artists of all skill levels. In this guide, we’ll provide you with step-by-step instructions on how to draw a school. So whether you’re an aspiring artist or simply looking for a fun creative art project, grab your pencils and let’s get started!

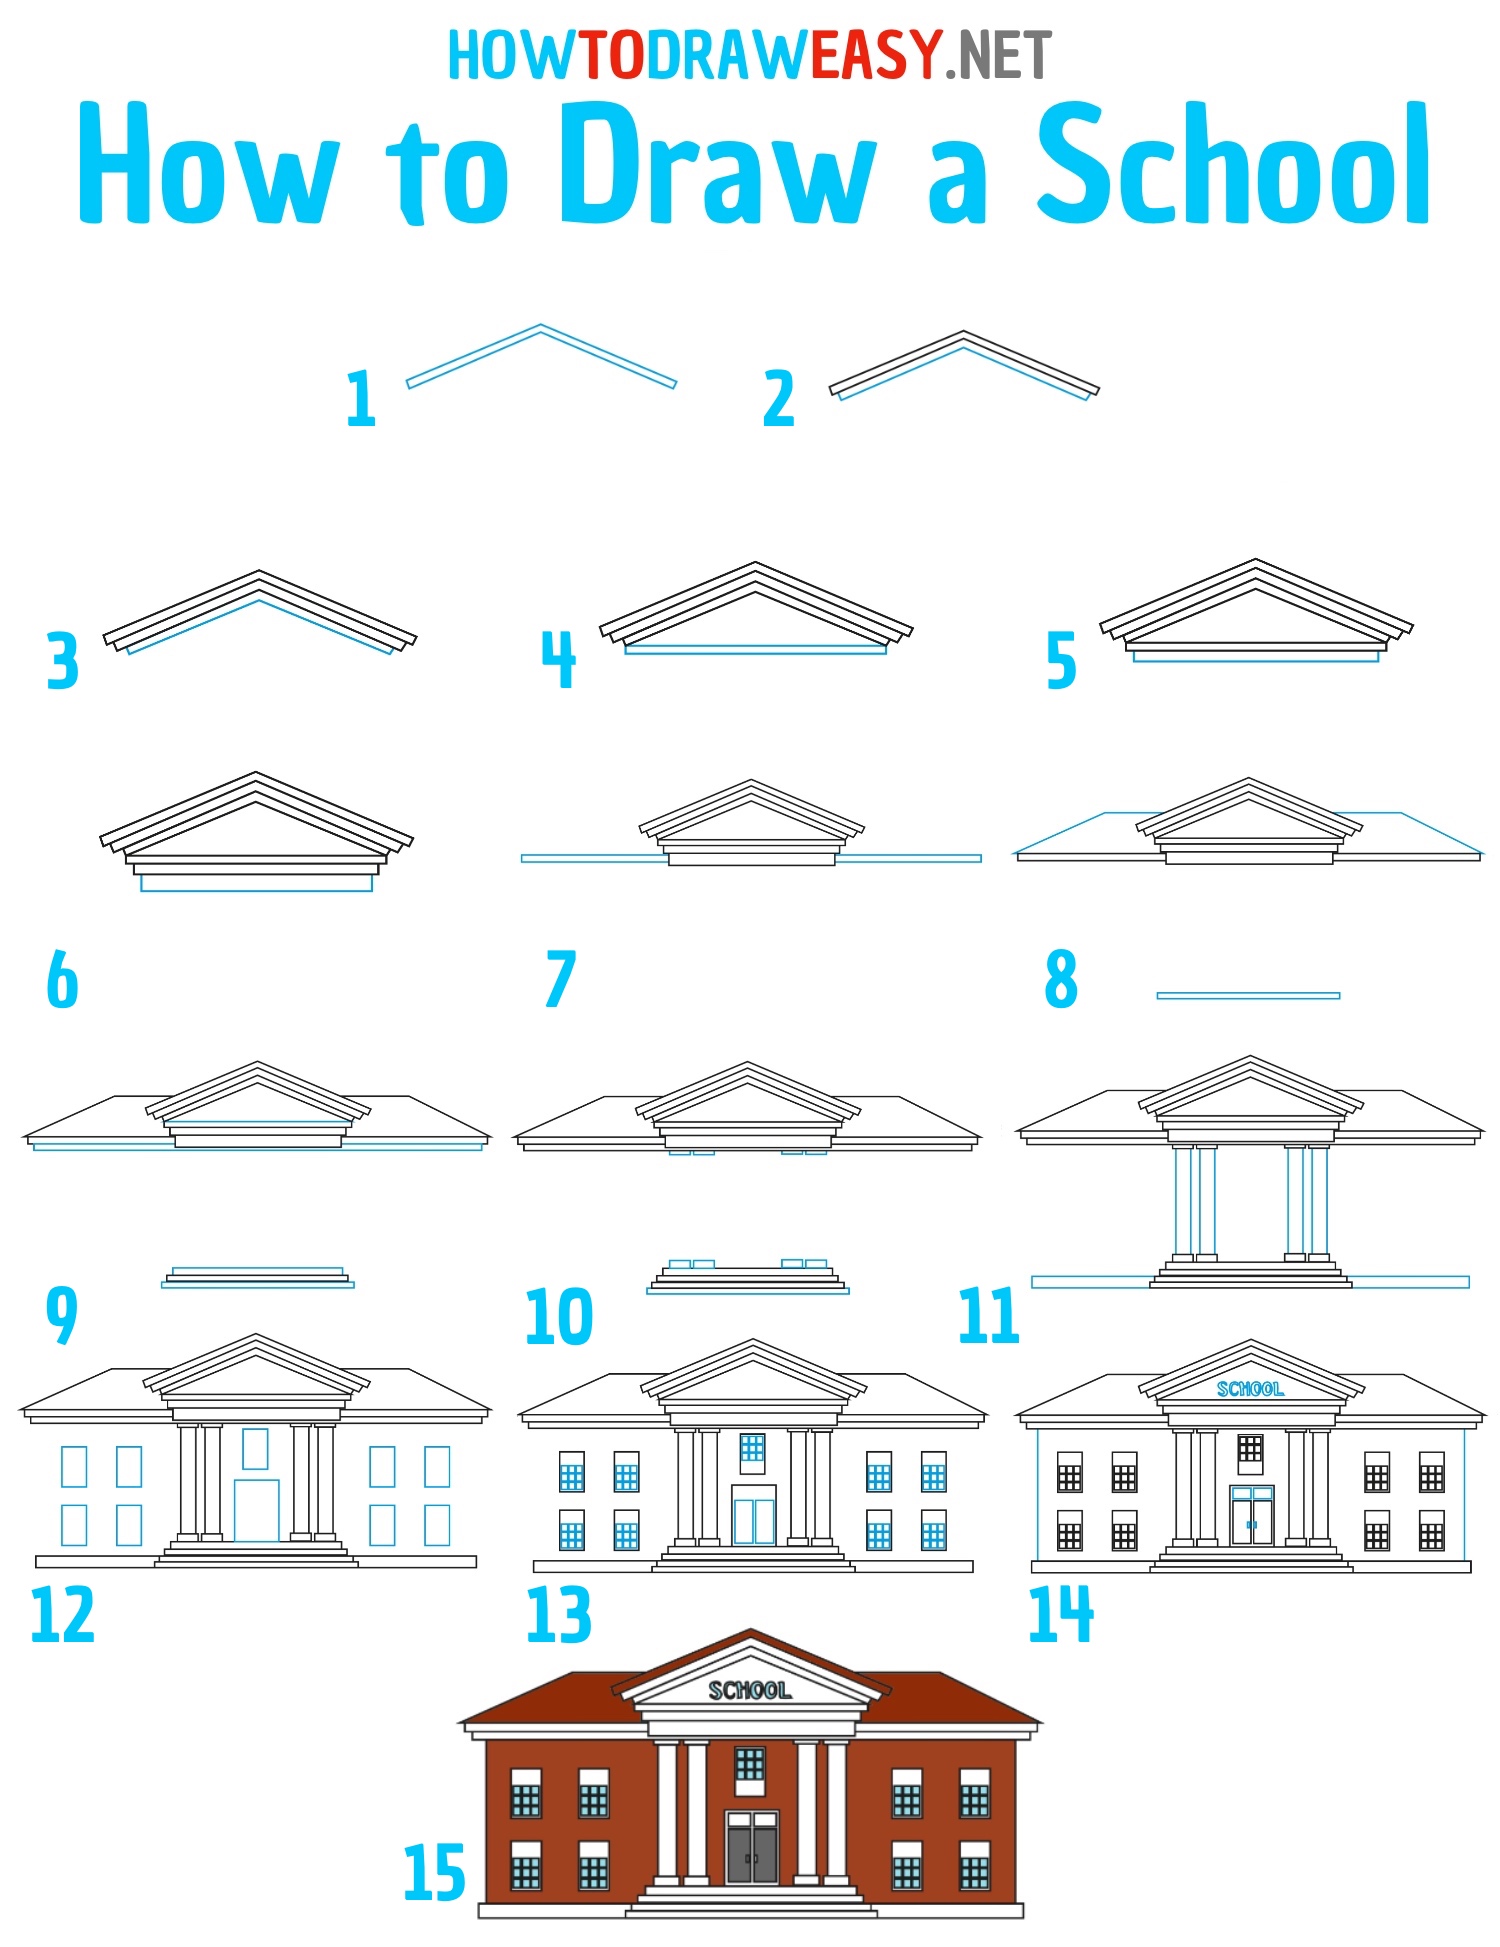
In this simple drawing lesson, you will learn how to draw a school building. This is a simple and schematic sketching guide in which anyone with any skill can draw this building. Schools are primarily general educational institutions, which are attended by the younger generations from an early age. This is how it works in most countries of the world because school is the place where people get their first basic knowledge. Schools were still in antiquity in states such as Ancient Egypt, Ancient Greece, Rome, Sumer, the countries of Asia, and other countries of the East.
Time needed: 45 minutes
How to Draw a School
- The first part of the roof.
You will need to start drawing the roof piece by piece, and first, draw the very top part of the pediment of the building.

- Add the middle.
Now, following the same pattern, add the middle part of this roof part.

- Lower part.
Add the lower part of the pediment roof.

- Pediment cornice.
Draw the horizontally located top of the pediment cornice.
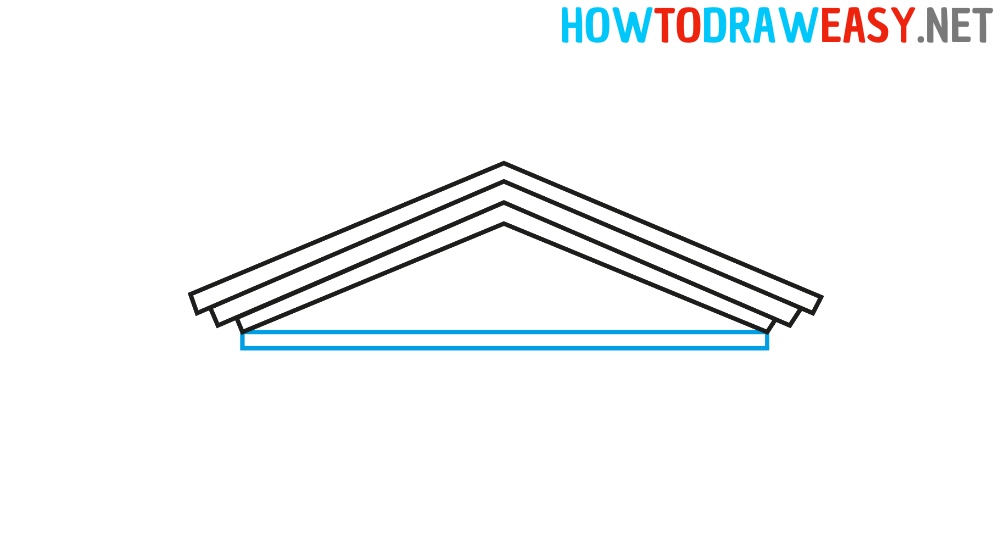
- Middle part.
Now draw the middle part of this structure, but slightly wider than the first one.

- Bottom line.
Now draw the largest part of this cornice.

- Cornice.
Now draw a long section of the cornice, which will be as wide as the entire main part of the building.

- Draw the roof.
Now draw the roof of the building as shown, and also draw the very bottom center part of the building.
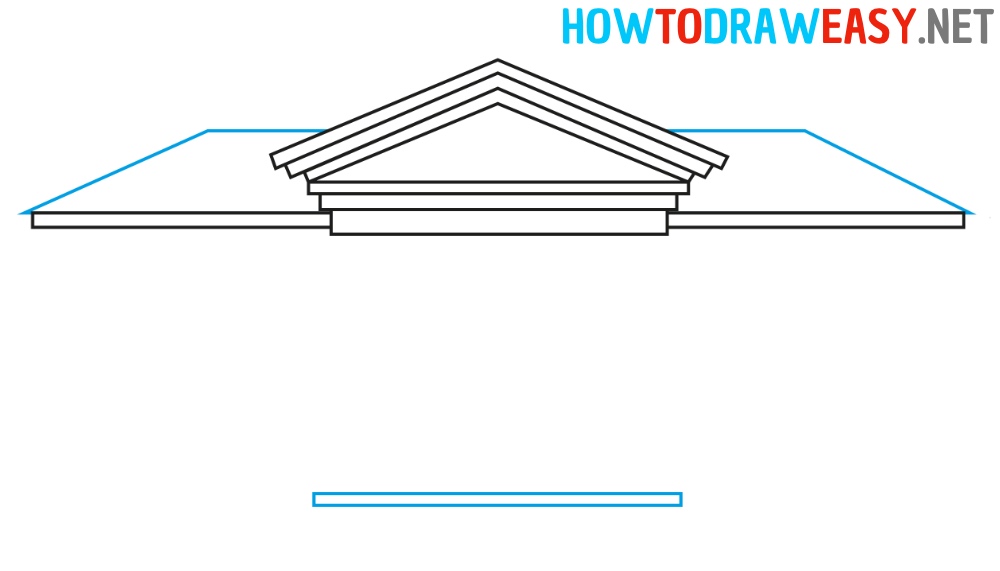
- Add details.
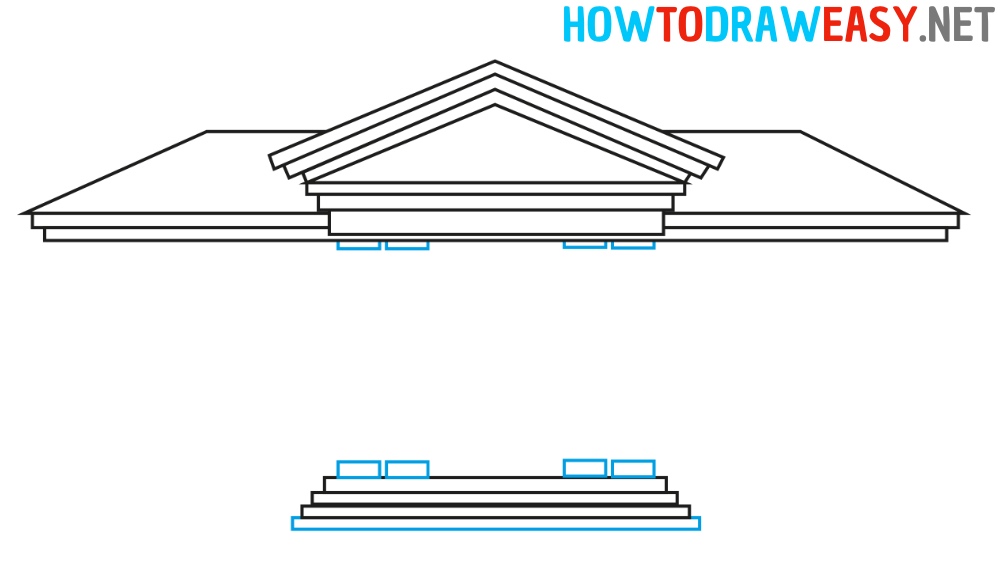
Draw the entire cornice of the building as shown, and also draw the entire staircase.

- Column base and capital.
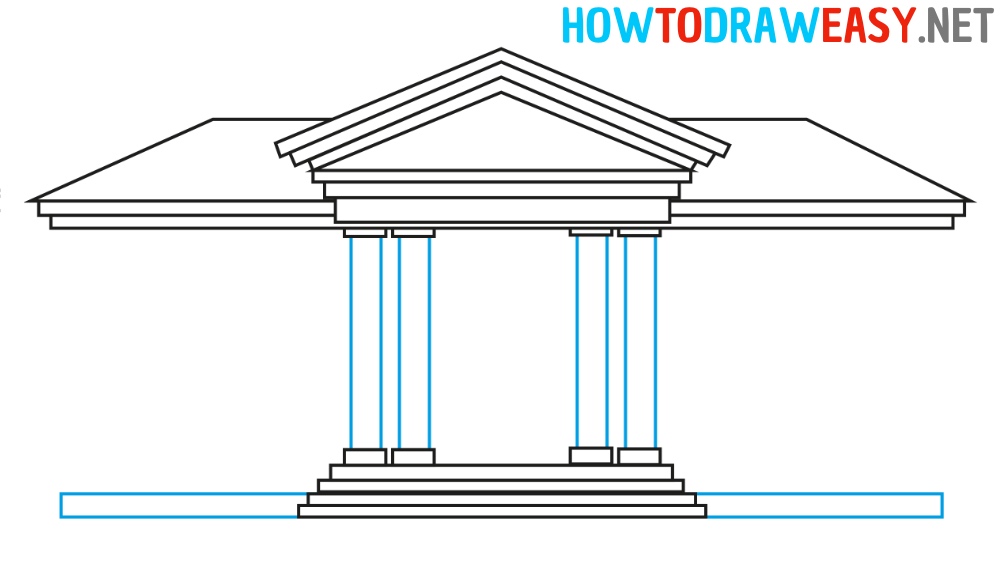
Sketch the base parts of the column on which the construction is supported—these are the capital and the base of the column.
- Draw the column.
Now sketch out the main part of the column, called the shaft.
- Window and door shapes.
Draw the rectangular shapes of the windows of the school building, and also draw the shape of the door in the same way.

- Window frames.
Detail the windows by drawing all the parts of the windows, the frame, and so on.

- Last details.
Now draw the sidewalls of the building and add all the details as shown in the example. You can write the name of your school, or draw the same as in the example in the step.

- Color the school.
Color the artwork of the school building. You can use other colors. If your school is a different color, then use these colors. Also, you can add something near the school, for example, a tree!

Drawing a school can be a challenging but rewarding experience for artists. By following our step-by-step guide and incorporating your own creative touches, you can create a unique and detailed representation of a school institution.
Whether you’re drawing for fun or honing your artistic skills, we hope this tutorial has inspired you to pick up your pencils and start sketching your art project!
