
How to Draw an Otter for Kids
Looking for an otter drawing reference? This is the perfect place to learn how to draw an otter easily and simply, even for kids.


Welcome to the lesson on how to draw an otter for kids. This drawing guide will depict one of the most agile and skillful mammals on Earth—the otter. This beast has flexibility, good flair, and the skills of an experienced hunter. Step-by-step instructions will tell novice artists how to draw an otter easily. Performing these steps step by step, at the end you will get a result that will certainly please!
It is noteworthy that the otter is a rather large animal with short and waterproof fur. Among its habitats, one can name forest reservoirs, in which many fish are found, as well as various ponds and lakes. The otter builds its burrow in the immediate vicinity of the water. This animal loves to feast on not only a variety of fish species, but also some rodents, lizards, and frogs. Drawing an otter is a simple and very interesting process. Follow the recommendations, show patience and accuracy when doing the work. A nice bonus to this lesson is that you can develop your skills in depicting symmetrical shapes, rounded shapes, and various curved lines.
Time needed: 20 minutes
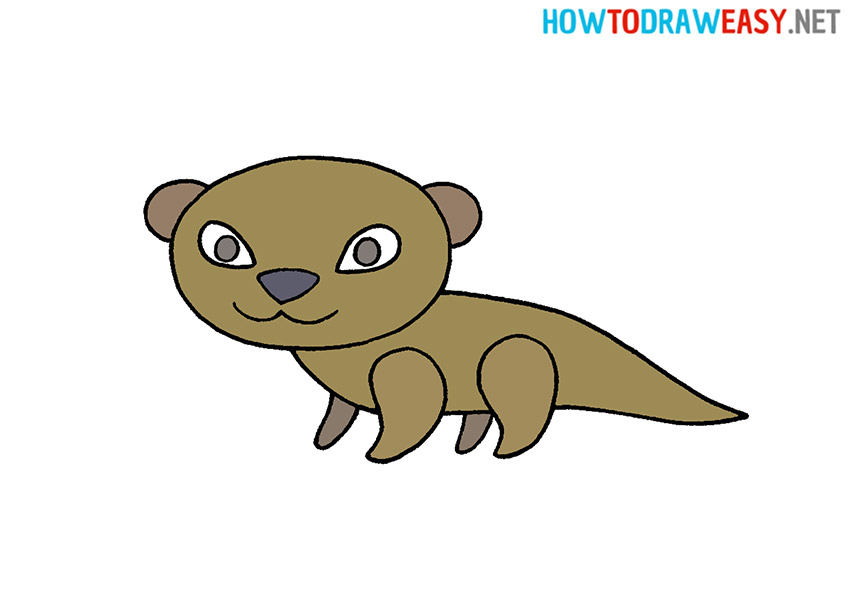
How to Draw an Otter for Kids
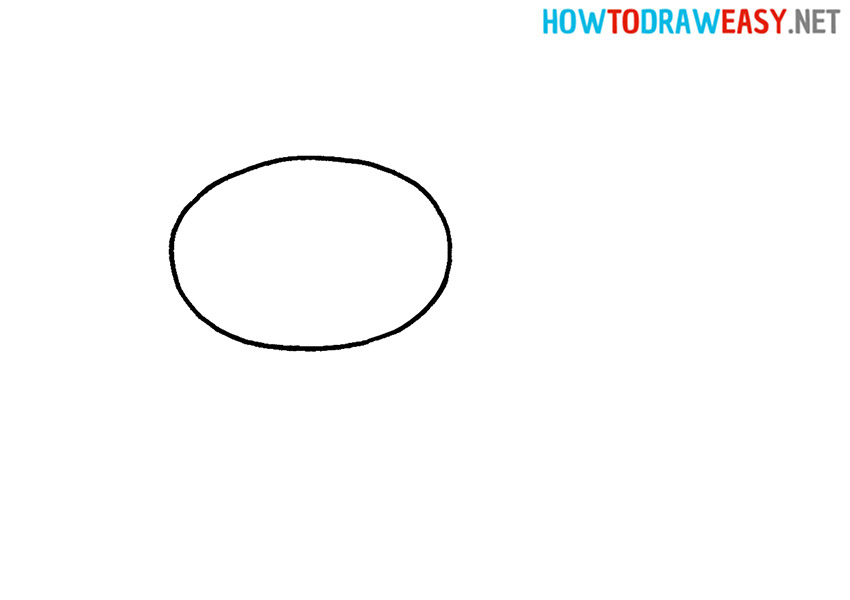
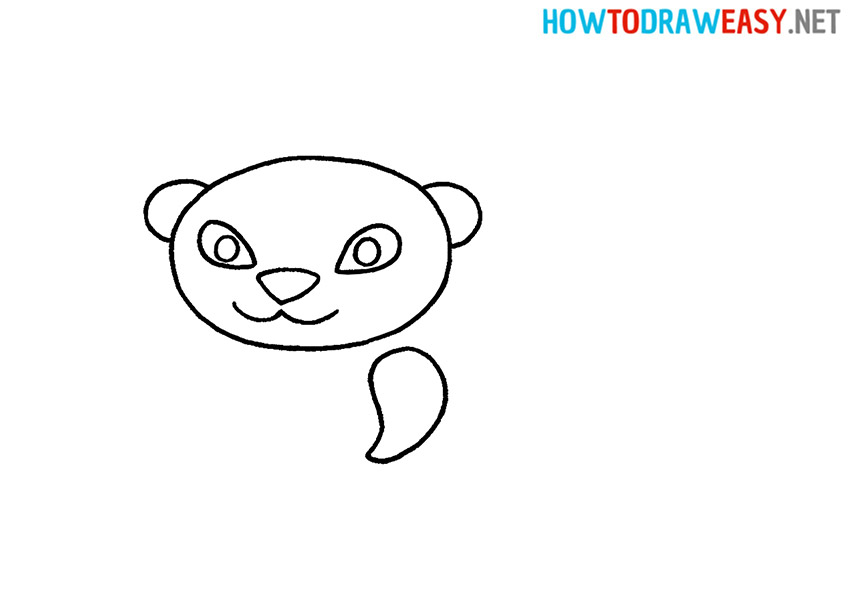
- Draw the head.
The drawing should start with an image of the head of the future otter. Draw an oval at the top of the sheet.
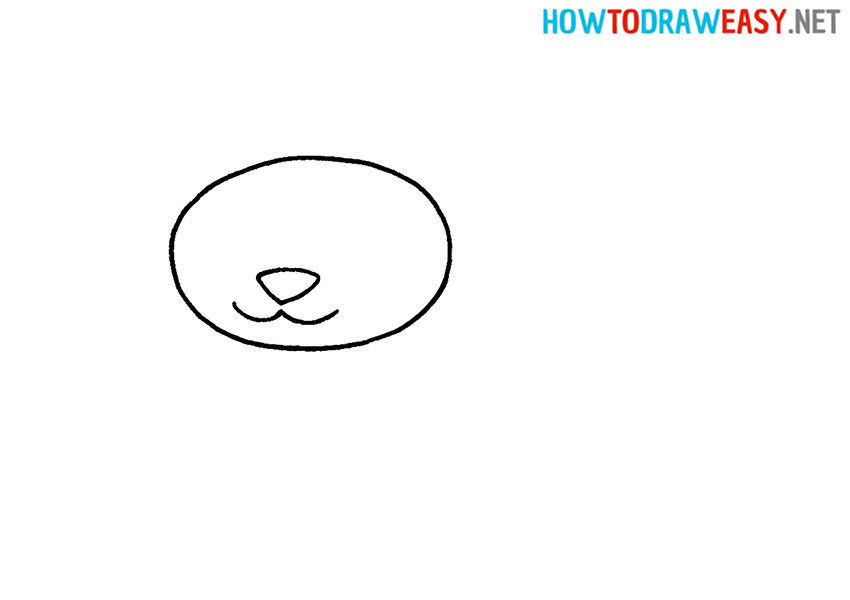
- Draw the nose and mouth.
Draw a small nose for your otter, then add a mouth using two curved lines.
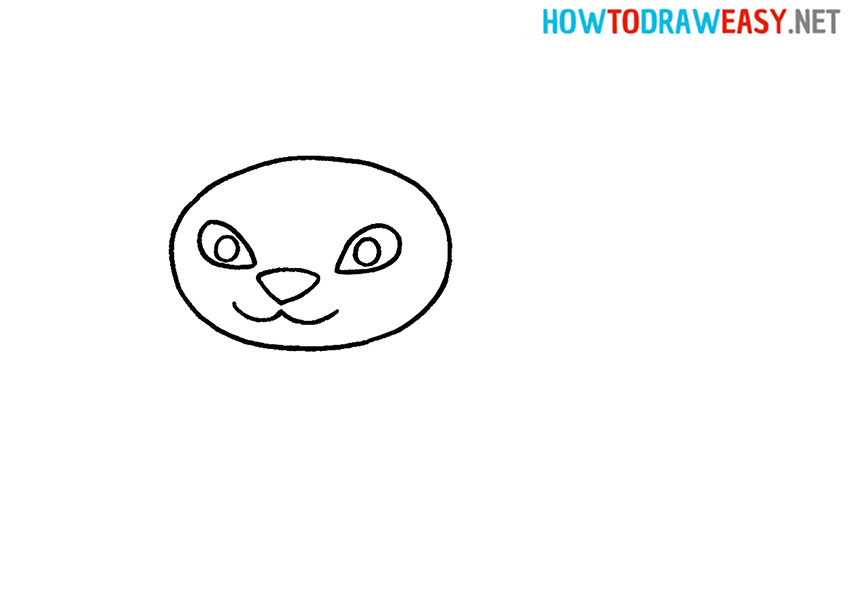
- Add eyes.
An important detail of the mammal’s drawing is its eyes. Note their almond shape. The eyes should be symmetrically positioned. Draw one round pupil in each eye. Make the pupils the same as well.
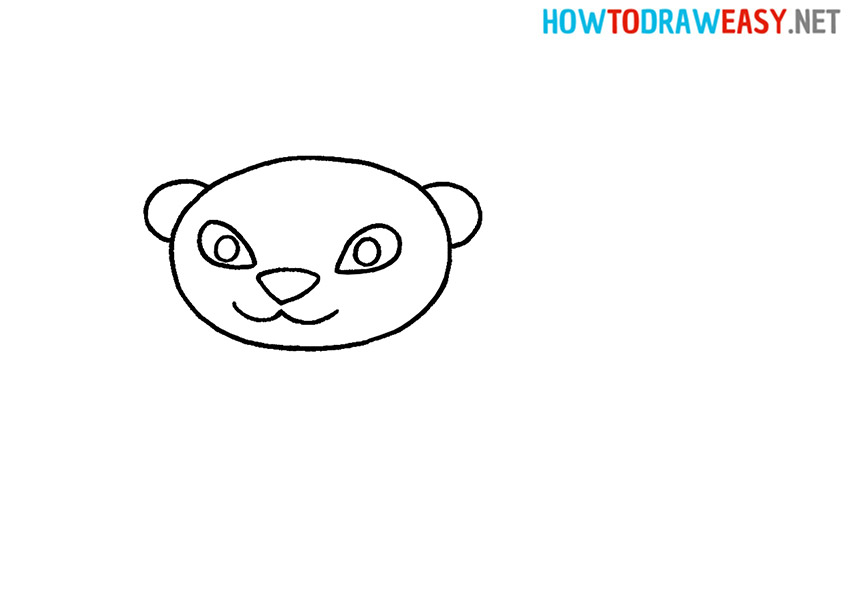
- Add the ears.
Otter’s ears are two unfinished ovals. Place them on either side of your head.
- Draw the front leg.
It is worth noting that the limbs of the otter are developed and can cope with various loads. Draw the front paw of the animal. It resembles an inverted drop of water, slightly pointed at the end.
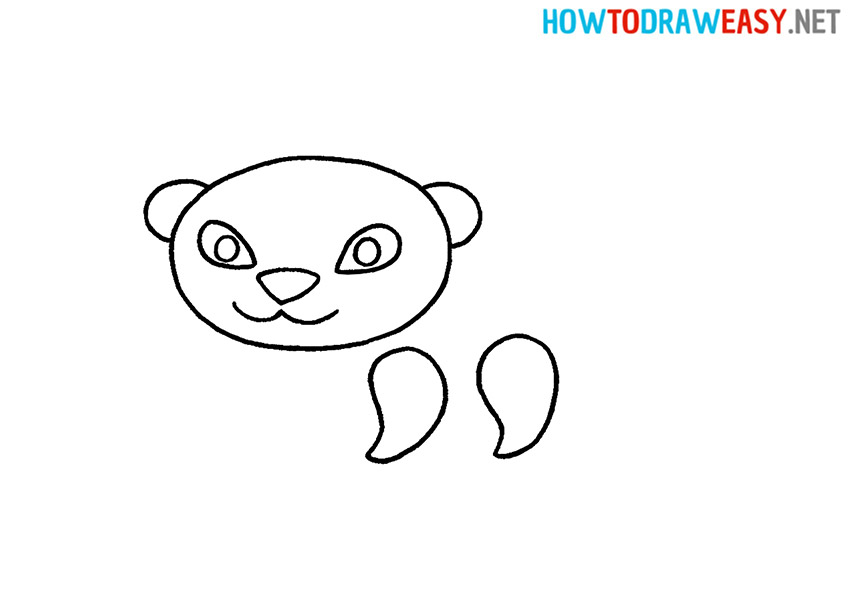
- Draw the hind leg.
Now you can proceed to the hind limb. Draw the paw in the same way, but note that it should be slightly larger than the first.
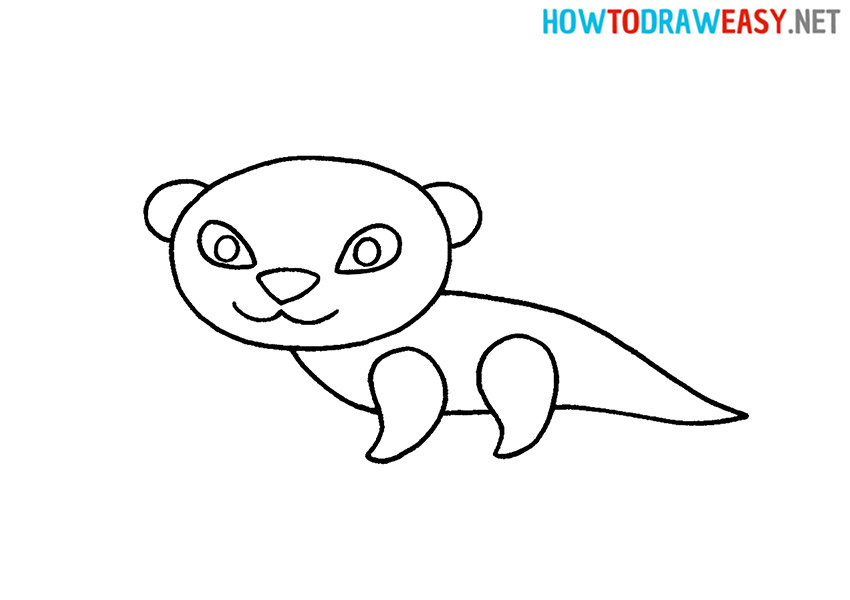
- Draw the body and tail.
Draw two curved lines. They should converge at the end, completing the body of the otter with a tail—a noticeable component of its image. In the process of drawing, be guided by the example from the instructions.
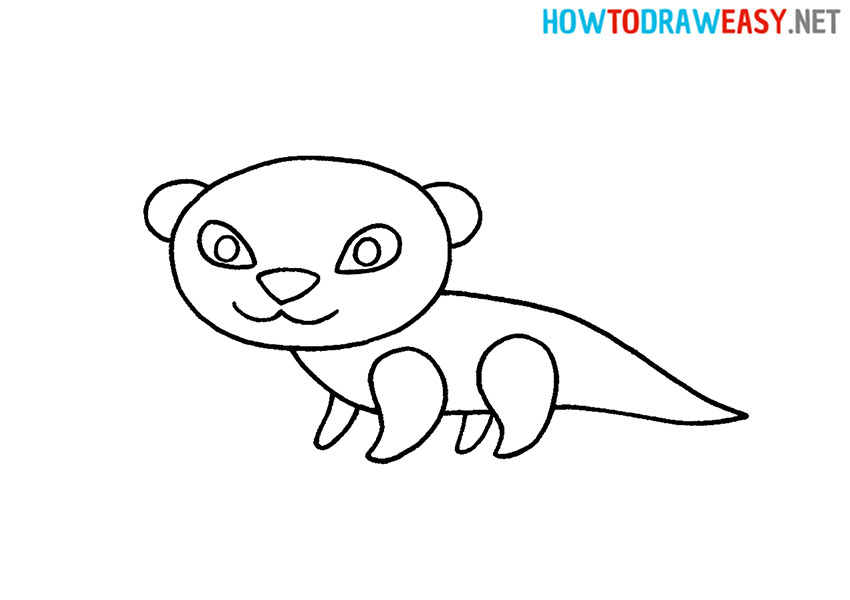
- Add front and back feet.
The penultimate step is to draw the remaining parts of the otter—front and hind legs, which are in the background.
- Color in the finished drawing of an otter.
Use your favorite coloring tools to add color to your cute otter drawing.


Draw other animals with us! You can find animals through a search engine on the site or in categories. We hope you have created a wonderful drawing!