
How to Draw a Ring for Kids
Want to draw a ring but don’t know how? This is the best place to learn how to draw a ring for kids and anyone who is a beginning artist.


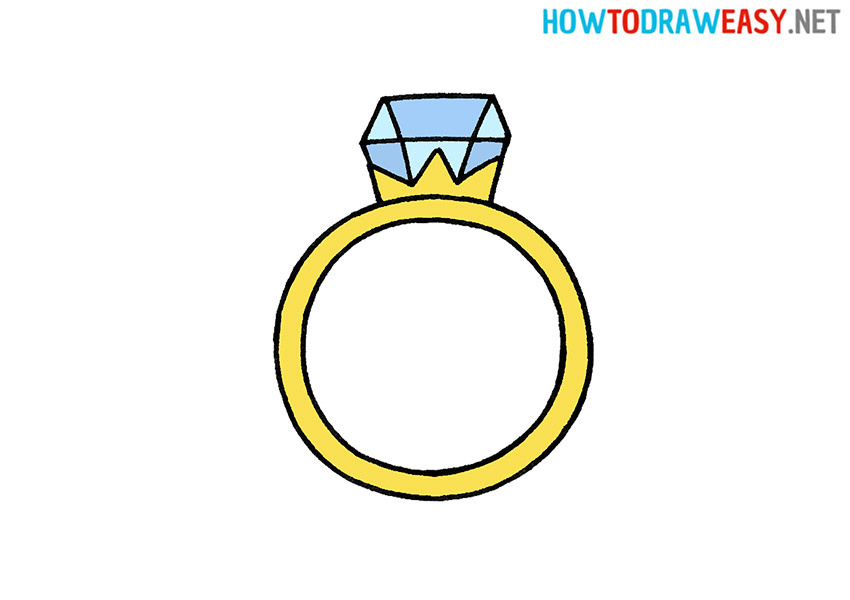
Hello everyone! Welcome to the tutorial on how to draw a ring for kids. Our ring will consist of a large diamond. An important point when drawing this accessory is that all lines must be smooth and accurate, otherwise, the drawing will look awkward.
A ring is a jewelry item that is worn on the finger. It can be made from various materials such as gold, silver, platinum, diamonds, pearls, and other precious stones. Rings can have different shapes, sizes, and designs, which make them unique.
Rings can be simple and elegant, with minimal decorations, or more complex and intricate, with many diamonds and other stones. Some rings also have symbolic meaning, such as engagement rings that couples exchange as a sign of their love and commitment to each other.
Rings can be worn on any finger, but they are most often worn on the ring finger of the left or right hand. Rings can also be given as a gift for special occasions such as birthdays, anniversaries, or weddings.
Rings are not only beautiful jewelry items but also symbols of style, individuality, and status. They can be simple or luxurious, but in any case, they are an important part of our culture and history.
We have created an easy step-by-step instruction so that everyone can draw a diamond ring step by step. Follow all the rules that are described in the instructions and success is guaranteed!
Time needed: 20 minutes
How to Draw a Ring for Kids
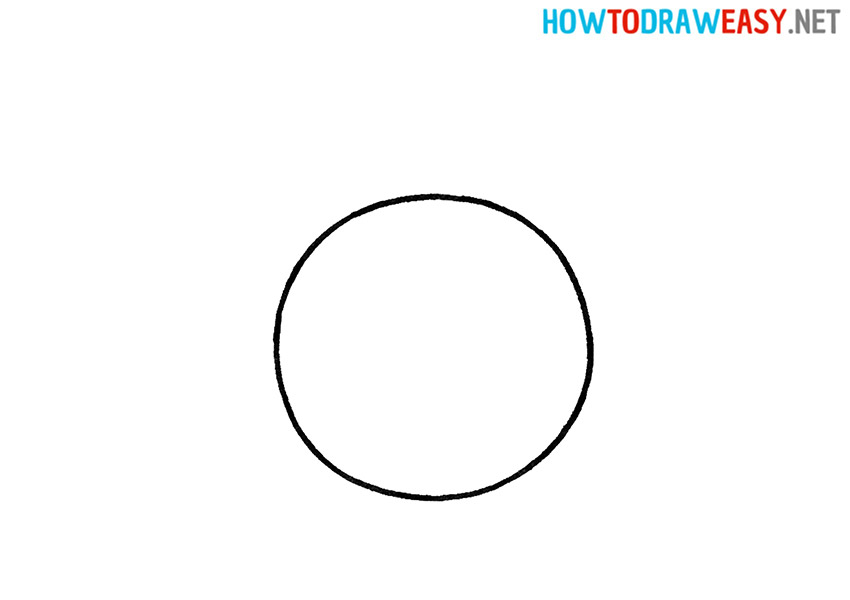
- Draw the shape of the ring.
The classic shape of the rings is considered to be round, because this jewelry is worn on the finger. Draw an even and large circle.
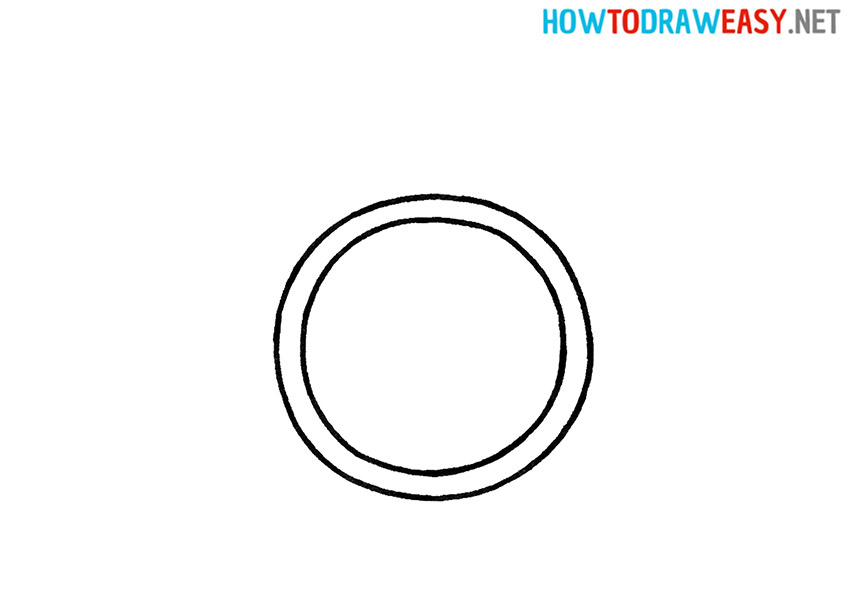
- Sketch the inside circle.
Draw the same one inside the large circle, but a small one. Thus, the decoration will turn out to be voluminous.
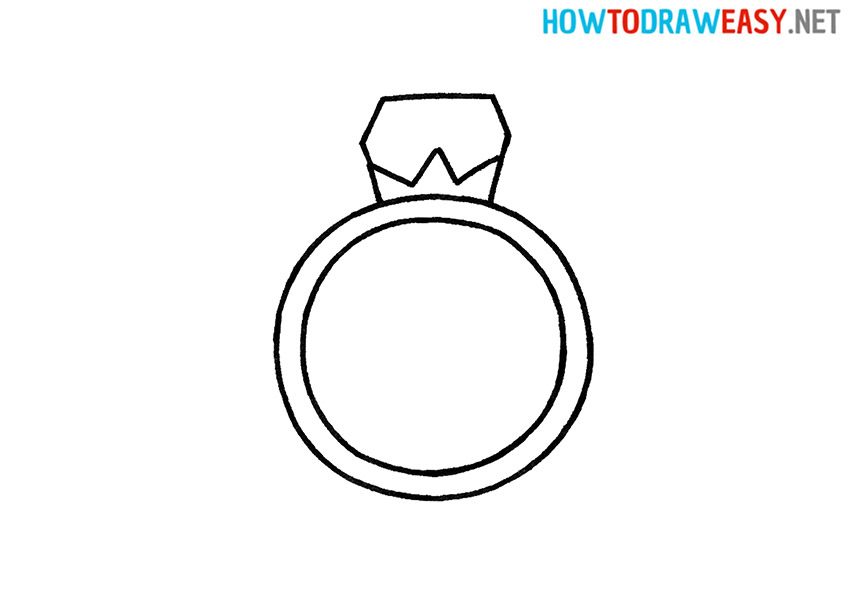
- Draw the prongs of the ring.
In the middle at the top of the ring, you need to draw prongs that resembles a crown with three sharp peaks.

- Start drawing the gem.
A diamond or gem can be drawn in any shape. We decided to draw a polygonal shape.
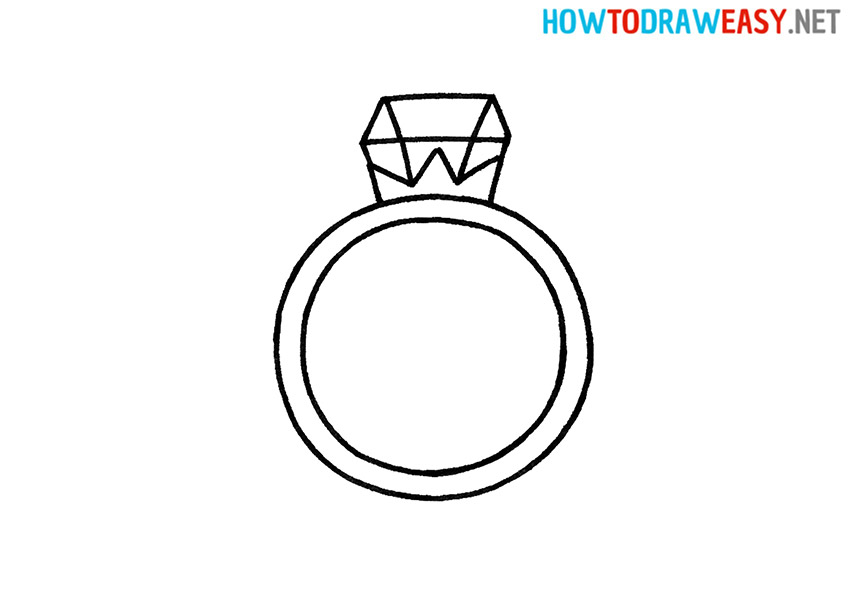
- Detail the diamond.
Add additional elements to the gem. Inside the stone, draw one horizontal and two vertical lines.
- Color the drawing.
We suggest painting the ring in a classic color scheme. Color the ring and diamond gallery in gold or yellow. And shade the precious stone in blue. You can experiment with the palette and add more shades of blue.


Congratulations on successfully completing your ring drawing! We believe in you and think that you are doing a great job with the process of learning to draw. Watch other drawing lessons and continue to upgrade your skills as an artist.