How to Draw a House Step by Step
Learn how to draw a house step by step and easy even for beginners. Draw a house by scrolling below to see all the detailed instructions and a collage of this drawing.


Hi all! In this tutorial, we will look at how to draw a house step by step. A house is a building that has a certain design and is designed for people to live in it. The dwelling has been known to people since the time of the primitive system. Initially, people chose caves, grottoes, and other similar natural places as dwellings.
Gradually began the internal arrangement and improvement of living conditions, as well as external decoration. Among the oldest houses are dugouts and huts. Nowadays, there are various types of residential buildings, there are separate houses with a landscape around the house. There are also apartment buildings that are very popular in cities like New York. Drawing a house is a simple and exciting activity, during which you will practice drawing various shapes and lines. Let’s get started!
Time needed: 25 minutes
How to Draw a House Step by Step
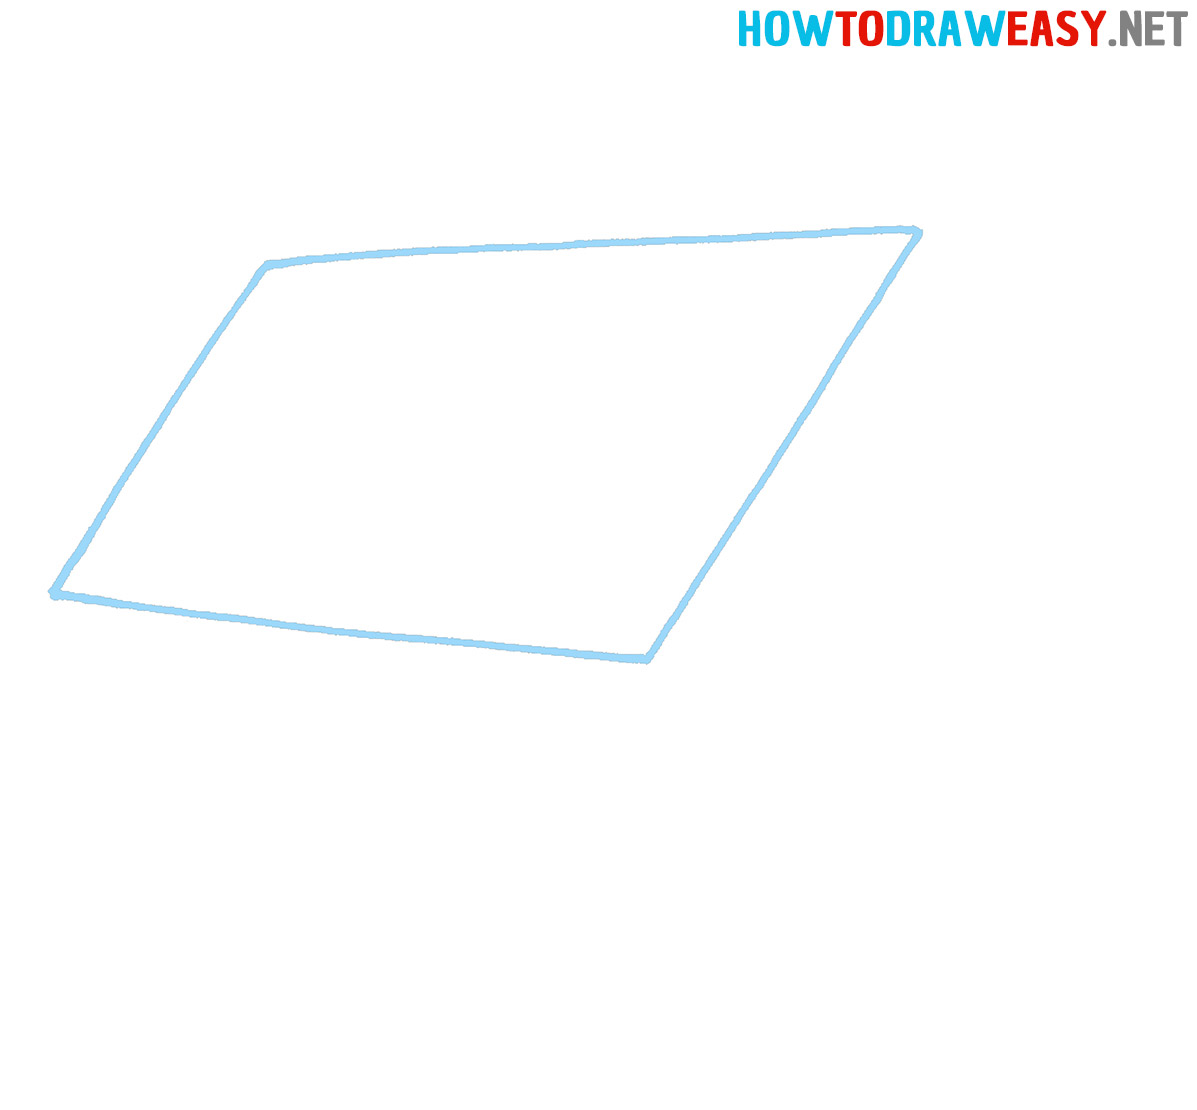
- Roof outline.
Start by drawing the rectangular part of the roof. This is the hipped edge of the roof.
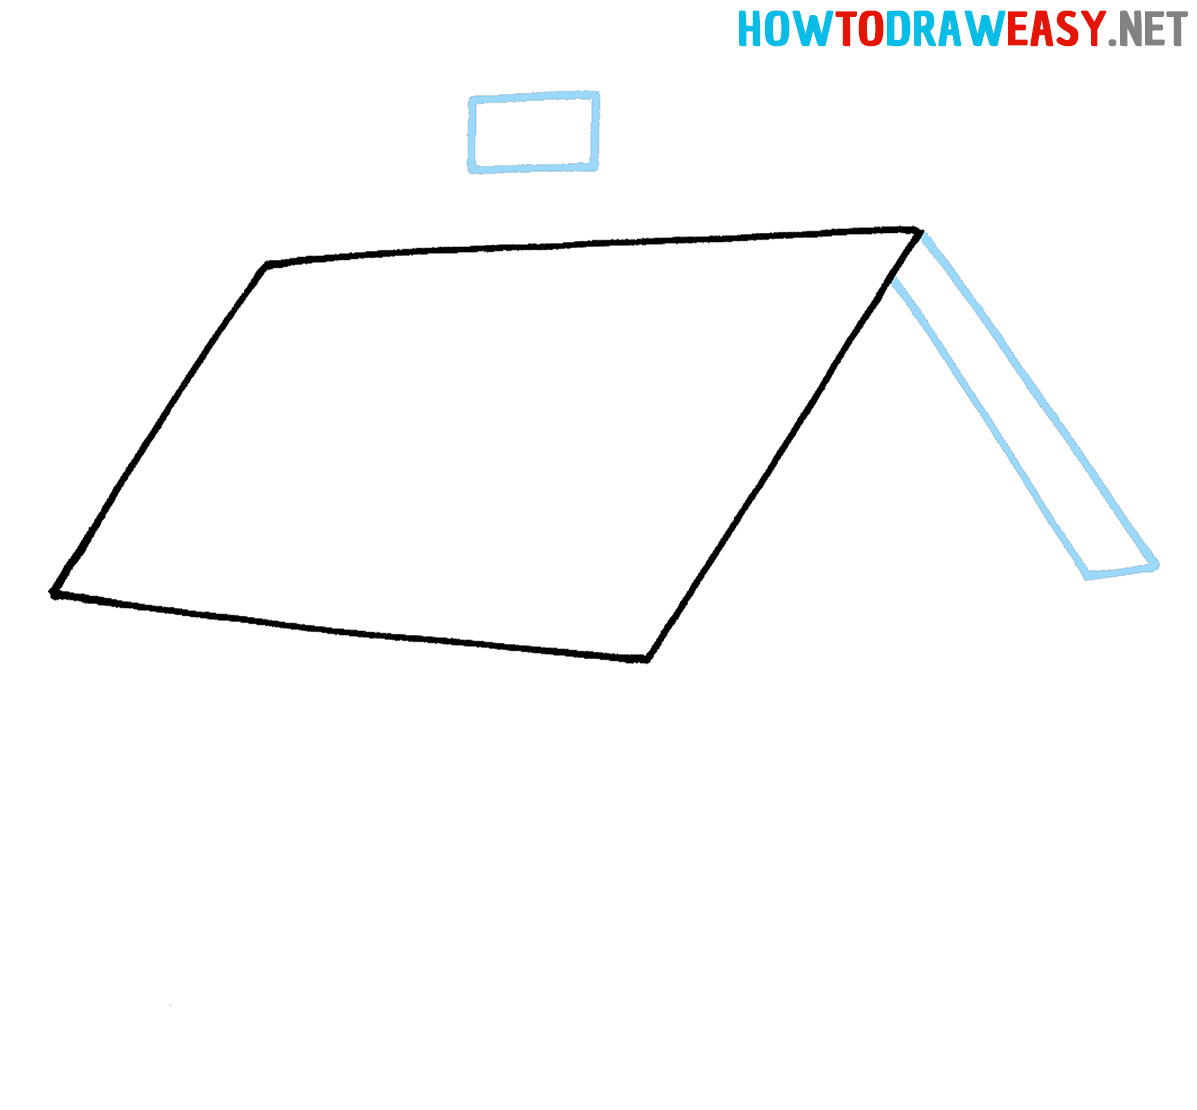
- Roof edge.
Now draw the fascia of the lower part of the roof as shown. Also depict the upper rectangular part of the chimney.
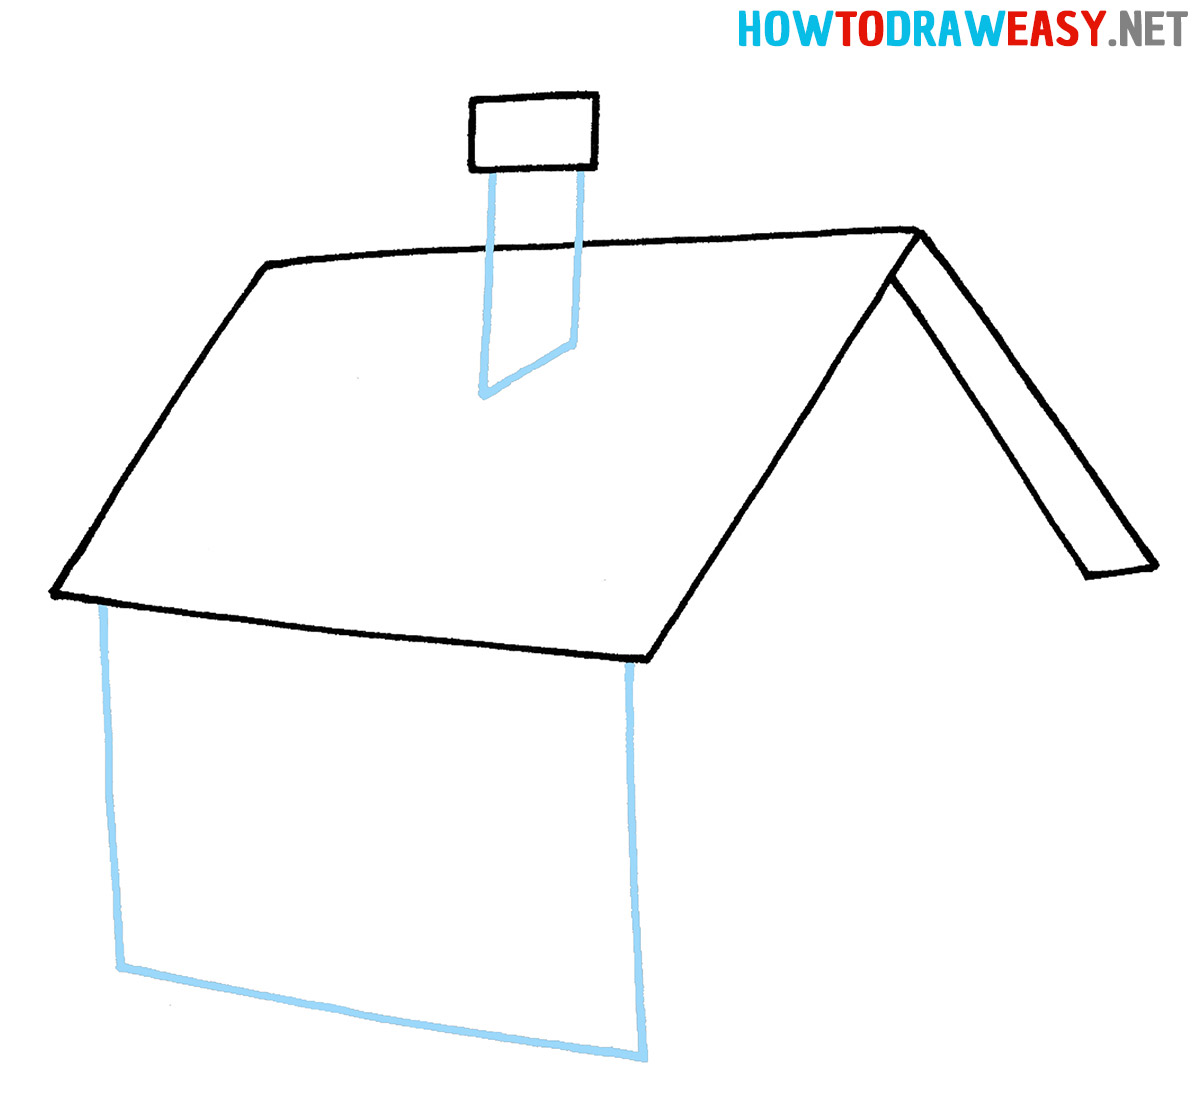
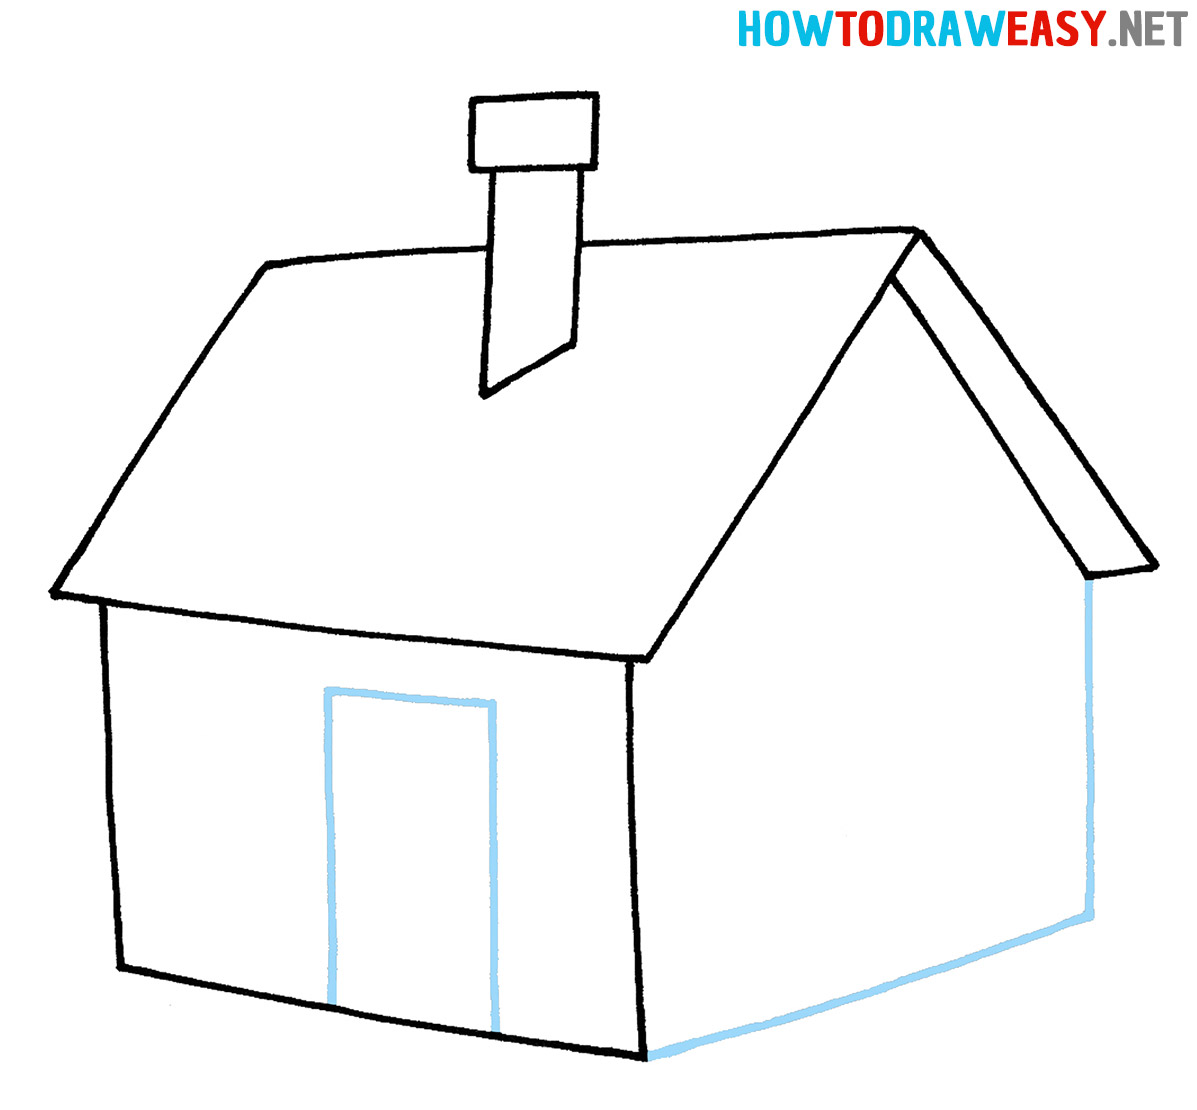
- Add the wall.
Now sketch the side wall using straight lines as in the example. Also draw the entire length of the chimney with straight lines.
- Add the door and the wall.
Draw the basic shape of the door using two vertical and one horizontal lines. Also draw the entire right side of the house as shown in the example.
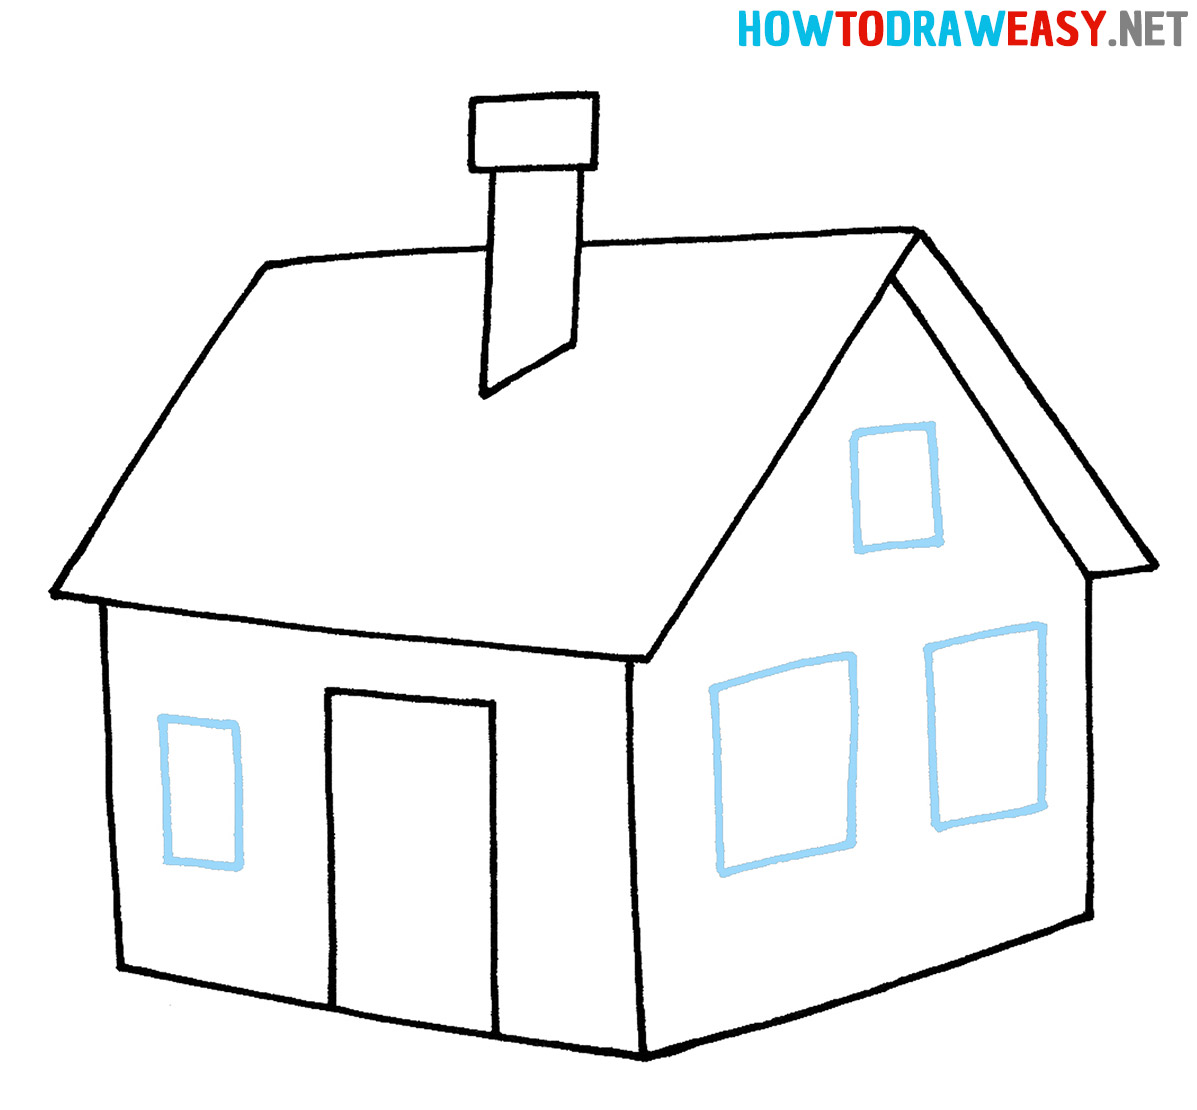
- Draw windows.
Draw one rectangular window near the door. On the other wall, draw two large windows and one small skylight.
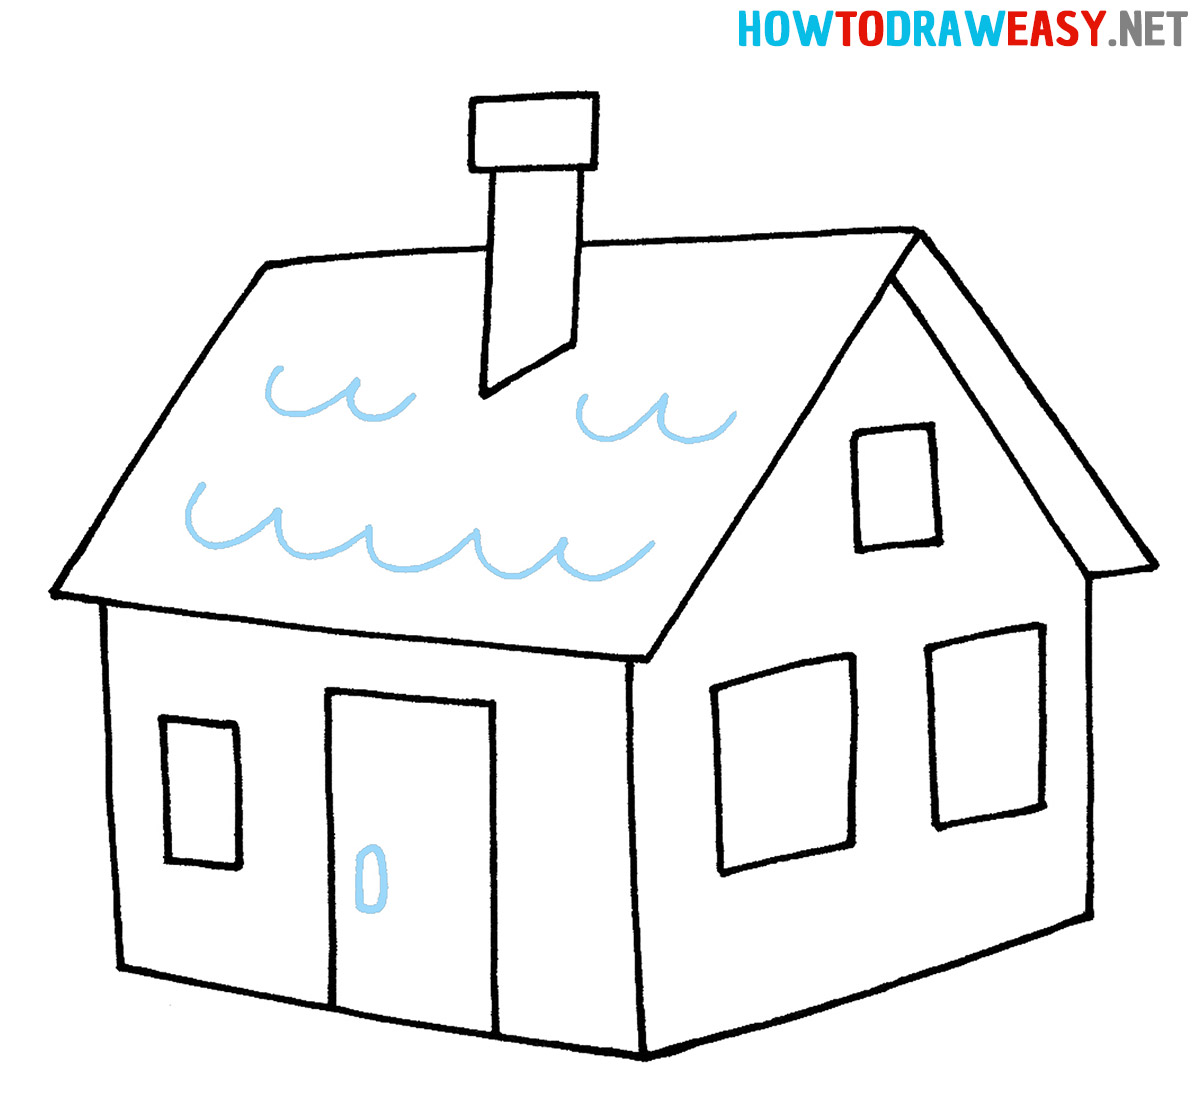
- Texture the roof.
To complete the drawing of the house, you need to draw the texture of the roof in the form of tiles.
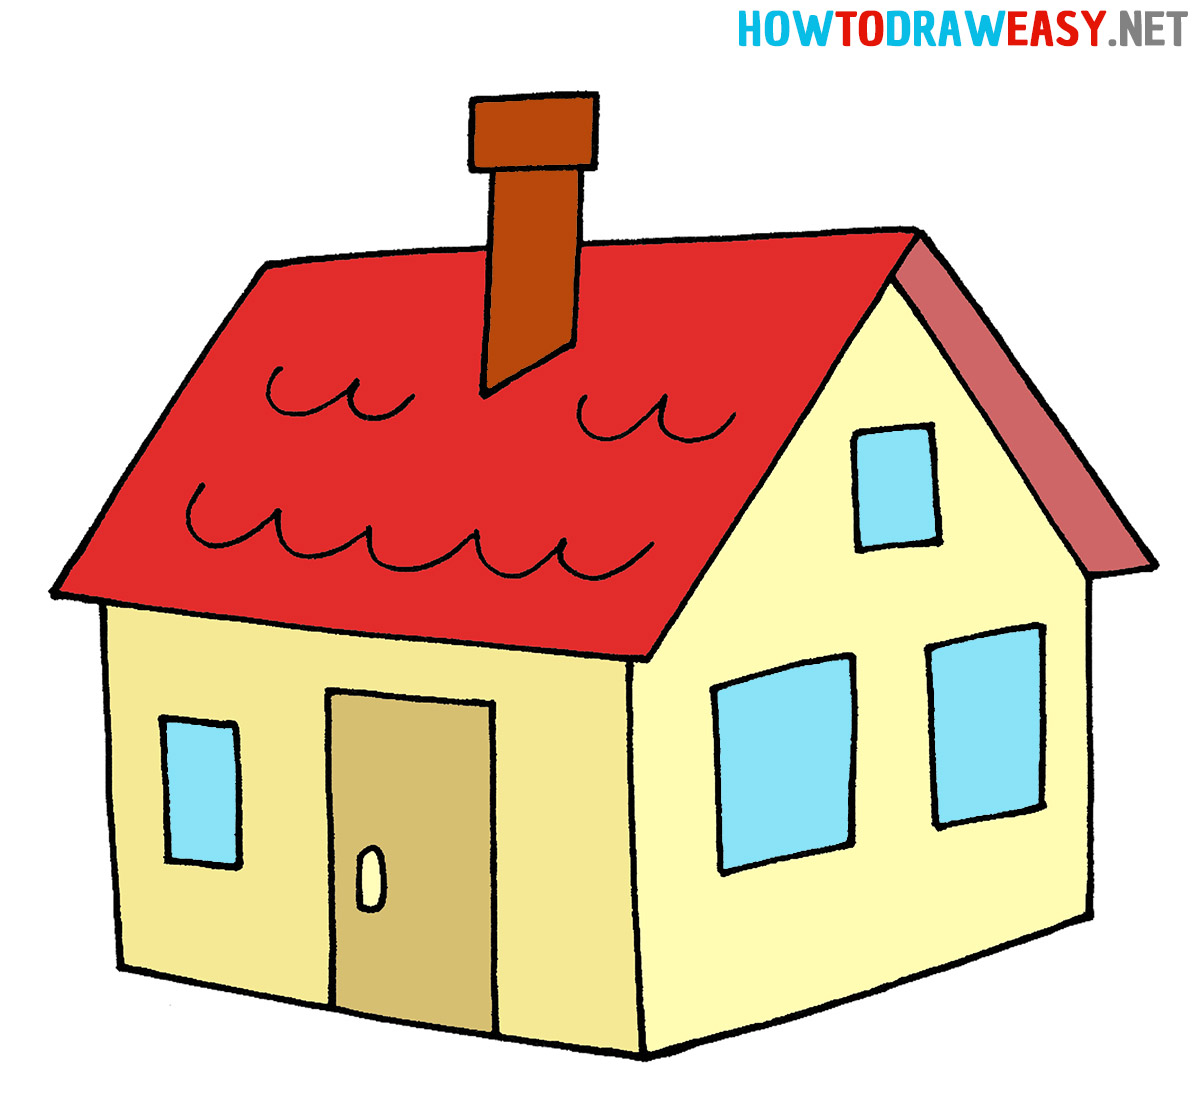
- Color your house.
We painted our house using two main colors—red for the roof and beige for the walls. You can color your house artwork any color you choose.