
How to Draw a Fist
Learn how to draw a fist step-by-step with this easy beginner’s guide. Follow 8 simple drawing steps, with tips.


Learn How to Draw a Fist Step-by-Step
Why Learn to Draw a Fist?
Drawing a human fist may seem simple at first glance, but it’s a great exercise to understand hand anatomy, proportion, and form. Whether you’re learning to draw characters in action or just practicing hand positions, this step-by-step tutorial is the perfect place to begin.
The clenched fist is one of the most dynamic hand gestures in art — representing strength, energy, or determination. It’s often used in superhero art, comic books, or action scenes.
What You’ll Need to Draw a Fist
Before you begin, gather the following basic tools:
- Pencil (HB or 2B for sketching)
- Eraser
- Optional ruler (to keep proportions steady)
- Black pen or marker (for tracing)
- Colored pencils or markers (for final coloring)
- Drawing paper or a sketchbook
These are all you need to create your own dynamic fist illustration!
What You’ll Learn in This Guide
In this lesson, you’ll learn how to:
- Draw the basic shape of a hand in a fist pose
- Understand the order of finger placement
- Add realistic shape and details to make the drawing pop
- Trace and color the drawing for a finished look
By the end of this guide, you’ll feel more confident drawing fists and be ready to explore other hand gestures and full characters too!
Time needed: 15 minutes
How to Draw a Fist
- Draw the Palm Shape
Start by drawing the basic shape of the palm. It should look a bit like a sideways shield or a soft-edged pentagon tilted slightly to the right. This will serve as the foundation for your fist.

- Add the Thumb Base
At the top right corner of the palm, draw the base part of the thumb — a curved shape that overlaps slightly into the palm. This shows where the thumb wraps around the fingers.

- Draw the Pinky Finger
Now add the smallest finger — the pinky — on the left side of the palm. It should look like a short, curved oval or capsule shape, placed horizontally above the palm outline.

- Add the Ring Finger
Draw the ring finger just to the right of the pinky. Use a similar rounded rectangle shape, slightly longer than the pinky, to reflect its size in proportion.

- Draw the Middle Finger
Next, add the middle finger. This finger should be the longest of all and follow the same curved, capsule-like shape. Place it above the palm and next to the ring finger.

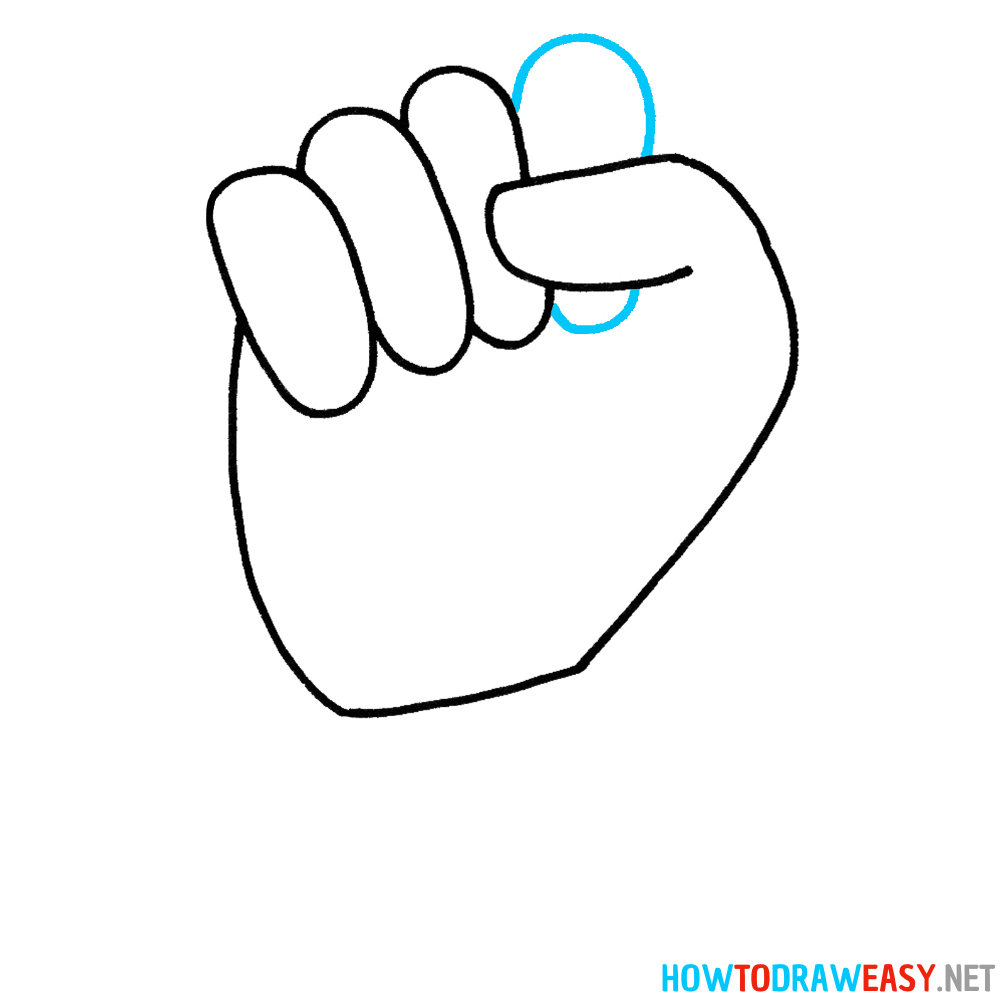
- Add the Index Finger
Finish the curled fingers by drawing the index finger at the far right, just left of the thumb. It should be slightly shorter than the middle finger but larger than the pinky.
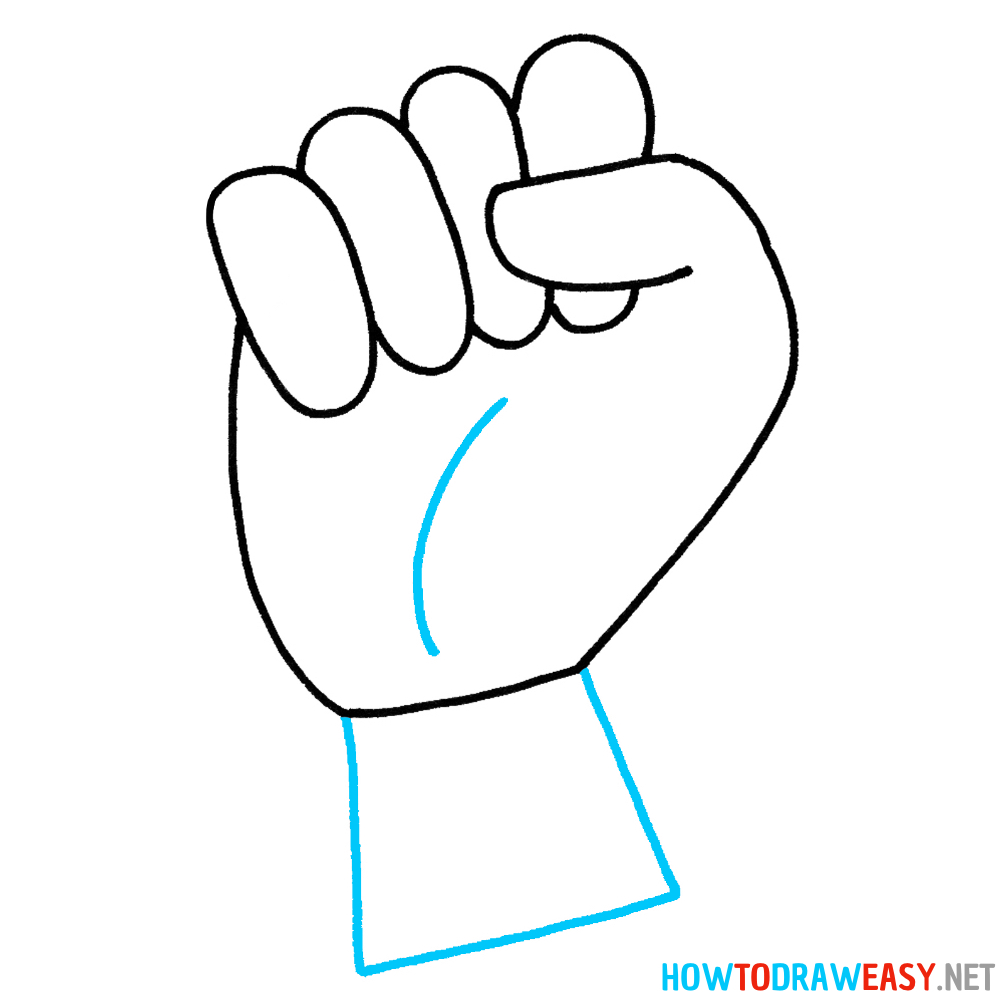
- Add Palm Details and Wrist
Now draw a short curved line inside the palm to indicate a fold in the skin. Then, sketch the cuff and wrist extending downward to show the arm continuing from the fist.
- Outline and Color
In this final step, trace over your entire drawing with a black pen or marker to define the lines clearly. Then color in the hand using a natural skin tone or any shade you’d like!


You Did It!
Congratulations! You just finished drawing a clenched fist — and that’s no small feat. Hands are one of the most challenging things to draw, so learning this pose puts you ahead on your artistic journey.
Remember: repetition is key. Try drawing the same fist from different angles, or mirror it to draw a left-handed version. Over time, your lines will become more fluid and confident.
🖼️ What’s Next? Try These Too!
Now that you’ve mastered the fist, why stop there? Try out other drawing tutorials on HowtoDrawEasy.net like:
- How to Draw a Hand
- How to Draw a Superhero Pose
- How to Draw Animal Paws
- How to Draw a Punching Action
Each tutorial is designed for beginners and will help expand your skills step-by-step.
Keep Drawing Every Day
Drawing even 10 minutes a day helps develop strong muscle memory and creativity. Don’t worry about perfection — just keep creating and improving! We’re here to help you learn one drawing at a time.