
How to Draw Santa
Learn how to draw Santa step by step with this easy Christmas drawing tutorial. Perfect for kids and beginners! Follow simple instructions to draw Santa, his hat, beard, coat, and gift sack.


Welcome to the How to Draw Santa Step-by-Step Guide
If you’ve ever wanted to learn how to draw Santa, this detailed step-by-step tutorial is the perfect place to start! Santa Claus is one of the most iconic holiday characters in the world, symbolizing joy, kindness, winter magic, and the spirit of giving. In this lesson, you’ll discover how to draw Santa in a simple, friendly cartoon style that’s great for kids, beginners, teachers, and anyone who enjoys holiday arts and crafts.
This guide breaks the drawing process into 10 easy steps, showing you exactly how to draw Santa’s face, hat, beard, coat, gift sack, boots, and more. With clear instructions and simple shapes, even complete beginners can follow along and create a festive Santa drawing.
Who Is Santa Claus? A Little Holiday History
Before you start drawing, let’s talk briefly about the character you’re bringing to life. Santa Claus is inspired by Saint Nicholas, a historical figure known for generosity and compassion. Over the centuries, this legendary character evolved into the cheerful, red-suited Santa we know today — appearing in books, movies, cartoons, and Christmas traditions around the world.
Santa is typically shown with:
- A fluffy red hat with white trim
- A big snowy beard
- A warm red coat
- A large gift sack filled with presents
- Friendly eyes and a joyful expression
When learning how to draw Santa, these key elements help make the character instantly recognizable.
What You Will Learn in This Santa Drawing Tutorial
In this illustrated guide, you will learn how to:
- Draw Santa’s face shape, eyes, nose, and eyebrows
- Add his iconic mustache and long beard
- Draw the Santa hat with fluffy trim and pom-pom
- Create the rounded body shape and cozy winter coat
- Bring Santa to life with arms, mittens, and decorative fur trim
- Add the famous gift sack
- Complete the drawing with boots and optional shading
- Color your Santa illustration with classic Christmas colors
Each step is simple and beginner-friendly, even if you have never drawn Santa before!
Drawing Supplies You Will Need
You won’t need anything complicated — this Santa drawing tutorial is designed to be completely accessible. Here’s what to prepare:
Basic Supplies:
- Pencil
- Eraser
- Black marker or pen for outlining
- Colored pencils, markers, or crayons
Optional:
- Paper with a smooth surface (helps with clean outlines)
- Gel pens or white markers for adding highlights
- A ruler (not required but helpful for younger artists)
Once your materials are ready, scroll down and follow the step-by-step images and instructions. Let’s bring Santa Claus to life on paper!
Time needed: 25 minutes
How to Draw Santa Step by Step
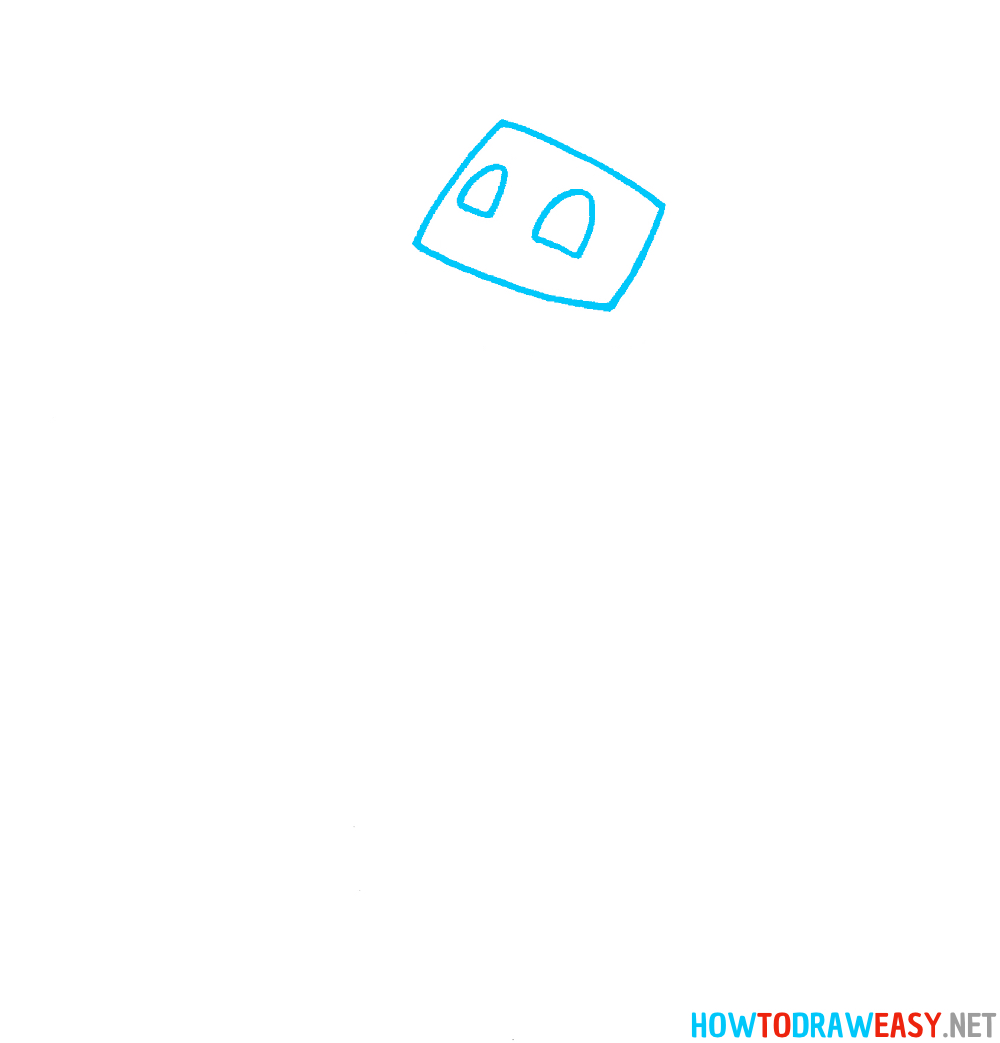
- Draw the Head Shape and Eyes
Begin by sketching Santa’s head. The shape tilts slightly, so draw a soft, rounded square or rectangle to represent his face. Inside the head, add two large oval or rounded-rectangular eyes. Keep the shapes simple and expressive. These basic outlines will help you place the facial features correctly.
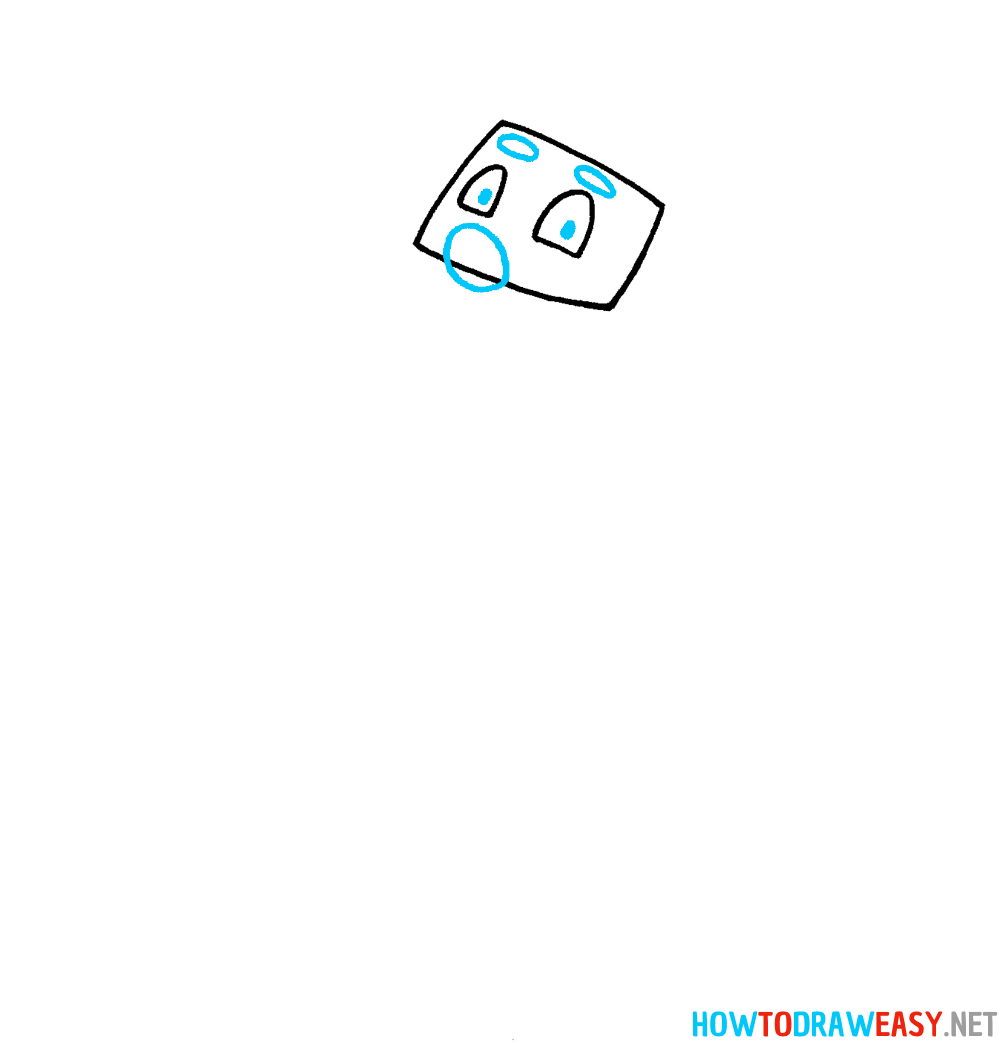
- Add the Eyebrows and Nose
Above each eye, draw curved eyebrows that follow the tilt of the head. These give Santa his friendly, surprised expression. Then add a small oval nose centered between the eyes and slightly lower. At this stage, the face should look simple but already recognizable.
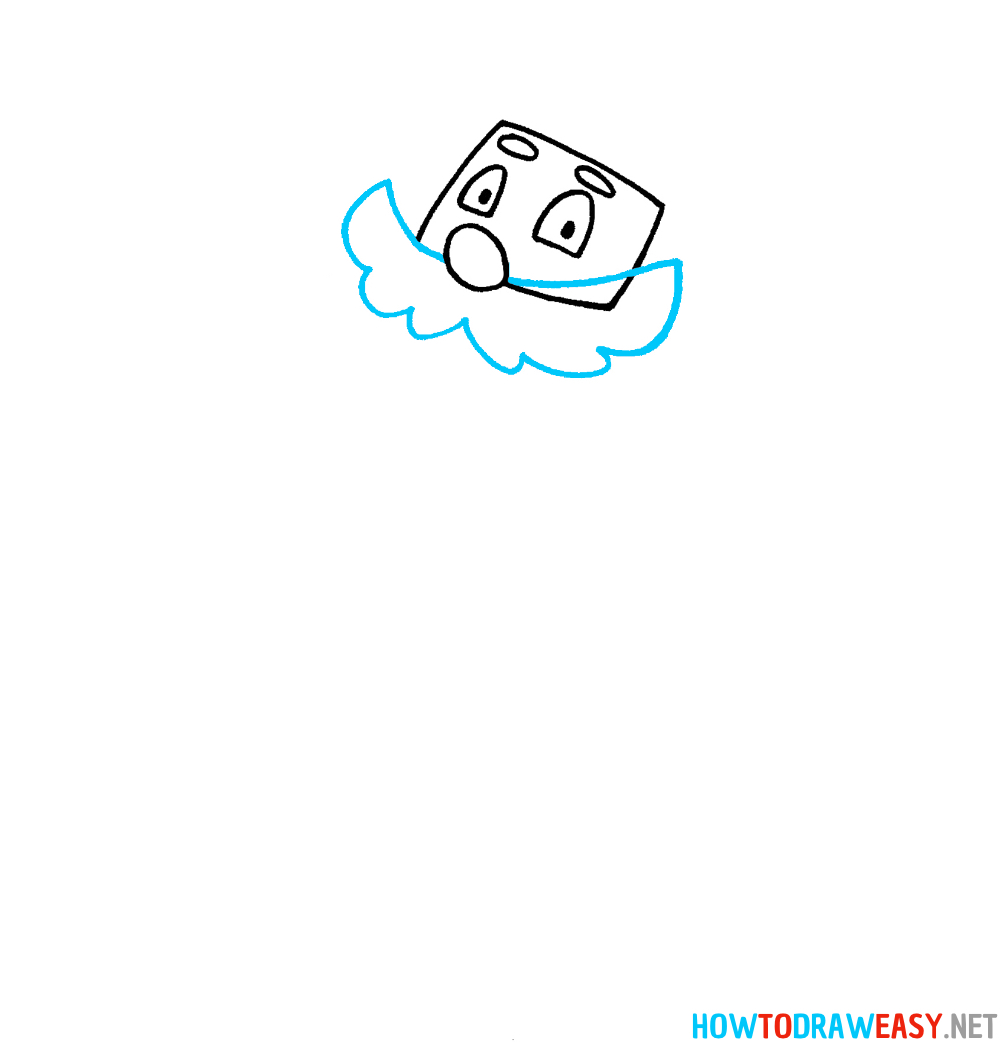
- Draw Santa’s Big Mustache
Using smooth, curved lines, draw Santa’s signature large mustache beneath the nose. Each side of the mustache should flare outward and downward, creating a thick, fluffy shape. The mustache will partially cover the lower part of the face, so draw it wide and full.
- Add the Hat Trim, Beard and Pom-pom
Now draw the fluffy trim of Santa’s hat. Use wavy, cloud-like lines that sit above the eyebrows.
Below the mustache, add Santa’s beard — large, wide, and slightly jagged at the bottom to show texture.
Finally, draw the small pom-pom on the side of Santa’s hat using a rounded, fluffy shape.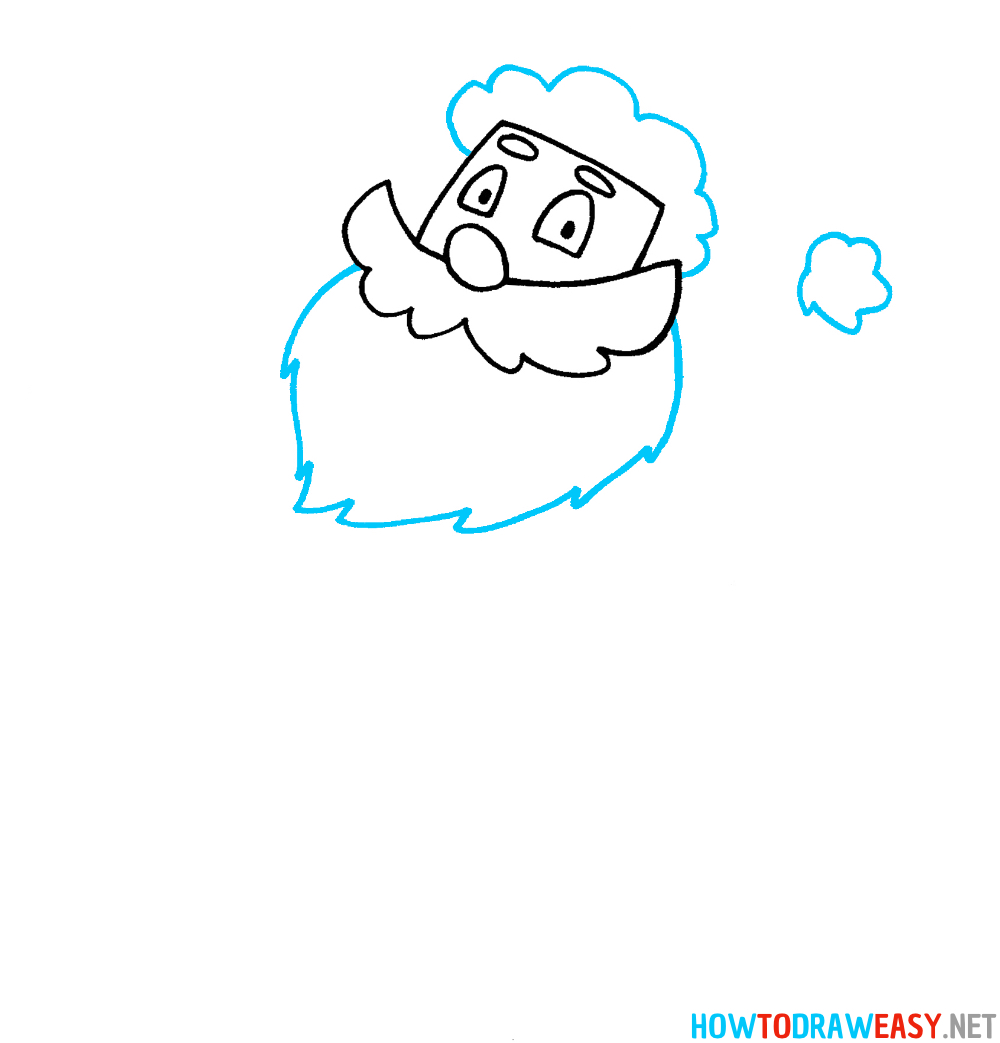
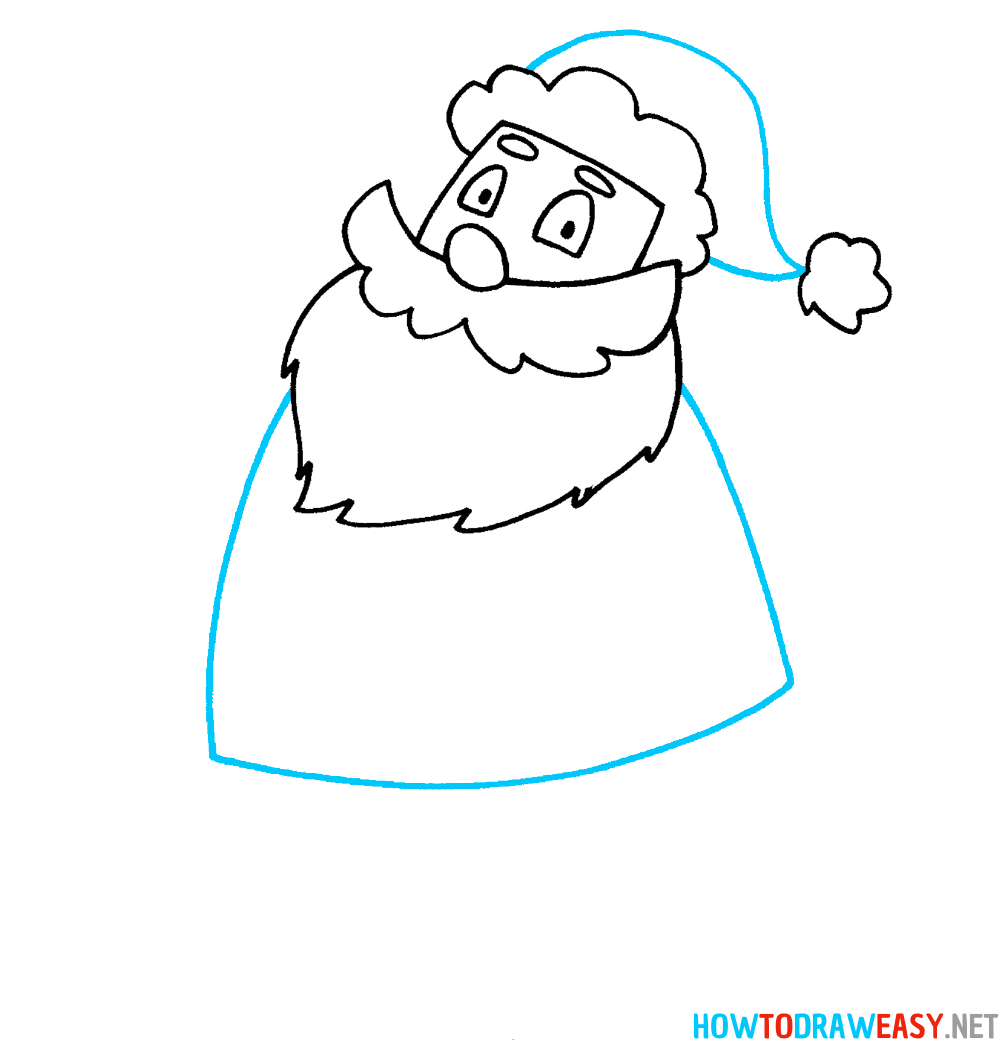
- Draw Santa’s Torso and Complete the Hat
Sketch Santa’s torso beneath the beard. It should be wide and rounded, forming the main shape of his coat. Then finish drawing the main body of the hat: a curved, drooping shape that bends to the side and connects to the pom-pom.
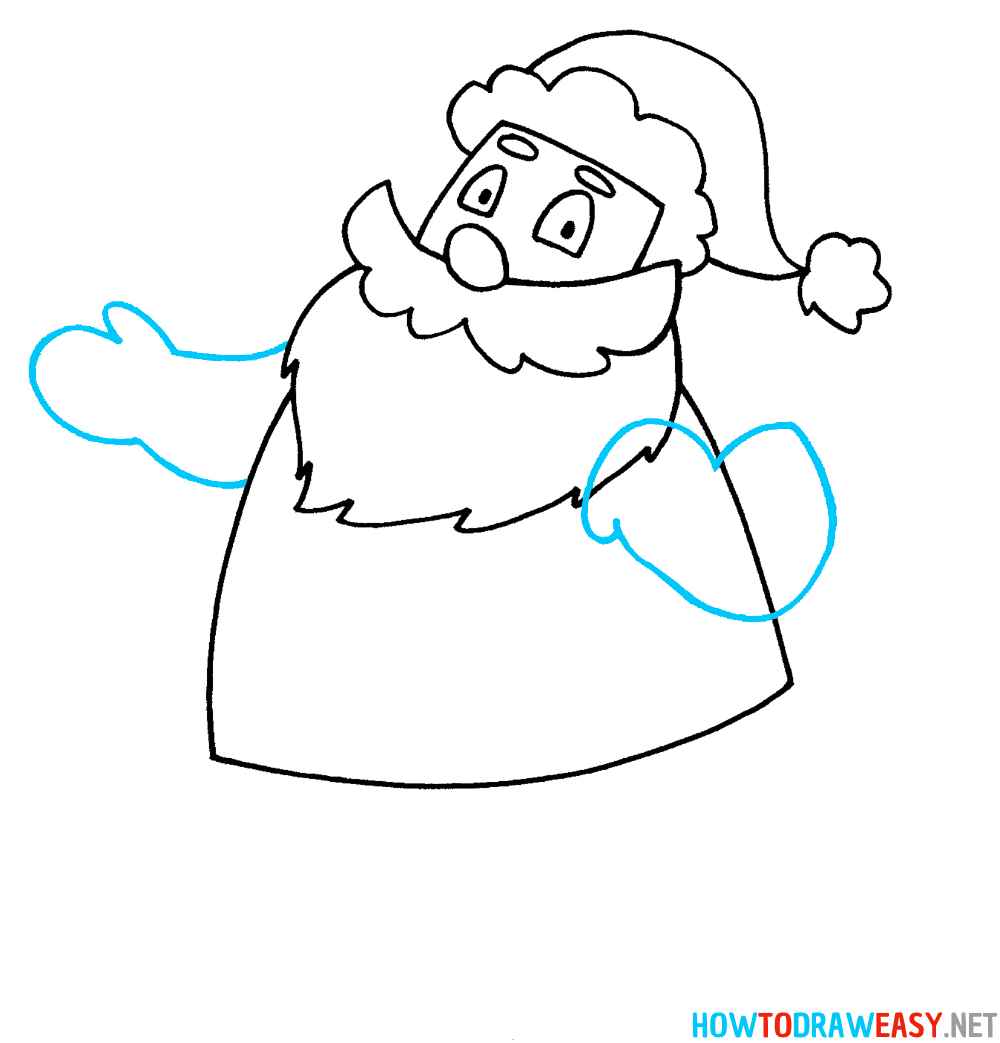
- Draw the Arms and Hands
Add Santa’s arms on both sides of the torso. Each arm should be puffy and rounded, matching the cozy style of his winter outfit. Draw simple mitten-like hands at the ends of the arms. Santa’s left hand appears open, while the right hand bends inward.
- Add the Fluffy White Trim on the Coat and Gloves
Draw the fluffy white fur details that decorate Santa’s outfit.
Add the scalloped fur trim along the bottom of the coat, the vertical trim down the center, and the fluffy cuffs on both gloves. These details give the coat its classic festive look.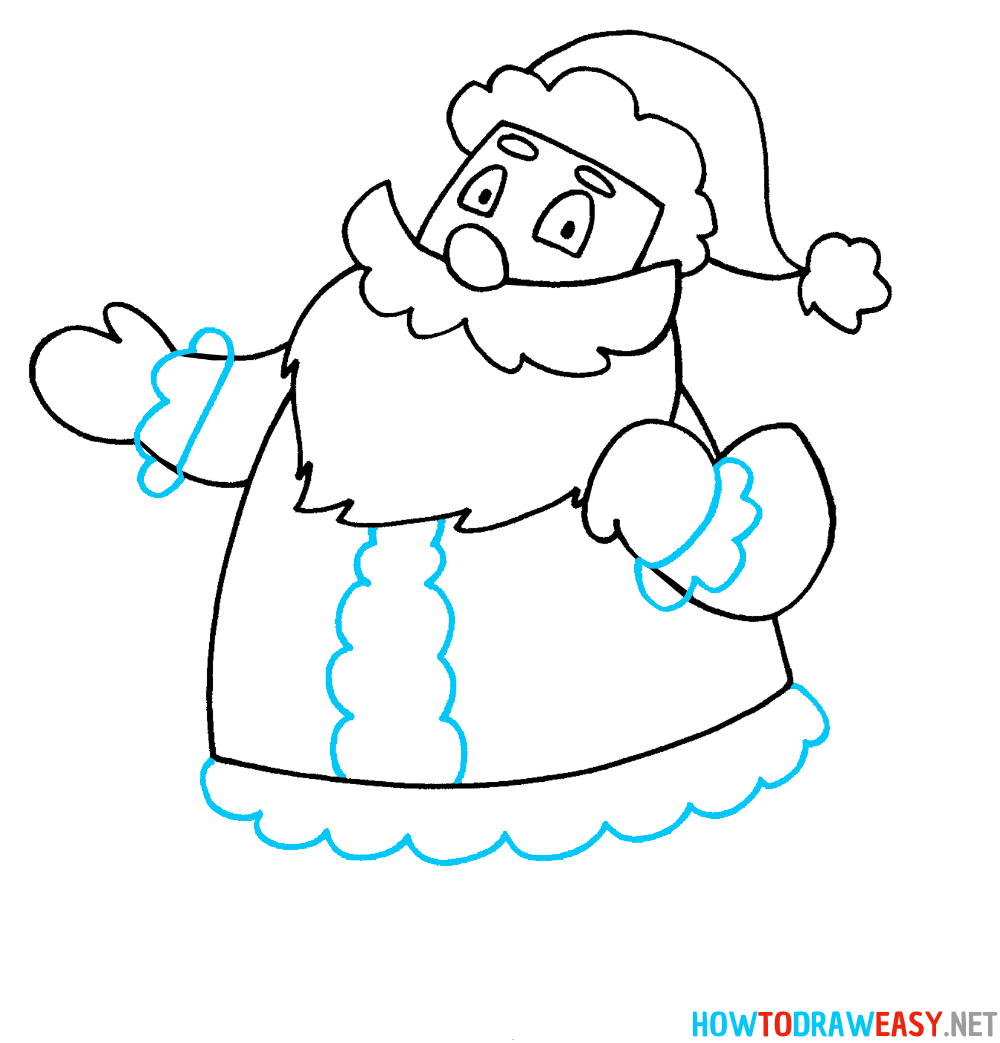
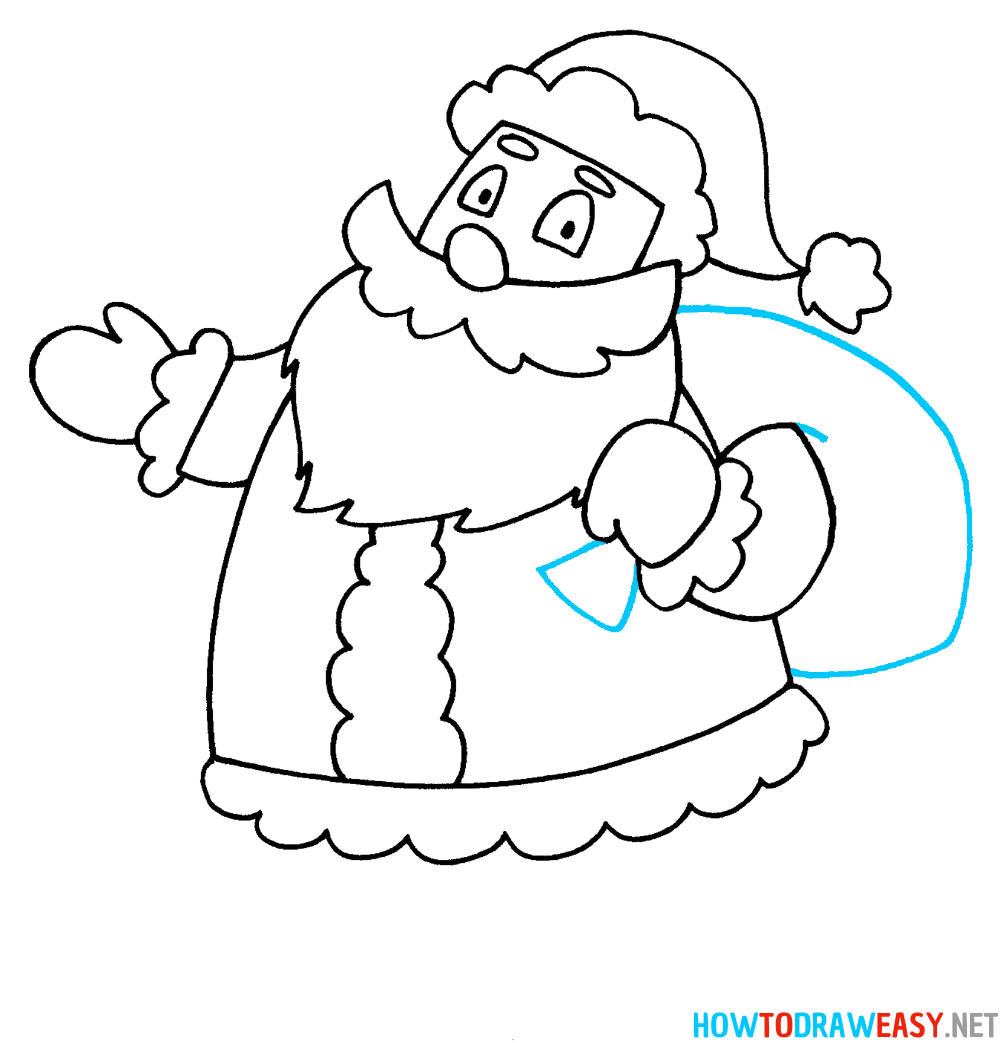
- Draw Santa’s Gift Sack
Behind Santa’s right side, sketch his large gift sack. Draw it as a rounded, slightly uneven shape to make it look full. Add a curved line to show where Santa is holding it with his hand. This sack should appear big and heavy, filled with presents.
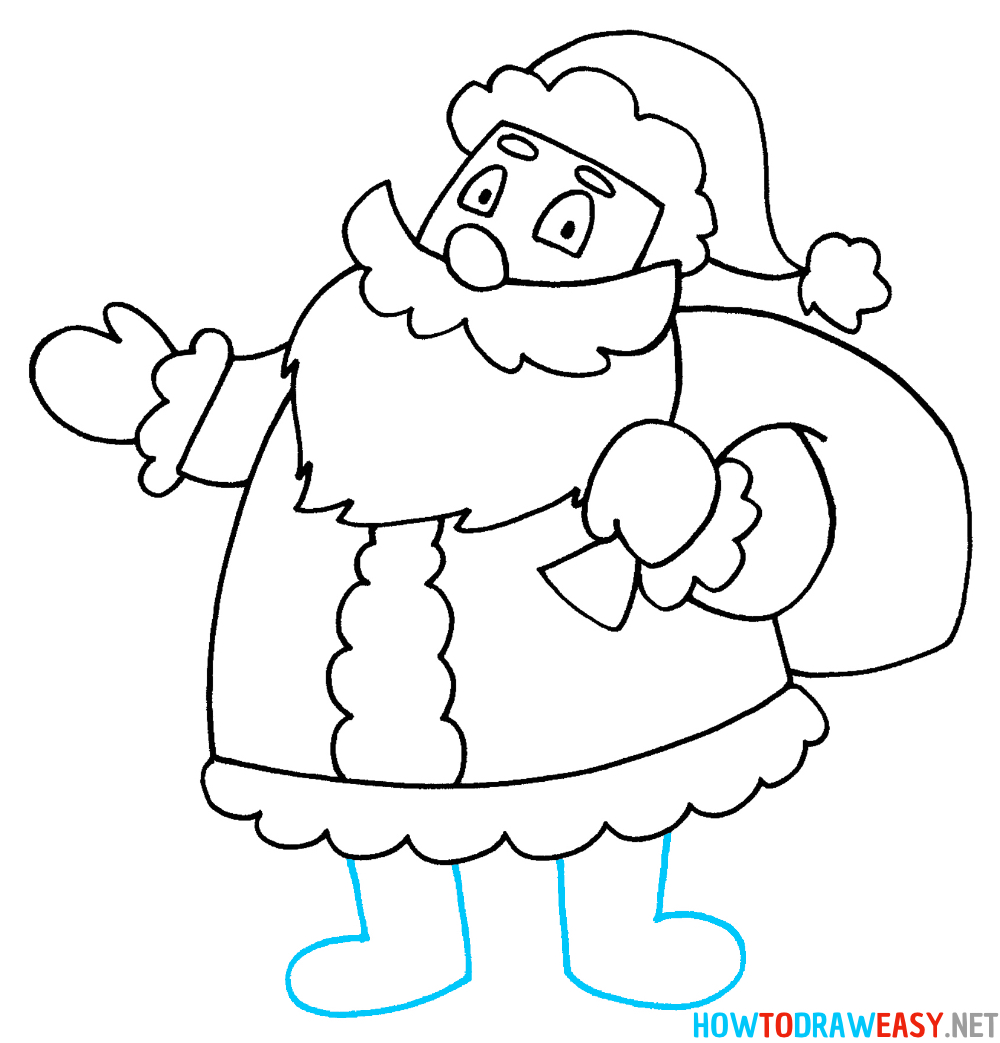
- Draw Santa’s Boots
Below the coat, draw Santa’s short legs and large winter boots. The boots should be rounded and simple, with a small sole at the bottom. Make them sturdy and slightly oversized for a cartoon-style Santa.
- Color Your Santa Drawing
Finish your artwork by coloring Santa. Use:
Red for the coat and hat
White for the fur trim and beard
Gray or black for the boots
Brown or red for the gift sack
Peach/skin tone for the face
Add soft shading to make the drawing more polished. Once colored, your Santa will look cheerful, bright, and ready for Christmas!


Great Job! You’ve Learned How to Draw Santa
Congratulations — you’ve completed all the steps in this tutorial and now know how to draw Santa from start to finish! By following the shapes carefully and adding details layer by layer, you created a cheerful and holiday-ready Santa illustration. This drawing style works perfectly for Christmas cards, school projects, gift tags, or simply for decorating your home during the holiday season.
Want to Keep Drawing? Explore More Christmas Tutorials!
If you enjoyed this step-by-step Santa drawing lesson, you’ll love trying other holiday-themed drawing guides on HowToDrawEasy.net. Here are some fun tutorials to continue your festive art collection:
- How to Draw a Christmas Tree
- How to Draw a Snowman
- How to Draw a Reindeer
- How to Draw an Elf
- How to Draw a Christmas Gift
- How to Draw a Gingerbread Man
These lessons follow the same easy-to-learn format and are perfect for building your seasonal drawing skills.
Share Your Artwork and Keep Practicing!
Drawing is a skill that improves every time you pick up a pencil. Don’t hesitate to personalize your Santa — maybe add snowflakes, candy canes, reindeer, or even draw Mrs. Claus next! If you’re learning along with friends or family, compare your drawings and have fun experimenting with different colors and details.
We hope this tutorial helped you enjoy the creative process and feel more confident with your art. Keep exploring, keep practicing, and stay inspired with more drawing lessons on HowToDrawEasy.net.
Happy holidays and happy drawing!