
How to Draw Thor Easy
Learn how to draw Thor easy step by step with this easy beginner-friendly tutorial. Follow 10 simple drawing steps to sketch and color the Marvel superhero Thor.


Learn How to Draw Thor – Step-by-Step for Beginners!
If you’ve ever wanted to learn how to draw Thor easy, the mighty god of thunder and one of Marvel’s most iconic superheroes, you’re in the right place! This easy drawing tutorial breaks the process into 10 beginner-friendly steps, so that kids, teens, and adults can follow along with confidence.
A Fun and Creative Drawing Activity
Drawing superheroes is not only a fun way to practice your skills, but it also inspires creativity and storytelling. Whether you’re a fan of the Marvel Universe or just love cool characters with epic capes and hammers, this Thor drawing guide is the perfect project for you.
Materials You’ll Need to Draw Thor
Before you start, make sure you have the following materials ready:
- Pencil
- Eraser
- Black ink pen or fine liner
- Coloring tools (markers/pencils/crayons)
- Drawing paper
No Experience Needed – Just Follow the Steps!
You don’t need to be a professional artist to draw Thor. This guide shows you exactly how to draw his helmet, hair, armor, hammer, and heroic pose. You’ll be surprised how simple it is to create a powerful superhero sketch from scratch!
Time needed: 25 minutes
How to Draw Thor
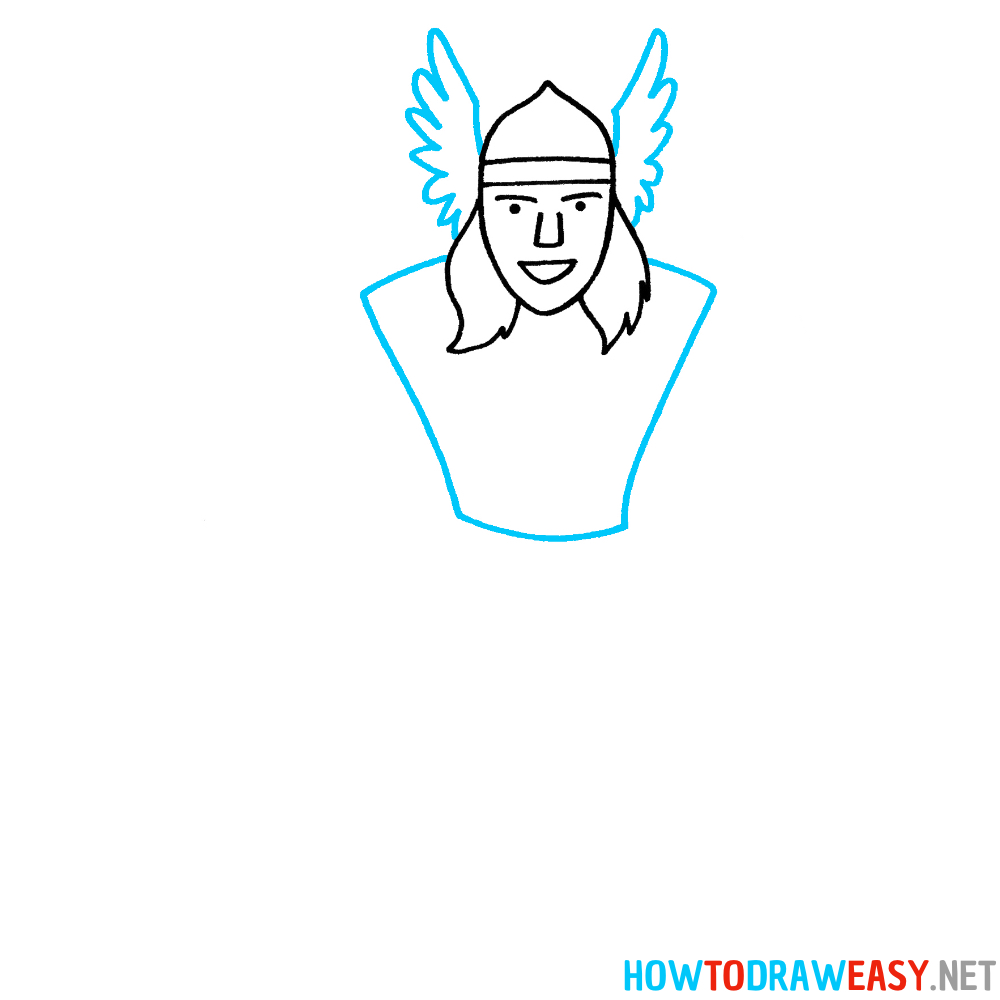
- Draw the Head Shape
Start by drawing the outline of Thor’s head — a tall oval shape with a slightly pointed chin. You need to form the shape of the helmet right away. Then add the nose and eyes, as in the example.

- Detail the Head
Draw Thor’s smiling mouth. Sketch a line for his helmet’s front edge across his forehead.

- Draw the Hair
Now, sketch Thor’s long hair on both sides of his head. Let it fall freely past his shoulders.

- Add Helmet Wings and Upper Body Shape
Draw the large, feathered wings of Thor’s helmet on each side. Then sketch his torso — a wide armor shape, like an upside-down trapezoid.
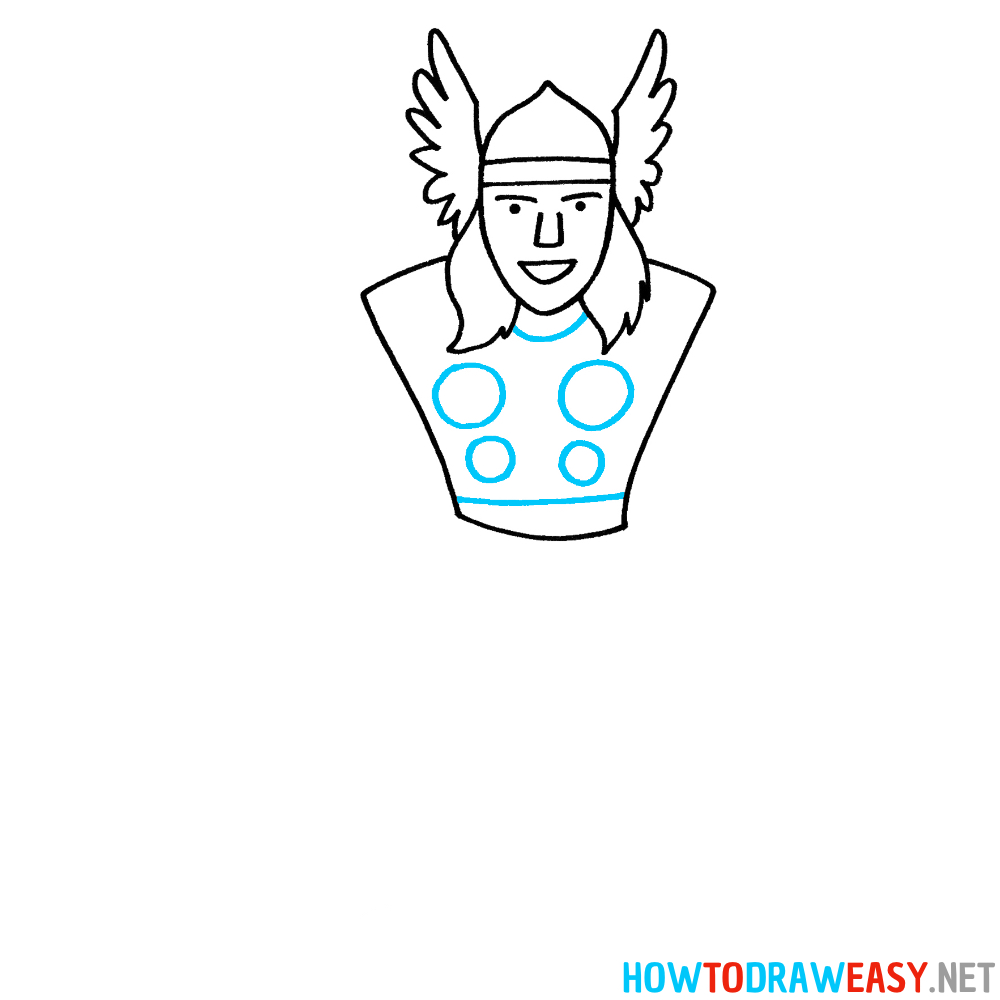
- Add Armor Details
Inside the torso shape, draw four circles — two on each side — to represent the circular plates on his armor. Also add a belt and upper torso plate.
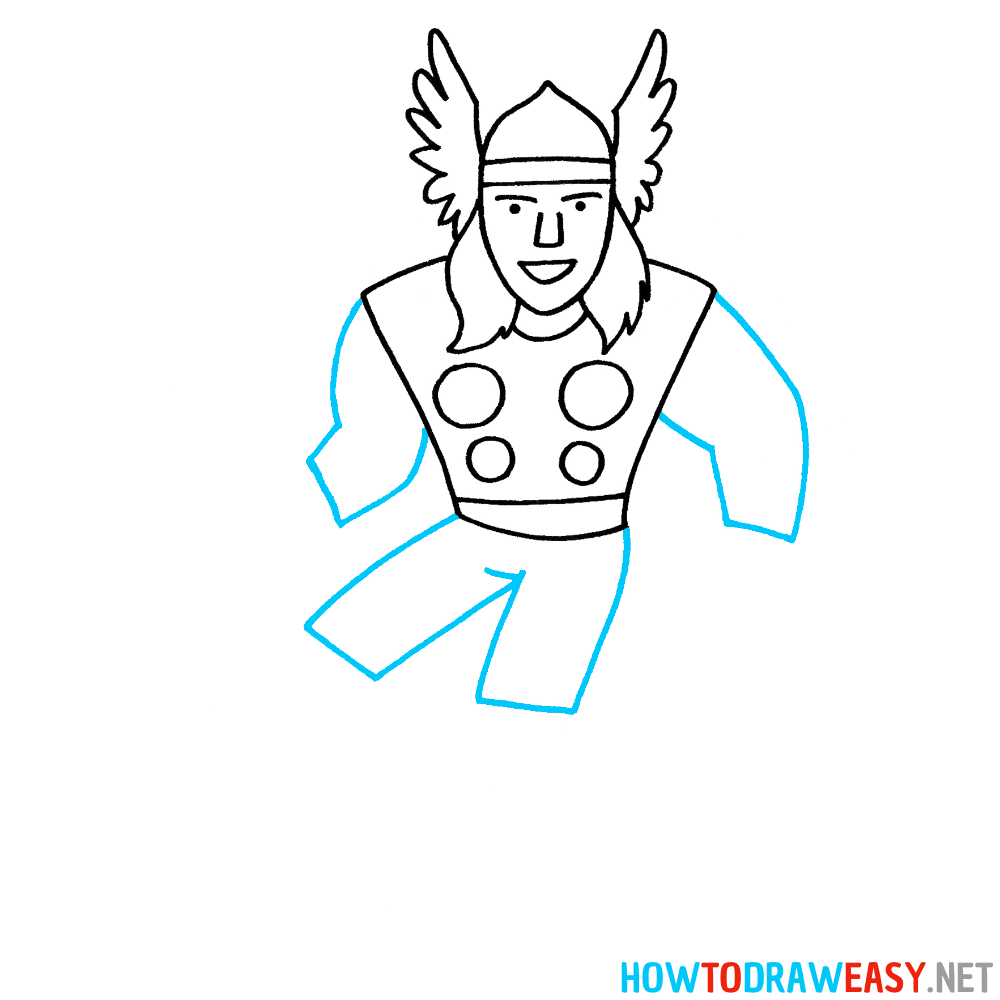
- Draw the Arms and Legs
Add Thor’s strong arms. Start with his shoulders and arms bent at the elbows, one arm down and one prepared to hold the hammer. Then, sketch Thor’s legs in a wide stance. Use simple, strong shapes for each leg.
- Draw Thor’s Hands and Armor Details
Now it’s time to finish drawing Thor’s powerful arms by adding his fists. Carefully sketch both hands in a clenched position, showing his strength and readiness for battle.
Next, add small armor details — draw the wristbands (bracelets) on each arm and knee pads (knee guards) on his legs. These parts of his costume help complete his warrior look.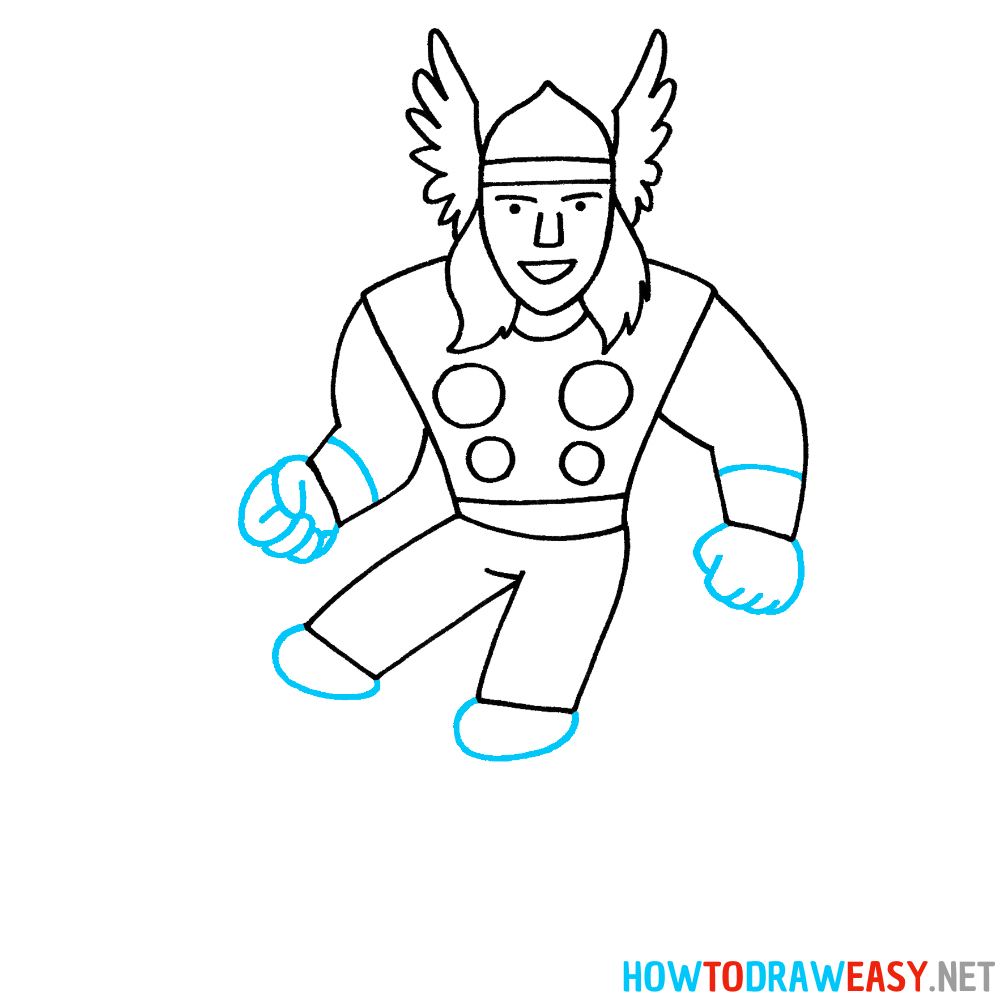
- Draw Thor’s Hammer Head and Boots
In this step, begin by drawing the top (metal) part of Mjölnir, Thor’s legendary hammer. It’s a rectangular block with clean lines to give it a strong, heavy appearance.
After that, draw Thor’s boots at the bottom of each leg. These boots complete the lower part of his superhero costume.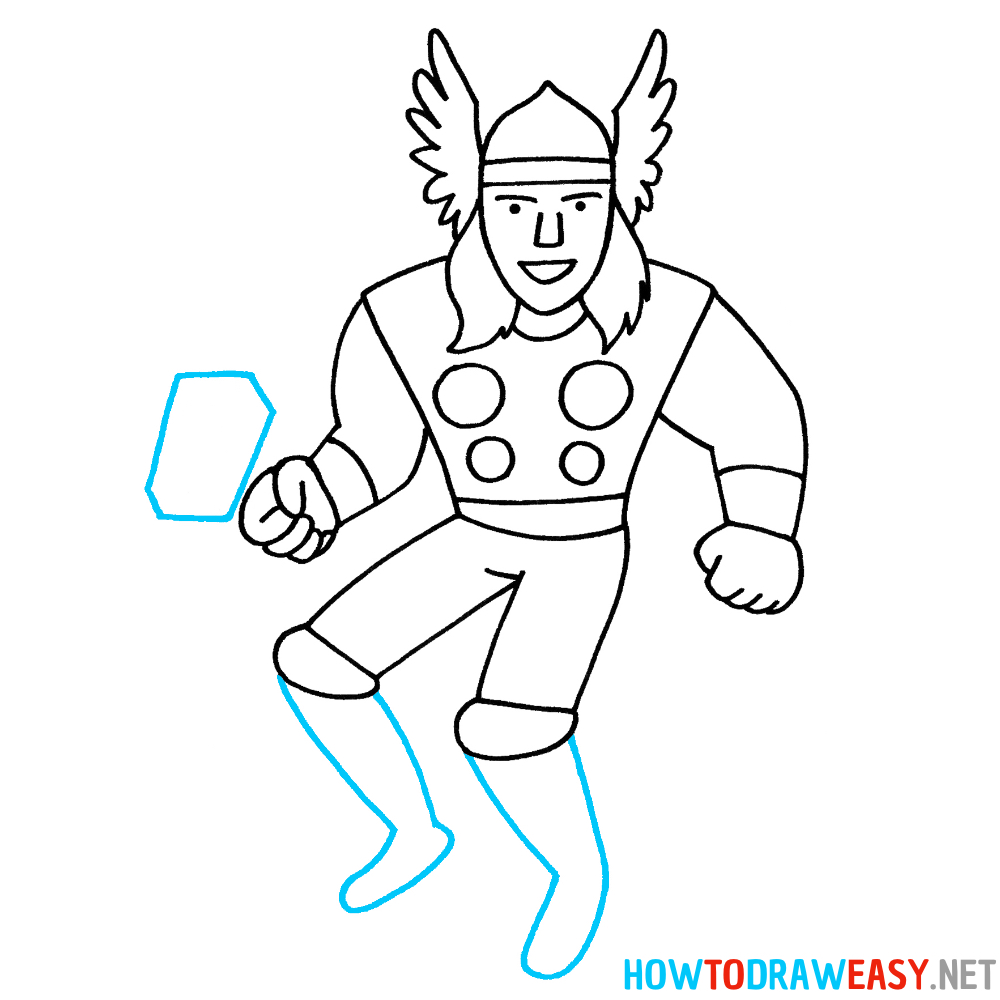
- Add Mjölnir’s Details and Thor’s Cape
Let’s make Mjölnir look more realistic by adding volume and depth — draw the second side of the hammer to give it a 3D effect, and then add the handle (grip).
Finally, draw Thor’s majestic cape flowing behind him. It attaches near his shoulders and curves around to show movement and power, adding even more heroism to your drawing.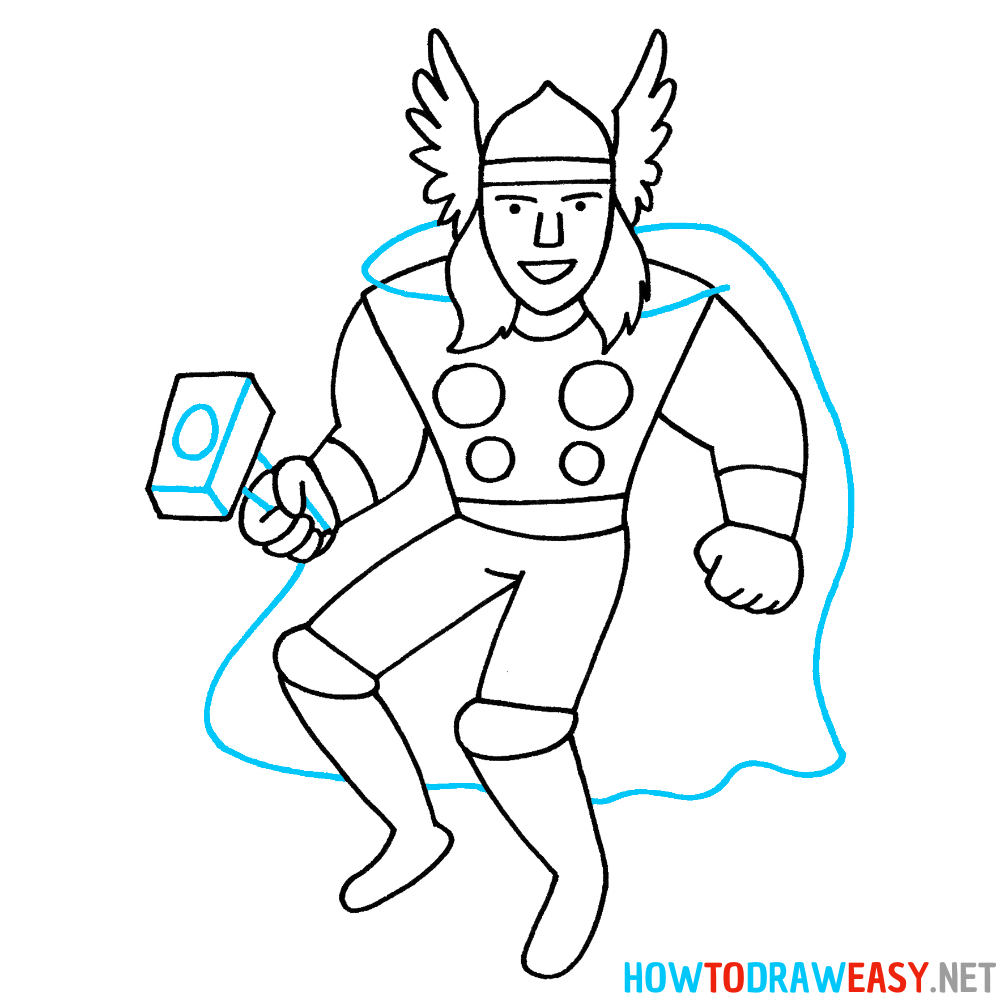
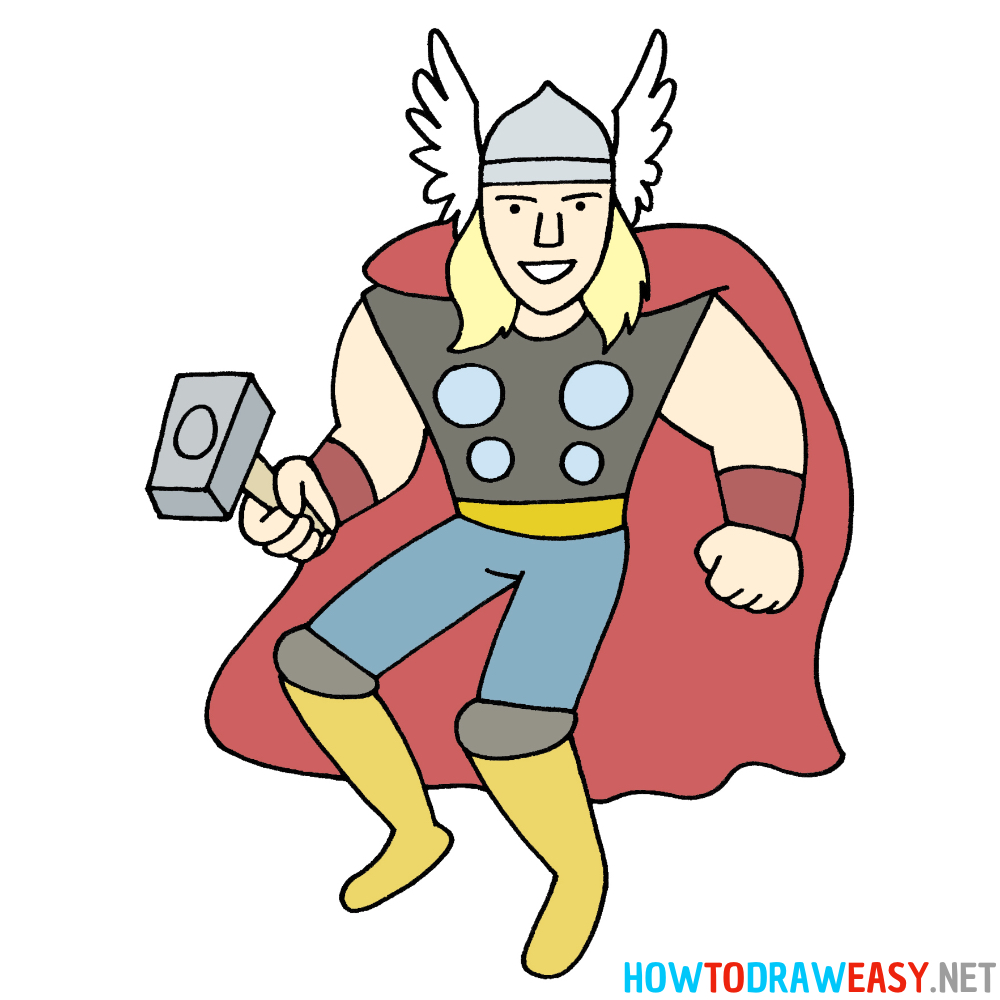
- Color the Drawing
Trace over your drawing with a black pen or marker. Then, color Thor! Use red for the cape, silver/gray for the helmet and armor, blue for the pants, and yellow for the boots and belt. Don’t forget to color Mjölnir in gray too!


You Did It – You Drew Thor!
Awesome job! You’ve just finished your drawing of Thor, complete with his powerful stance, helmet wings, and legendary hammer Mjölnir. Whether you followed along digitally or with pencil and paper, you’ve created your own superhero artwork.
Keep Practicing and Drawing More Superheroes
The more you draw, the better you’ll get — and drawing your favorite characters is a great way to improve your skills. If you enjoyed this lesson, we’ve got plenty more for you to explore!
Discover More Drawing Lessons
Don’t stop here! Check out more step-by-step drawing guides on our website — from animals and cartoon characters to superheroes and vehicles. Whether you’re into Marvel, DC, or original art, you’ll find something fun and new to draw every week.
HowToDrawEasy for more cool tutorials!