
How to Draw an Eagle
Learn how to draw an eagle step by step with this easy tutorial. Perfect for beginners and kids who want to draw a flying eagle full of strength and detail.


How to Draw an Eagle Step by Step
Eagles are powerful and majestic birds, symbols of strength and freedom all around the world. Drawing an eagle is a wonderful way to practice capturing movement, proportion, and detail — all in one image. In this lesson, we’ll show you how to draw an eagle in flight step by step, from simple shapes to a finished, colored drawing.
Why Draw an Eagle?
Eagles are not only beautiful but also full of energy and emotion. Their sharp eyes, curved beaks, and wide wings make them one of the most dynamic subjects for artists. Learning how to draw an eagle helps you improve your understanding of animal anatomy, motion, and composition. Whether you’re a beginner or already familiar with sketching, this tutorial will guide you through each step clearly and confidently.
What You Will Learn in This Tutorial
By following this step-by-step guide, you’ll learn how to:
- Build an eagle drawing using basic geometric and curved shapes.
- Draw the head, beak, wings, and talons with accurate proportions.
- Create feather details that look layered and natural.
- Add movement and balance to your drawing through body posture.
- Trace, shade, and color your eagle for a lifelike finish.
Tools You’ll Need to Draw an Eagle
You don’t need professional tools — just the basics to get started:
- Pencil – Use an HB or 2B pencil for sketching light lines.
- Eraser – To clean up any extra construction lines.
- Paper – Any smooth drawing paper or sketchbook page.
- Black pen or marker – For outlining your final drawing.
- Colored pencils or markers – Browns, grays, yellow, and white for shading and coloring.
Optional: a ruler or fine liner if you prefer clean outlines and feather details.
A Few Tips Before You Start
- Begin with light, gentle strokes so you can easily correct proportions.
- Observe real eagle photos to understand their wing and body movement.
- Keep your lines confident — eagles are strong creatures, and your drawing should reflect that energy.
- Add shading gradually; soft transitions between light and dark areas will make your eagle look realistic.
Who This Lesson Is For
This lesson is perfect for beginners, students, and anyone who enjoys drawing animals. Even young artists can follow these steps thanks to clear, structured instructions. Art teachers and parents can also use this as a fun project to explore wildlife art and symbolism.
Step-by-Step Tutorial Overview
In this 9-step drawing lesson, you’ll start by sketching the head and beak, then move on to the wings, tail, and legs. You’ll finish with line tracing, shading, and coloring to bring your eagle to life.
Once you’re ready, scroll down and follow the nine easy steps below to draw your majestic eagle!
Time needed: 20 minutes
How to Draw an Eagle
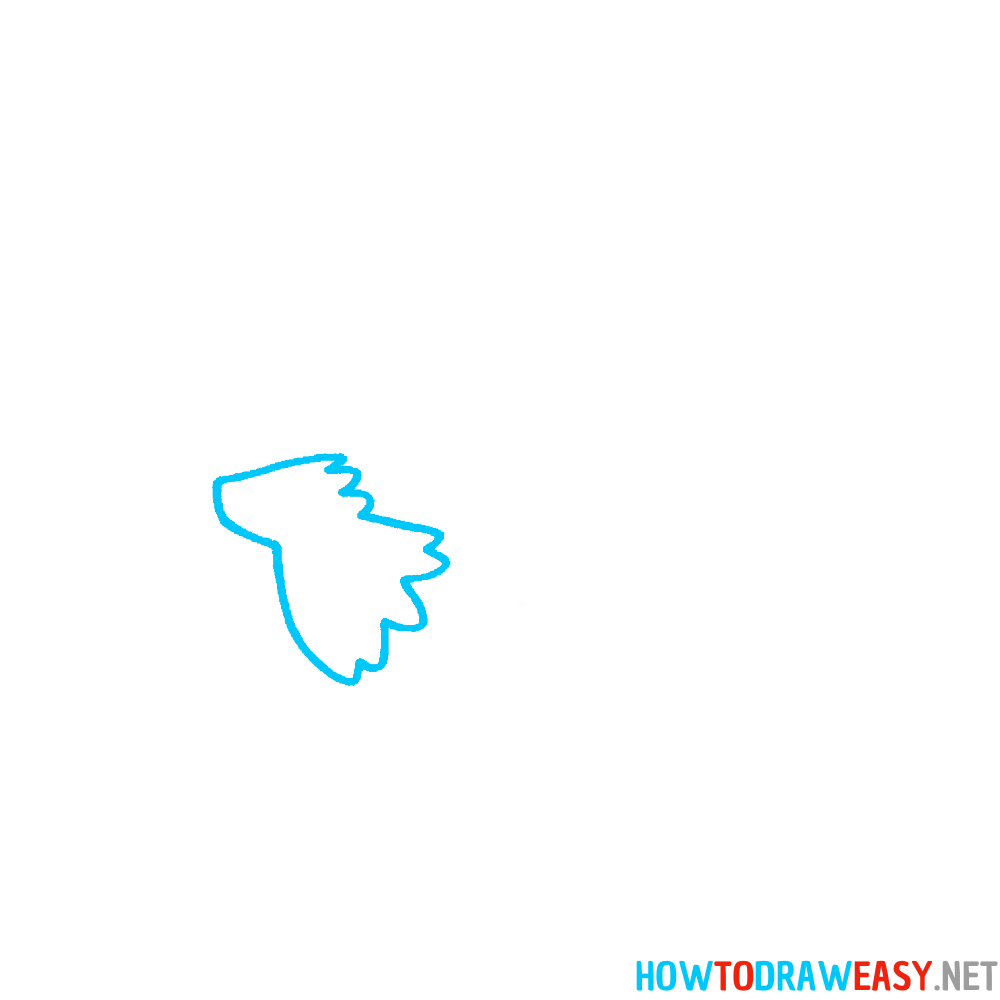
- Block in the Head Crest and Neck Gesture
Begin with the small shape that will become the eagle’s head crest and the top of the neck. Draw a short, slightly jagged silhouette — not a smooth circle — to suggest the layered feathers at the back of the head. This rough, energetic outline sets the bird’s character, so don’t be afraid to give it a little motion: a few small zigzag points imply feather texture right away.
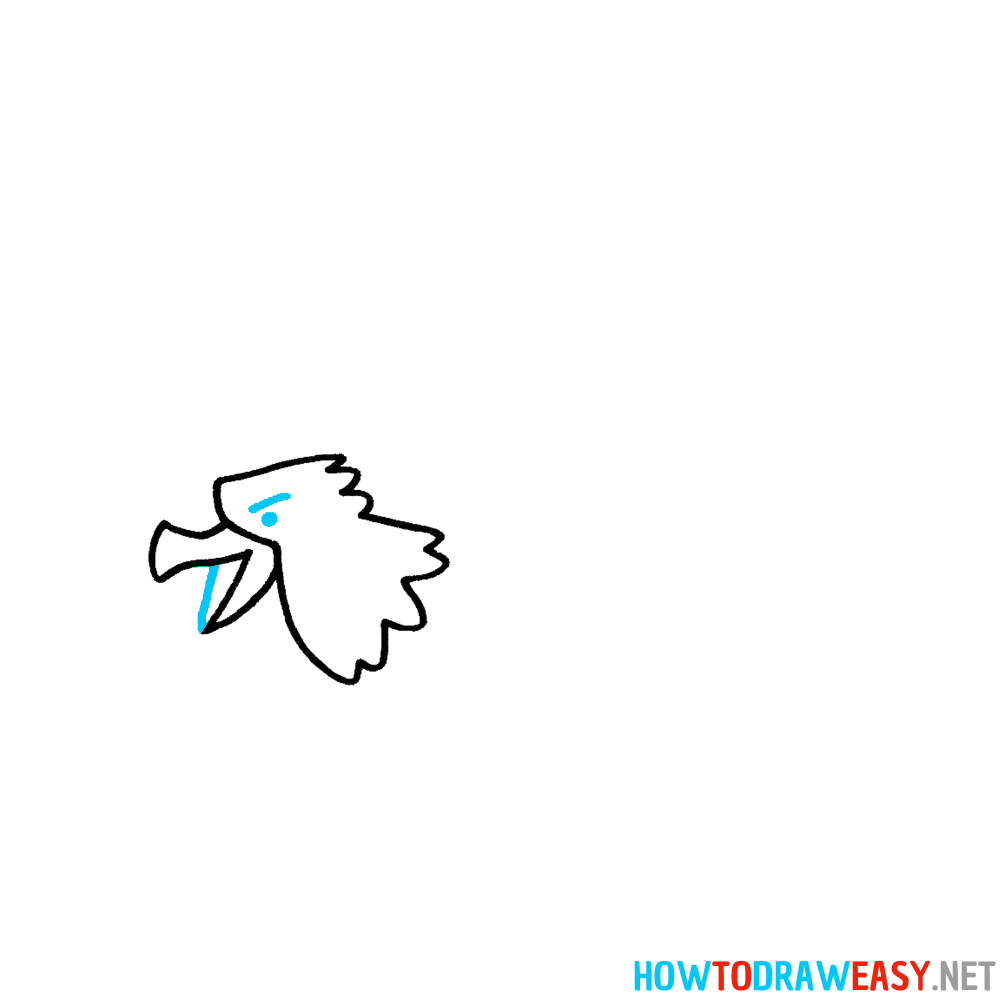
- Add the Beak and Open Mouth
Attach the beak to the front of the head: sketch a hooked triangular shape that curves downward at the tip. If the eagle in the collage is calling, open the lower beak as a thinner curved triangle under the upper beak and add a small tongue shape inside. Keep the beak strong and slightly exaggerated — the hooked beak is a defining feature, so make its curve confident.

- Define Eye and More Head Feathers
Place a small sharp eye near the beak — a simple dot or almond-shaped mark will do — then refine the jagged feather line around the throat and back of the head. Add a short line for the eyebrow ridge above the eye to give the eagle intensity. At this stage, tidy the head silhouette but keep the jagged feather edges so the head still reads as textured and raptor-like.
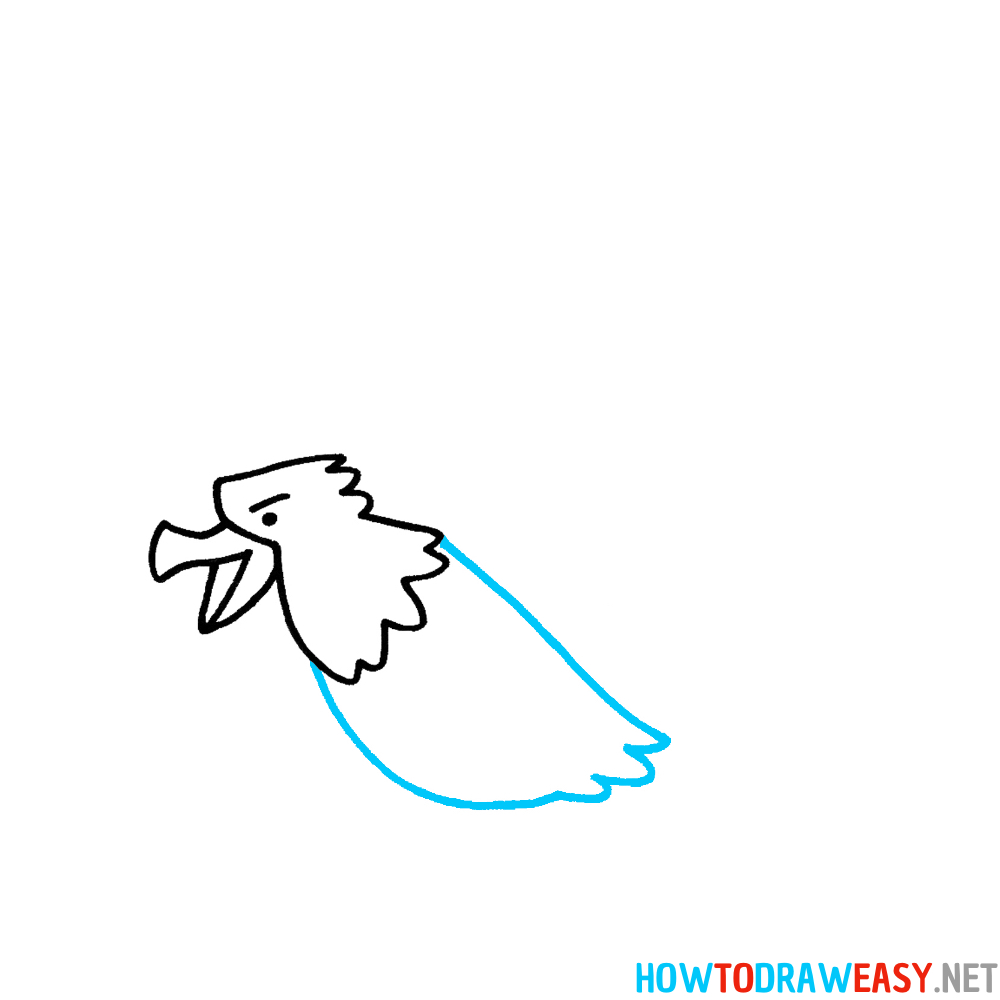
- Sketch the Body Flow and Tail Base
From the head, draw a long sweeping curve down and back to form the eagle’s body and tail base. This single flowing line should communicate momentum and posture — the bird is leaning forward in flight. Finish the lower body with a slightly scalloped rear edge where the tail feathers will begin; this keeps the silhouette lively and hints at the layered tail.
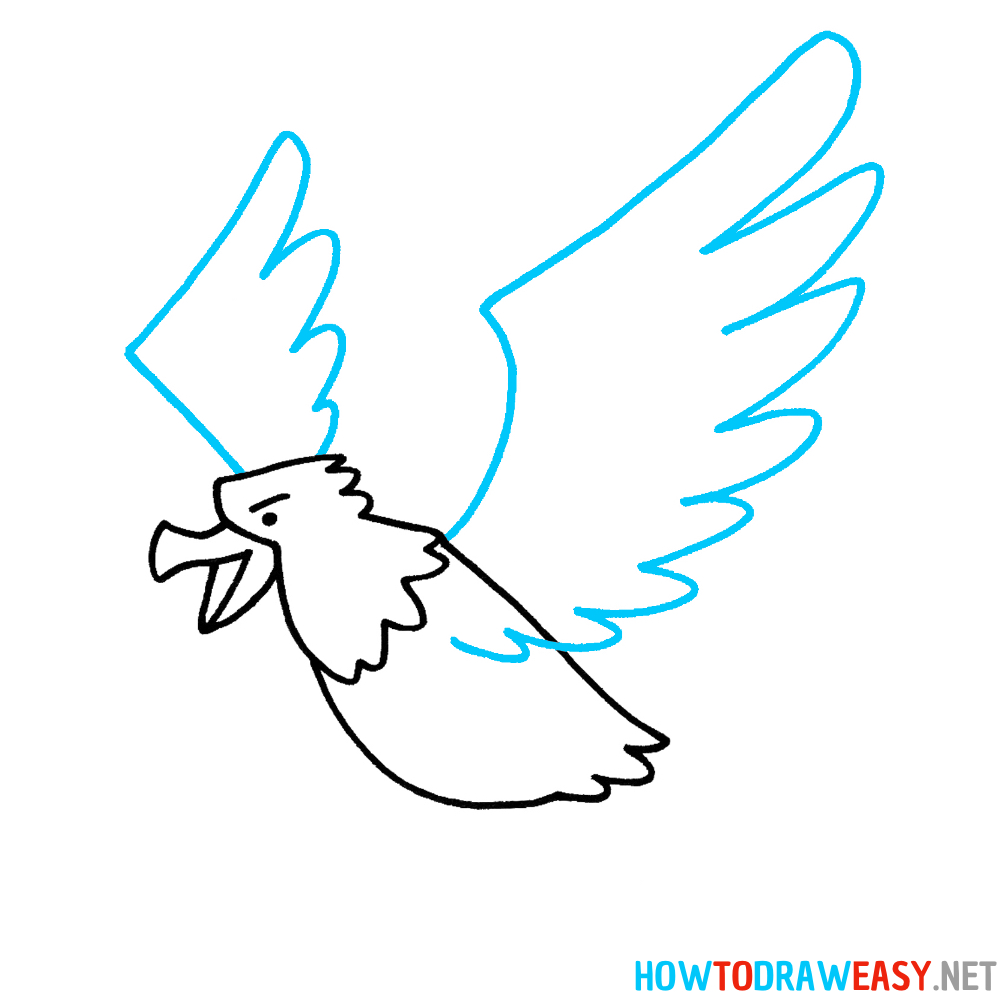
- Block in the Upper Wing Shape
Add the large upper wing by drawing a long, broad, curved shape rising from the shoulder area. The wing’s leading edge should be rounded and strong; the trailing edge can have gentle scallops where the primary feathers will attach. Think of this wing as a fan — wide at the top and tapering toward the tip — and keep your line smooth to show aerodynamic power.
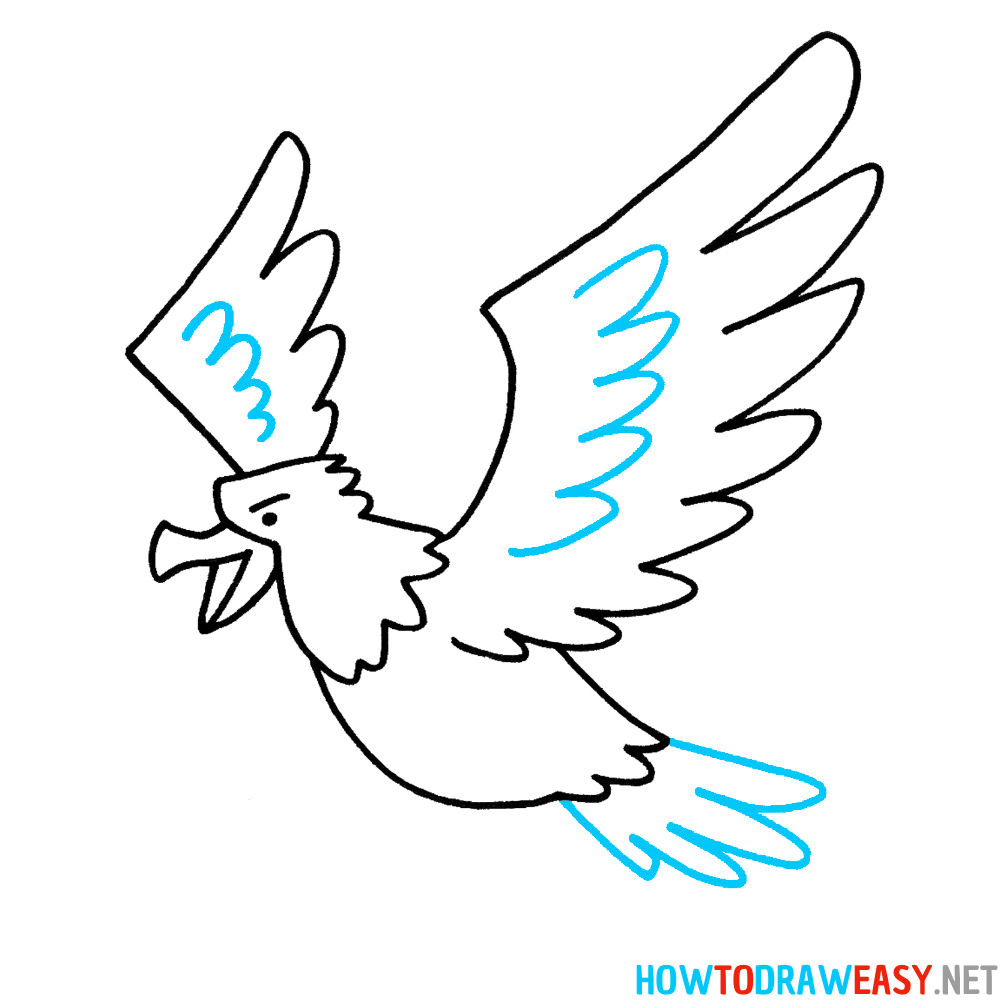
- Detail the Wings and Add the Tail Feathers
Now it’s time for details. Draw the layers of feathers inside each wing. Use curved lines to suggest soft texture and volume. Then, add the tail feathers at the back — short, triangular shapes that fan out slightly. This will complete the eagle’s body form.
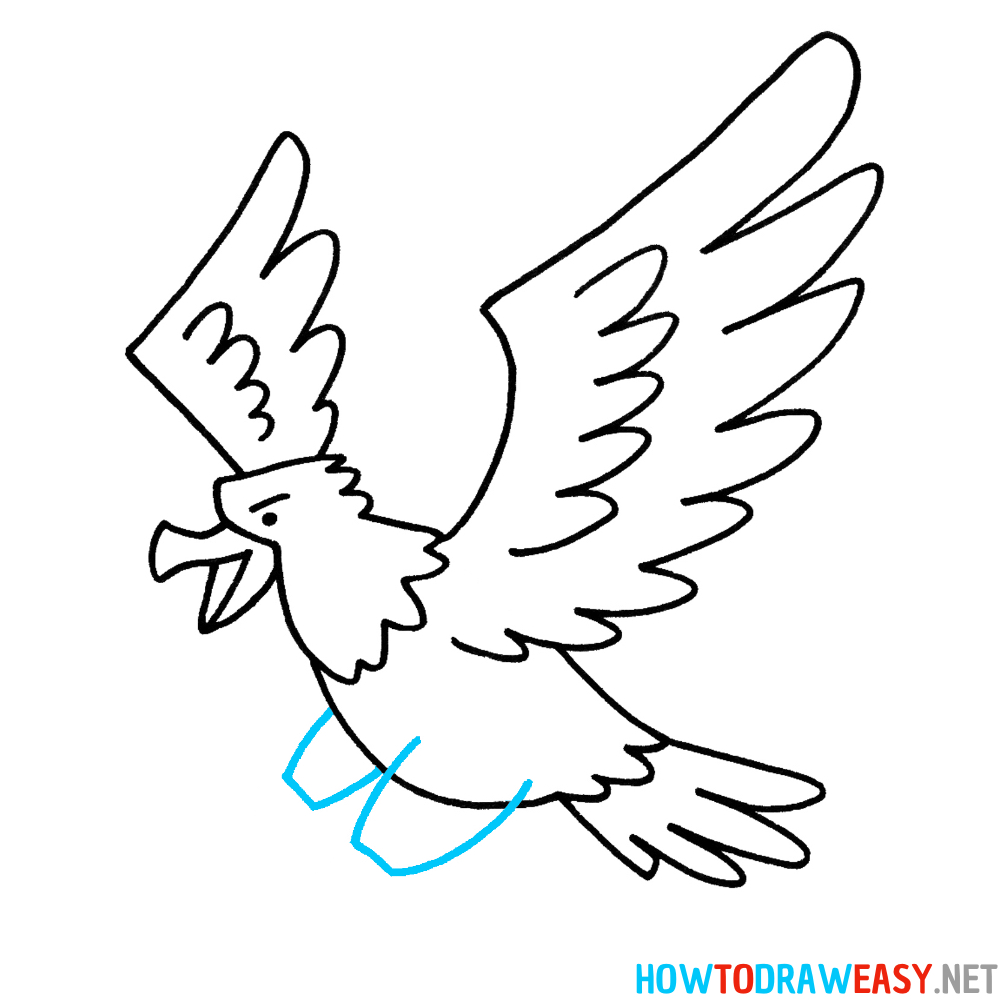
- Sketch the Thighs
Begin forming the eagle’s legs by sketching the rounded upper parts — the thighs. They should connect smoothly to the body. These shapes give structure to the lower part of the eagle and prepare for the addition of legs and claws.
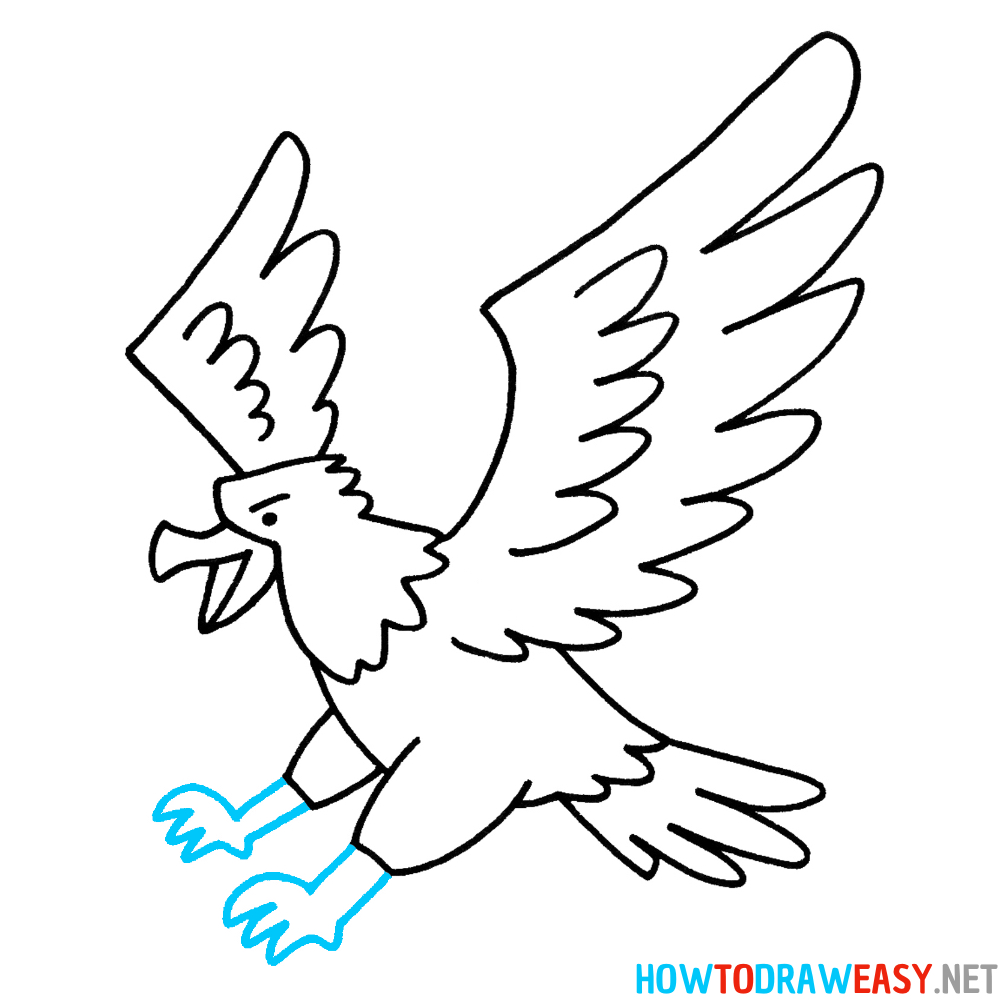
- Draw the Legs and Talons
Now draw the eagle’s legs extended forward as it prepares to land or catch prey. Make sure to draw strong, curved claws — eagles have sharp talons that are their most powerful feature. Add detail by shaping the toes and emphasizing the claws’ pointed ends.
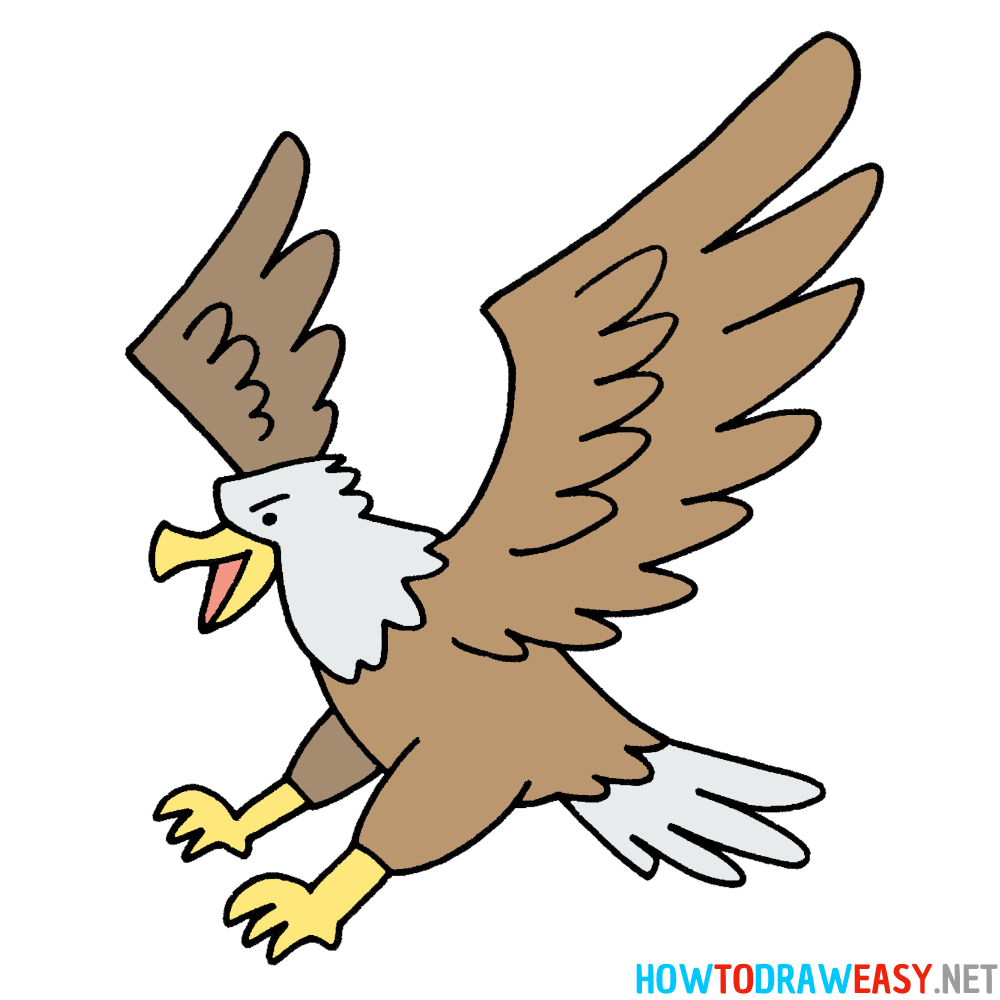
- Trace and Color Your Eagle
Once all the pencil lines are in place, trace your entire drawing with a black pen or fineliner. Clean up any extra lines with an eraser. Then, color your eagle — use rich browns for the body, yellow for the beak and talons, and light gray or white for the head and neck. Add shading to give volume and depth, making your eagle look like it’s soaring through the air.


Great Work!
Congratulations — you’ve completed your eagle drawing! You started with simple shapes and ended up with a powerful bird that looks full of motion and life. Drawing an eagle takes patience and confidence, and you’ve managed both beautifully.
Practice Makes Every Sketch Stronger
Don’t worry if your first eagle doesn’t look perfect. Drawing is a skill built over time. Try sketching your eagle again with different poses — wings spread wider, talons out, or soaring high. Every new attempt helps you understand structure and improve your sense of motion.
Keep Learning with HowToDrawEasy.net
If you enjoyed this tutorial, keep practicing with other fun lessons on HowToDrawEasy.net. You’ll find dozens of drawing guides — from animals and birds to vehicles, characters, and everyday objects. Each lesson is designed to help you grow your skills step by step in an easy and enjoyable way.
Keep drawing, stay creative, and never stop exploring new ideas. Every page of your sketchbook is a chance to fly higher — just like your eagle!